Showing posts with label other desserts. Show all posts

Friday, December 9, 2011

Buttered popcorn ice cream with caramel sauce


In a recent issue of Bon Appetit magazine there was a recipe for "Buttered Popcorn Ice Cream Sunday."  Intrigued?  So was I! I've been on a sweet and salty kick lately and this recipe just screamed "MAKE ME!" Who was I to disagree with a poor innocent dessert.  It was everything I hoped for and then some.  I made some changes based on the ingredients I had on hand, but kept as close to the recipe as possible.  It really does taste like buttered popcorn and the caramel sauce just takes it over the top!

Buttered-Popcorn Ice Cream Sundae
8 Servings
adapted from a Recipe by Elizabeth Falkner
Ingredients

Caramel Sauce
1 cup sugar
2 tablespoons light corn syrup
1/8 teaspoon cream of tartar
2 tablespoons (1/4 stick) butter
1/2 cup heavy cream
1 teaspoon vanilla extract
1/4 teaspoon kosher salt

Buttered-Popcorn Ice Cream
2 cups popped popcorn  (I don't recommend using microwave popcorn!) I air popped mine.
1 1/2 tablespoons unsalted butter, melted
1 teaspoon kosher salt, divided
1 1/2 cups 2% milk  (using 2 cups whole milk would have produced a creamier texture but I added another     1/2 cup of cream to compensate for the lower percentage milk)
2 1/2 cups heavy cream
1/4 cup light corn syrup
5 tablespoons sugar, divided
8 large egg yolks

Directions:
Caramel Sauce

Combine sugar, corn syrup, cream of tartar, and 1/4 cup water in a medium saucepan. Stir over medium-low heat until sugar dissolves. Increase heat and cook without stirring, occasionally swirling pan and brushing down sides with a wet pastry brush, until dark amber in color, about 7 minutes.

Remove from heat; immediately add butter and stir until melted. Slowly add cream (mixture will bubble vigorously). Add vanilla and salt; whisk until smooth. DO AHEAD: Can be made 1 month ahead. Let cool completely. Cover sauce and chill. Rewarm slightly before using.

Buttered-Popcorn Ice Cream
Set a strainer over a large bowl; set aside. Place popcorn in another large bowl. Drizzle butter over and sprinkle with 1/2 tsp. salt; toss to coat. Add milk and cream; cover and let steep for 10 minutes. Stir in corn syrup and 1 Tbsp. sugar.  Purée popcorn mixture in a blender until smooth. Transfer to a large saucepan and bring to a simmer over medium heat.

Using an electric mixer, beat yolks, remaining 4 Tbsp. sugar, and remaining 1/2 tsp. salt in a large bowl until thick ribbons form. Gradually whisk hot popcorn mixture into yolk mixture. Return to saucepan and cook over medium-low heat, stirring constantly with a wooden spoon, until custard is slightly thickened and an instant-read thermometer registers 175°.  Pour through strainer (important step, don't skip!) Cover and chill overnight.
Process in an ice cream maker according to manufacturer's instructions. Transfer to a container, cover, and freeze. DO AHEAD: Can be made 2 days ahead. Keep frozen.

Read More http://www.bonappetit.com/recipes/2011/10/buttered-popcorn-ice-cream-sundae#ixzz1fjBxsCVy


Sunday, November 27, 2011

Daring Bakers Challenge: Sans Rival


One thing I like about being a daring baker is that I'm introduced to recipes from other countries. Doesn't hurt that those recipes are desserts either :-)  I love meringue and this recipe uses that and a french butter-cream.   And yes, you are quite correct in thinking that this produces a very rich dessert!

Blog-checking lines: Catherine of Munchie Musings was our November Daring Bakers’ host and she challenged us to make a traditional Filipino dessert – the delicious Sans Rival cake! And for those of us who wanted to try an additional Filipino dessert, Catherine also gave us a bonus recipe for Bibingka which comes from her friend Jun of Jun-blog.


Sans Rival
Servings: 12
10 large egg whites, room temp
1 cup (240 ml) (225 gm) (8 oz) white granulated sugar
1 teaspoon (5 ml) (3 gm) cream of tartar
2 cups (480 ml) (240 gm) (8½ oz) chopped, toasted cashews, divided  
I used toasted almonds instead of  cashews

Directions:
1. Preheat oven to moderate 325°F/160°C/gas mark 3.
2. Line cake pan bottoms with parchment paper and butter and flour the sides really well.
3. In a large clean, dry glass or metal mixing bowl, beat egg whites on medium until foamy (2 mins.). Sprinkle with cream of tartar. Gradually add sugar, a couple of tablespoons at a time, continuing to beat now at high speed until stiff shiny peaks form. (about 7-10 mins.)
4. Fold in nuts 1 cup finely chopped nuts
(Note the more finely ground for folding into meringue. The coarsely ground for is decoration of finished cake.)
5. I traced circles to make smaller individual servings rather than 4 large cakes.  Using a pastry bag, I filled in the 32 circles.  Be sure to flip the paper over and not bake on the side with the pencil!
6. Bake in preheated oven for 30 minutes, or until golden brown. Remove the meringue from the baking pans while still hot; allow to cool slightly. Peel off the parchment paper while it is still warm, it is difficult to remove sometimes when they have completely cooled.
7. When cool, trim edges so that all 4 meringue layers are uniformly shaped. Set aside.

French Butter-cream:
5 large egg yolks, room temperature
1 cup (240 ml) (225 gm) (8 oz) white granulated sugar
1/4 cup (60 ml) water
1¼ cup (300 ml) (2½ sticks) (285 gm) (10 oz) unsalted butter, room temperature
Optional Flavorings: 2 oz (55 gm) unsweetened chocolate, melted, or 1½ teaspoon (7 ½ ml) almond extract, or 1½ teaspoon (7 ½ ml) vanilla extract, or any flavor you like

Directions:
1. Put the egg yolks in a mixing bowl. Beat at high speed until the yolks have doubled in volume 
and are a lemon yellow.
2. Put the sugar and water in a heavy pan and cook over medium heat, stirring the sides down only until all the sugar is dissolved and the syrup reaches 235°F/112°C (or thread stage).
3. With the mixer on high, very slowly pour the syrup down the sides of the bowl, until all has been added. Be careful as the very hot syrup could burn you if it splashes from the beaters. Continue beating on high until the mixture is ROOM TEMPERATURE (about 15 mins). Still on high, beat in the soft, room temperature butter a tablespoon at a time. Add flavoring after you beat in the butter. Refrigerate the buttercream for at least an hour, and whip it smooth just before you use it.
Assembly:
Set bottom meringue on cake board with a dab of butter cream to hold it in place. Spread a thin layer of buttercream and then place another meringue on top. Repeat with a thin layer of buttercream, meringue, thin layer of buttercream, meringue, and finally buttercream the top and sides. Decorate with reserved nuts.

Refrigerate until ready to serve. It is easier to cut cold. May freeze.


Friday, September 9, 2011

Icebox Cake... ish

This month our Have the Cake challenge was to make an Icebox Cake. I had never heard of an Icebox cake and the process certainly was intriguing.  I didn't follow any set recipe and I didn't exactly use cookies either.  During our last vacation, Neil and I went to a Russian grocer store.  On the shelf were these packages of thin wafers, about 1o to a package.  We bought a package with the intent on figuring out how exactly it was used in  Russian recipes.  While we have exactly figured that part out, but we did have success with using it in our version of the icebox cake.
These are the wafer layers... please, if you have any idea how they are supposed to be used, do tell! 
I did alternating layers using ganache and a whipped cream/cream cheese mixture.
I iced the cake with the remainder of the cream cheese/whipped cream mixture and then sprinkled on mini chocolate chips.  We were too impatient to let it set over night, but we did wait a good eight hours! Turned out to be super yummy!


      Icebox Cake
1 package dry wafer sheets
3 cups whipping cream
6 tablespoons confectioners sugar
8 ounces cream cheese, softened
2 teaspoons vanilla extract
2 cups semi sweet chocolate chips
2 1/2 tablespoons whipping cream

Directions:
In a medium bowl, add whipping cream and confectioners sugar, mix until soft peaks form.  Add vanilla and mix once more.
In a small bowl,  mix softened cream cheese until whipped.  Gently fold into whipped cream.
Melt together the chocolate chips with the 2 1/2 tablespoons whipping cream; blend until smooth and creamy.
Take one wafer and top with a good sized dollop of whipped cream/cream cheese mixture; smooth over wafer. Repeat making three layers. On the top of the third wafer, spread some of the chocolate ganache mixture.  Follow this with another layer of the whip cream mixture and alternating with chocolate layers until you have three wafers remaining.  For the final three wafers use only the whipped cream mixture. 
Ice cake with remaining whipped cream.  Sprinkle with mini chocolate chips, if desired.
Refrigerate over night. Keep leftovers in refrigerator.

Monday, July 18, 2011

Secret Recipe Club: Chai Tea Creme Brulee


This is the first time I am taking part in Amanda's Cookin' Secret Recipe Club. This is a blog task in which we are challenged to choose a recipe from an assigned blog we are given. 

I was given the delightful opportunity to be given the blog of  Carolyn's,  All Day I Dream About Food. After being diagnosed with pre-diabetes, she took on the role of sharing with the world many fabulous recipes that are low carb and/or gluten free.

After much browsing through Carolyn's blog and drooling all over my computer (yes, her blog is truly drool worthy!) I chose to recreate her Chai Tea Creme Brulee.  I've tried making creme brulee once before and it was a massive failure.  Still, it is one of the recipes I chose to make before I die ( see that post here) and her recipe would give me the opportunity to have a success this time... plus it gave me the chance to use some of my cherished black tea that I brought home from Africa.  While Carolyn's original recipe includes erythritol and stevia, I adjusted the recipe to use regular sugar as I was unable to find erythritol.

Chai Tea Creme Brulee
adapted from here at All Day I Dream About Food
1 3/4 cups heavy cream
1 tbsp loose black tea
1 cinnamon stick (or 1 tsp ground cinnamon)
1 tsp coarsely ground cardamom seeds
1/2 tsp ground ginger
1/8 tsp ground cloves
4 egg yolks
1/4 cup granulated sugar
1/2 tsp vanilla extract
1 tablespoon raw sugar

 Directions:

Preheat oven to 300F.
Heat cream, tea, cinnamon, cardamom, ginger and cloves in a small saucepan over medium low heat, until steam rises. Remove from heat, cover the pan and let steep for 15 minutes. Strain through a fine-mesh strainer to remove all solids and set aside.

In a medium bowl, beat egg yolks and 1/4 cup of granulated sugar together until thickened and pale yellow. Add cream very slowly, stirring continuously. Add in vanilla.

Divide custard between 4 small ramekins (or a single one-quart ceramic or glass baking dish). Set into a larger baking pan and pour hot water to within 1-inch from top of ramekins or baking dish.


Bake until the custard is just set but still slightly wobbly in the middle, 40-45 minutes. Remove baking pan from the oven and let cool. Then wrap each ramekin tightly in plastic and chill for at least 2 hours.

Just before serving, divide raw sugar over tops of creme brulee, sprinkling across the top evenly. Heat with a kitchen torch until it bubbles and browns. Let sit for a few minutes to allow topping to harden. You can also brown the topping under your broiler, watching very carefully and turning the cups to ensure even browning.


BLOG HOP SNIPPET:


Wednesday, June 15, 2011

Fresh Peach Cake


While I think this taste would be ideally suited for when peaches are ready for picking in your area, I was too tempted by the picture in my magazine to wait until late summer!  The June issue of FoodNetwork Magazine is full of great summer ideas and I have tons of pages ear marked for experimentation!  

I did make a few minor changes... I did not have quite enough sour cream so I used what I had and also a container of peach yogurt.  The recipe also called for two extra large eggs and I only had large eggs on hand.  The cake was still super moist so I don't think the egg difference made all that much of a difference. I did make one minor error... the recipe called for layering the peaches twice.  I was in a rush and skipped over that part... sigh.  It did still taste divine though!
Fresh Peach Cake

modified from the Food Network Magazine

1/4 pound unsalted butter, at room temperature
1 1/2 cups granulated sugar
2 extra large eggs, at room temperature  (I used 2 large eggs)
1 cup sour cream, at room temperature  (I added container of peach yogurt to the sour cream I had on hand,  since I was low on sour cream)
1 teaspoon vanilla extract
2 cups all-purpose flour
1 teaspoon baking soda
1 teaspoon baking powder
1/2 teaspoon kosher salt
1 teaspoon ground cinnamon
3 large ripe peaches, peeled, pitted and sliced  (I used just a bit over a pound of ripened peaches)
1/2 cup chopped pecans


Sprinkled topping of nuts and cinnamon

Directions:

Preheat the oven to 350 degrees F.  Grease a 9-inch square baking pan
In a large size bowl, beat together the butter and 1 cup of sugar for 3-5 minutes on medium high speed, or until light and fluffy.  Reduce speed to low and add the eggs, one at a time, then the sour cream, vanilla and mix until the batter is smooth.
In a separate bowl, sift together the flour, baking soda, baking powder and salt.  With the mixer on low, slowly add the dry ingredients to the batter and mix just until combined.
In another small bowl, combine the remaining 1/2 cup sugar and the cinnamon.
Spread 1/2 the batter evenly in the pan.  Top with half of the peaches, then sprinkle with 2/3 of the sugar cinnamon mixture.  Spread the remaining batter on top, arrange the remaining peaches on top and sprinkle with the remaining sugar mixture and the pecans
Bake the cake for 45 to 55 minutes, or until a toothpick inserted in the center comes out clean.  Serve warm or at room temperature
fresh from the oven!


Saturday, June 4, 2011

Lemon White Chocolate Cheesecake Bites


It seems like all the baking I've been doing these past few months have been for events.  Not that this has proven to be a problem... better that I get lots of people eating my goodies than just me!  Straight from the "Betty Crocker Best Cupcakes & Cakes" came the delightful little mouthfuls.  They were just perfect for the dessert table at our ladies tea!  There is just something about mini foods that I find just especially tasty.  Maybe its because I can get away with eating three (or four) of them as compared to one big piece of cheese cake.  I'm not saying it makes a whole lot of caloric sense - just that in my greedy little mind, more seems all the better!


Lemon White Chocolate Cheesecake Bites
Crust:
1/2 cup graham cracker crumbs
1 teaspoon sugar
2 tablespoons unsalted butter, melted, slightly cooled.
Filling:
1 package (8 ounces) cream cheese, softened
1/4 cup sugar
1 egg
1 teaspoon grated lemon peel
1/2 cup white vanilla baking chips
1 teaspoon vegetable oil


Directions:
Heat oven to 300 degrees F.  Place mini paper baking cups in each of 18 mini muffin cups; spray paper cups with cooking spray.  In medium bowl, mix crust ingredients until crumbs are moistened.  Spoon and lightly press 1 teaspoon mixture in bottom of each cup.
Add chips then add more mixture
In Large bowl, beat cream cheese and 1/4 cup sugar with electric mixer on medium speed until well blended.  On low, beat in egg until smooth.  Add lemon peel and lemon juice; beat until smooth.  Spoon about 1 teaspoon cream cheese mixture into each paper cup.  Place 5 to 6 of the white baking chips on top of each (using 1/4 cup total).  Divide remaining cream cheese mixture evenly among cups (about 2 heaping teaspoons each).  Bake 25 to 30 minutes or just until filling looks set.  Cool on racks 30 minutes.  Refrigerate 1 hour.
after baking

 In Small microwavable bowl, microwave remaining 1/4 cup white baking chips and the oil uncovered on high 30 to 40 seconds until mixture can be stirred smooth.  Drizzle over cheesecakes.  Store covered in refrigerator.

Sunday, February 27, 2011

February Daring Bakers Challenge: Panna Cotta and Florentine Cookies

Print Friendly and PDF
               The February 2011 Daring Bakers’ challenge was hosted by Mallory from A Sofa in the Kitchen. She chose to challenge everyone to make Panna Cotta from a Giada De Laurentiis recipe and Nestle Florentine Cookies.


     I love being a part of the Daring Kitchen challenges because I am given the opportunity to make so many new things.  I had never had either of the challenge recipes this month. While both are a bit too sweet for my preference, that doesn't mean they weren't delicious!   Even better was that both recipes were super easy to make!
Chocolate Panna Cotta
Recipe adapted from Bon Appetit
Ingredients:
1 cup (240 ml) whole milk
1 tablespoon (15 ml) (7 gm) (¼ oz) unflavored powdered gelatin
2 cups (480 ml) whipping cream (30+% butterfat)
½ cup (115 gm) (4 oz) sugar
¾ cup (145 gm)(5 oz) bittersweet or semisweet chocolate
½ teaspoon (2½ ml) vanilla extract

Directions:
1.Pour milk into a small bowl, sprinkle gelatin over the top, set aside for 2-5 minutes.
2.Place a medium saucepan over medium heat, stir in cream, sugar and vanilla. Bring to a low boil.
3.Add chocolate and whisk until melted. Whisk the milk/gelatin mixture into chocolate cream mixture. Whisk until gelatin has dissolved.
4.Transfer to ramekins, or nice glasses for serving.
5.Cover and chill at least 8 hours, or overnight

Florentine cookies
Recipe from the cookbook “Nestle Classic Recipes”, and their website.
Ingredients:
2/3 cup (160 ml) (150 gm) (5.3 oz) unsalted butter
2 cups (480 ml) (160 gm) (5 2/3 oz) quick oats
1 cup (240 ml) (230 gm) (8 oz) granulated sugar
2/3 cup (160 ml) (95 gm) (3⅓ oz) plain (all purpose) flour
1/4 cup (60 ml) dark corn syrup
1/4 cup (60 ml) whole milk
1 tsp (5 ml) vanilla extract
pinch of salt
1½ cups (360 ml) (250 gm) (9 oz) dark or milk chocolate

Directions:
Preheat oven to moderately hot 375°F (190°C) (gas mark 5). Prepare your baking sheet with silpat or parchment paper.
1.Melt butter in a medium saucepan, then remove from the heat.
2.To the melted butter add oats, sugar, flour, corn syrup, milk, vanilla, and salt. Mix well. Drop a tablespoon full, three inches (75 mm) apart, onto your prepared baking sheet. Flatten slightly with the back of your tablespoon, or use a spatula. These cookies are intended to spread thin so it is very important not to leave room on the cookie sheet.  I baked six cookies at a time.
3.Bake in preheated oven for 6-8 minutes, until cookies are golden brown. Cool completely on the baking sheets.
4.While the cookies are cooling melt your chocolate until smooth either in the microwave (1 1/2 minutes), or stovetop (in a double boiler, or a bowl that fits atop a saucepan filled with a bit of water, being sure the water doesn't touch the bottom of the bowl).
5.Peel the cookies from the silpat or parchment and place face down on a wire rack set over a sheet of wax/parchment paper (to keep counters clean).
6.Spread a tablespoon of chocolate on the bottom/flat side of your cookie, sandwiching another (flat end) cookie atop the chocolate.
This recipe will make about 2 1/2 - 3 dozen sandwiched Florentine cookies. You can also choose not to sandwich yours, in which case, drizzle the tops with chocolate (over your wax paper).

Wednesday, November 17, 2010

The Daring Cook Challenge: November is Souffle month

Print Friendly and PDF
I am running so behind these past months.  I don't quite know what my problem is.  I did put this up in the forum (a day late) but still wanted to post it on my blog.

Blog-checking lines: Dave and Linda from Monkeyshines in the Kitchen chose Soufflés as our November 2010 Daring Cooks’ Challenge! Dave and Linda provided two of their own delicious recipes plus a sinfully decadent chocolate soufflé recipe adapted from Gordon Ramsay’s recipe found at the BBC Good Food website.

I have never eaten a souffle or made one before so I didn't quite know what to expect.  I'm hoping this recipe I found for a single souffle is indeed an actual souffle.  Based on what I've heard and read about souffles, I'm thinking this recipe is not that far off the mark (if indeed it is).  I believe it could have used another minute in the oven and it would have been perfect.  I was afraid to try putting it back into the oven once we had removed it.  Any way, it was absolutely delicious!  My hubby and I had a great time eating this delight before breakfast! 

Single serve chocolate souffle
1 6oz or 8 oz ramekin.  (mine was a 6 oz and I think a bigger one
 would have produced better results)
1 small piece of parchment paper (to make a collar on your ramekin)
1/4 cup (2oz) chocolate chips (I used dark chocolate chips)
1 Tb unsalted butter
2 Tb granulated white sugar
1 Tb all purpose flour
2 Tb Half&Half   (I didn't have half and half so I substituted
some Chocolate Mint Truffle Coffee Creamer... hey, it worked!)
1 egg yolk
2 egg whites

DirectionsPrepare your ramekin for your chocolate souffle for one. Grease the inside of the ramekin with the 1 TB butter (You will not use all the butter but save it) and coat with the 2 TB granulated sugar. (Sugar will stick to butter on the inside of the ramekin. You will have some left over at the bottom, again save it)
Create a collar around your ramekin by wrapping a piece of parchment paper around the outside and securing with a piece of tape. The parchment paper will support the souffle as it bakes,
allowing it to rise.
  Melt the chocolate with the leftover butter and half&half in the microwave for approximately 1 minute. Add the flour and egg yolk and stir to combine.
 In a separate bowl, whip the egg whites to soft peaks. Add the excess sugar from the ramekin and continue to whip until stiff peaks form.
Add approximately 1/3 of egg whites to chocolate mixture to lighten the chocolate. Then gently fold in the rest of the egg whites with a spatula until combined. Do not over mix as this will deflate the egg whites.
Pour the mixture into the prepared souffle dish. Bake in the oven at 350 for 15 minutes to produce a souffle with a slightly molten center. If desired, cook longer. Serve immediately with your garnish of choice. Personally, I think a spoon is all the garnishment this delight needed!


Wednesday, September 15, 2010

MSC September Challenge: Cookies and Cream

Print Friendly and PDF
Nina from Nina's Cupcakes chose Cookies and Cream Cupcakes for this month's flavor of Martha Stewart's Cupcake Challenge.

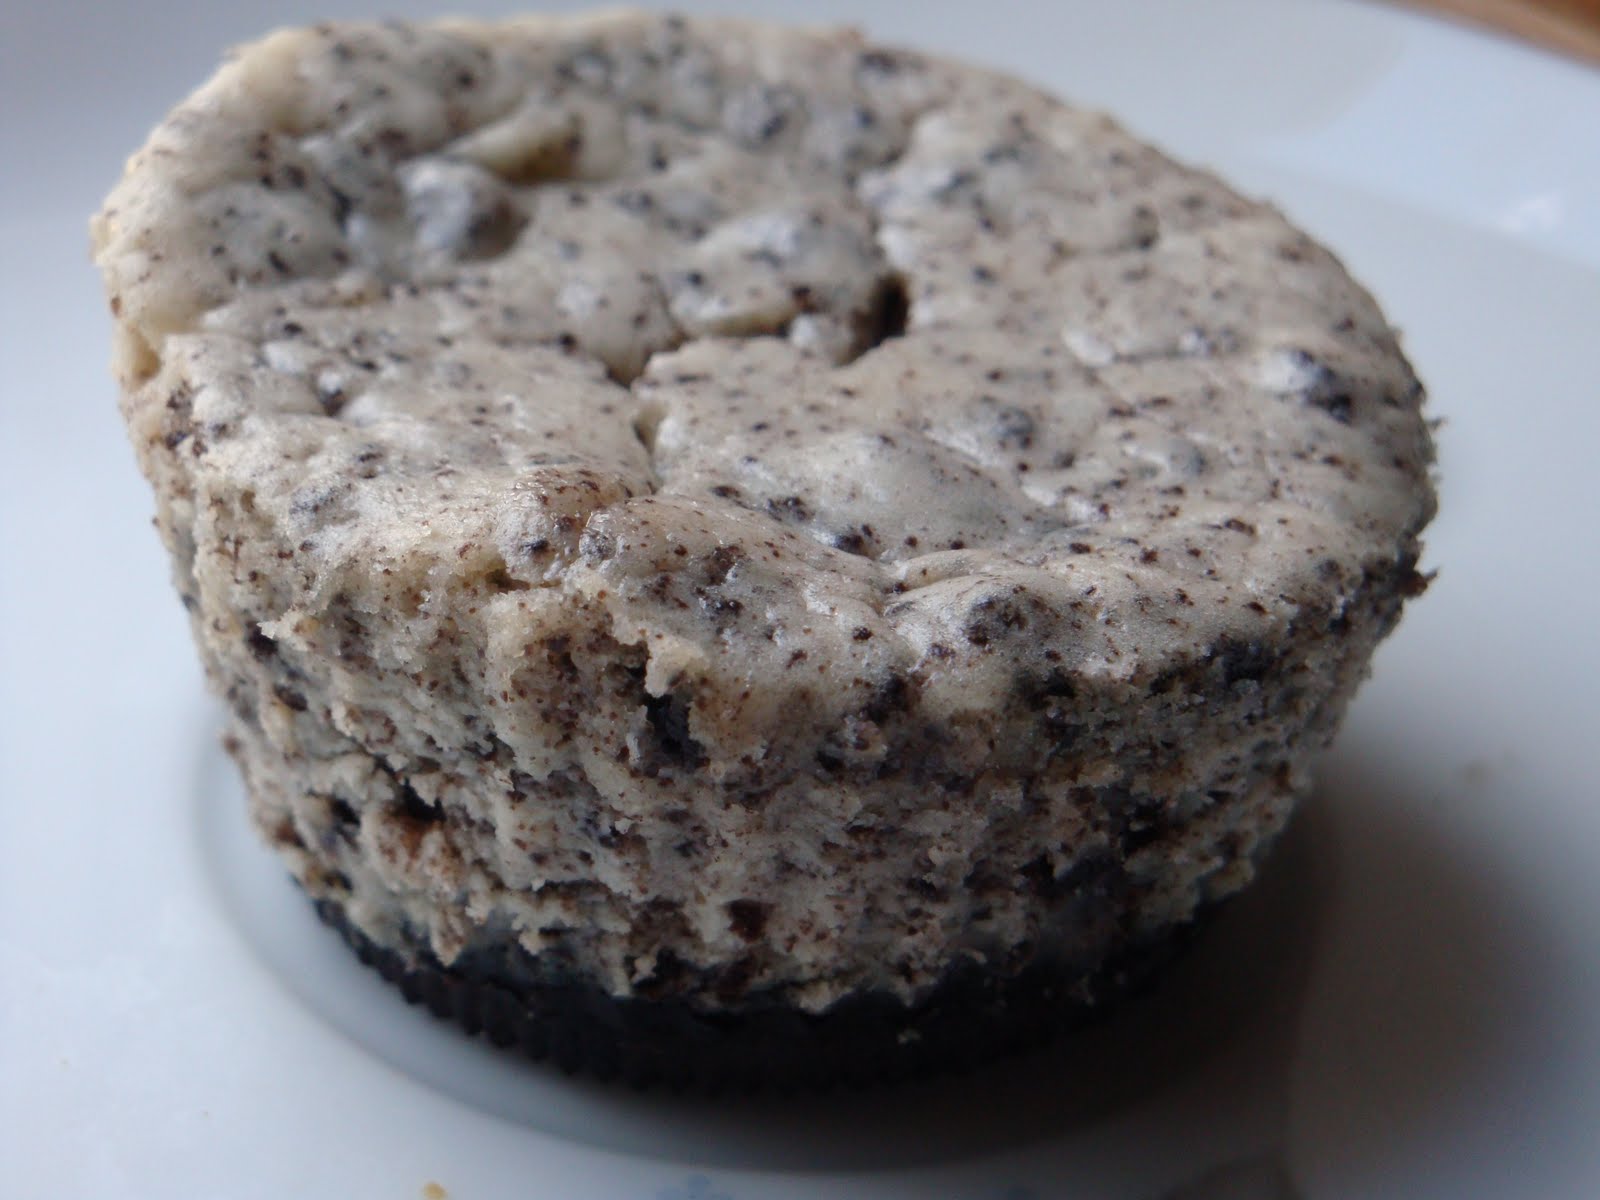
This recipe makes thirty of the most sinful tasting desserts you will ever eat!  It isn't a true "cupcake" as it. is a cheesecake in a cupcake liner. Who cares???!!  It had a cookie and cheesecake...need I say more???  After sharing a few of these delights with my family, painful as that was, I made my husband take the rest to work.  These were good to keep around the house.

Martha Stewart's Cookies and Cream
From the book: Martha Stewart's Cupcakes: 175 Inspired Ideas for Everyone's Favorite Treat

42 cream-filled sandwich cookies, such as Oreos, 30 left whole, and 12 coarsely chopped
2 pounds cream cheese, room temperature
1 cup sugar
1 tsp vanilla extract
4 large eggs, room temperature, lightly beaten
1 cup sour cream
Pinch of salt


Directions:

1. Preheat oven to 275 degrees. Line standard muffin tins with paper liners. Place 1 whole cookie in the bottom of each lined cup.

2. With an electric mixer on medium high speed, beat cream cheese until smooth, scraping down sides of bowl as needed. Gradually add sugar, and beat until combined. Beat in vanilla.

3. Drizzle in eggs, a bit at a time, beating to combine and scraping down the sides of the bowl as needed. Beat in sour cream and salt. Stir in chopped cookies by hand.

4. Divide batter evenly among cookie-lined cups, filling each almost to the top. Bake, rotating pan halfway through, until filling is set, about 22 minutes. Transfer to wire racks to cool completely. Refrigerate at least 4 hours (or up to overnight). Remove from tins just before serving.
three for me!!
one for you :-)

Saturday, August 28, 2010

August Daring Bakers Challenge: Baked Alaska

Print Friendly and PDF
The August 2010 Daring Bakers’ challenge was hosted by Elissa of 17 and Baking. For the first time, The Daring Bakers partnered with Sugar High Fridays for a co-event and Elissa was the gracious hostess of both. Using the theme of beurre noisette, or browned butter, Elissa chose to challenge Daring Bakers to make a pound cake to be used in either a Baked Alaska or in Ice Cream Petit Fours. The sources for Elissa’s challenge were Gourmet magazine and David Lebovitz’s “The Perfect Scoop”.

Hubby surprised me with an ice cream maker : -)  He said it was for me but I know it was because he didn't want any more late nights of having to stay up so that I could mix the ice cream.  Its not like we were up THAT late last month!!! Its a nice, simple cheapie machine that will provide us with some major yumminess in months to come.

I'm all about different flavors but hubby, my mom and son all like the boring vanilla ice cream.  Thankfully a vanilla recipe was provided for us so I knew that A: it would be good and B: I wouldn't have to go doing a web search for an awesome vanilla ice cream.

The cake was over baked but did have a good taste to it.  Sort of reminded me of the chocolate chip cookies I make using browned butter.  If you have never browned butter, you are in for a treat! Just the smell of the butter browning is heavenly!

The recipe I used for meringue made way to much.  Maybe I just didn't cover mine up enough, I don't know.  All I know is that I had enough to cover six more cakes!  I thought I would just bake the remainder of the meringue into cookies but they dried out into this funky sponge texture... almost rubbery.  Ick, wasn't impressed with that at all!  Over the ice cream itself though it was quite good.

Vanilla Ice Cream

1 cup (250ml) whole milk
A pinch of salt
3/4 cup (165g) sugar
1 vanilla bean, split lengthwise OR 2 teaspoons (10ml) pure vanilla extract
2 cups (500ml) heavy (approx 35% butterfat) cream
5 large egg yolks
1 teaspoon (5ml) pure vanilla extract

Directions:
1. Heat the milk, salt, and sugar in a medium saucepan until the liquid steams. Scrape out the seeds of the vanilla bean with a paring knife and add to the milk, along with the bean pod. Cover, remove from heat, and let infuse for an hour. (If you do not have a vanilla bean, simply heat the milk, salt, and sugar in a medium saucepan until the liquid steams, then let cool to room temperature.)

2. Set up an ice bath by placing a 2-quart (2 litre) bowl inside a large bowl partially filled with water and ice. Put a strainer on top of the smaller bowl and pour in the cream.

3. In another bowl, lightly beat the egg yolks together. Reheat the milk in the medium saucepan until warmed, and then gradually pour ¼ cup warmed milk into the yolks, constantly whisking to keep the eggs from scrambling. Once the yolks are warmed, scrape the yolk and milk mixture back into the saucepan of warmed milk and cook over low heat. Stir constantly and scrape the bottom with a spatula until the mixture thickens into a custard which thinly coats the back of the spatula.

I couldn't resist! It looked as if it were smiling
at me so I added some Kix cereal for eyes.
4. Strain the custard into the heavy cream and stir the mixture until cooled. Add the vanilla extract (1 teaspoon [5ml] if you are using a vanilla bean; 3 teaspoons [15ml] if you are not using a vanilla bean) and refrigerate until thoroughly chilled, preferably overnight.

5. Remove the vanilla bean and freeze in an ice cream maker. If you don’t have an ice cream maker, you can make it without a machine. See instructions from David Lebovitz: here 

Brown Butter Pound Cake

19 tablespoons (9.5 oz) (275g) unsalted (sweet) butter
2 cups (200g) sifted cake flour (not self-rising; sift before measuring)
1 teaspoon (5g) baking powder
1/2 teaspoon (3g) salt
1/2 cup (110g) packed light brown sugar
1/3 (75g) cup granulated sugar
4 large eggs
1/2 teaspoon pure vanilla extract

Directions:
1. Preheat the oven to 325°F/160°C and put a rack in the center. Butter and flour a 9”x9” (23cmx23cm) square pan.

2. Place the butter in a 10” (25cm) skillet over medium heat. Brown the butter until the milk solids are a dark chocolate brown and the butter smells nutty. (Don’t take your eyes off the butter in case it burns.) Pour into a shallow bowl and chill in the freezer until just congealed, 15-30 minutes.
this is how the browned butter looks
3. Whisk together cake flour, baking powder, and salt.

4. Beat the brown butter, light brown sugar, and granulated sugar in an electric mixer until light and fluffy, about 2 minutes. Beat in the eggs one at a time, mixing well, and then the vanilla extract.

5. Stir in the flour mixture at low speed until just combined.

6. Scrape the batter into the greased and floured 9”x9” (23cmx23cm) square pan. Smooth the top with a rubber spatula and rap the pan on the counter. Bake until golden brown on top and when a toothpick inserted into the center comes out clean, about 25 minutes.

7. Cool in the pan 10 minutes. Run a knife along the edge and invert right-side-up onto a cooling rack to cool completely.

Meringue (For the Baked Alaska)
8 large egg whites
½ teaspoon (3g) cream of tartar
½ teaspoon (3g) salt
1 cup (220g) sugar

     Beat the egg whites, cream of tartar, and salt on high speed in an electric mixer until soft peaks form. Beat in the sugar gradually in a slow stream until stiff peaks form.

Assembly Instructions – Baked Alaska
1. Line four 4” (10cm) diameter tea cups with plastic wrap, so that plastic wrap covers all the sides and hangs over the edge. Fill to the top with ice cream. Cover the top with the overhanging plastic wrap and freeze for several hours, or until solid.

2. Level the top of the brown butter pound cake with a serrated knife or with a cake leveler. Cut out four 4” (10cm) diameter circles from the cake. Discard the scraps or use for another purpose.

3. Make the meringue (see above.)

4. Unwrap the ice cream “cups” and invert on top of a cake round. Trim any extra cake if necessary.

5. Pipe the meringue over the ice cream and cake, or smooth it over with a spatula, so that none of the ice cream or cake is exposed. Freeze for one hour or up to a day.

6. Burn the tips of the meringue with a cooking blow torch. Or, bake the meringue-topped Baked Alaskas on a rimmed baking sheet in a 500°F/260°C oven for 5 minutes until lightly golden. Serve immediately.

Tuesday, July 27, 2010

DARING BAKERS CHALLENGE JULY, 2010-Swiss swirl ice cream cake!

Print Friendly and PDF
     This month's daring bakers challenge was one I could really sink my teeth into!  Perfectly suited for our summer weather here in the United States.  I was especially excited about this dessert because my oldest son was coming to visit us and I wanted to make something special for him... this certainly fit the criteria!
     The July 2010 Daring Bakers’ challenge was hosted by Sunita of Sunita’s world – life and food. Sunita challenged everyone to make an ice-cream filled Swiss roll that’s then used to make a bombe with hot fudge. Her recipe is based on an ice cream cake recipe from Taste of Home.
     While we were required to make a Swiss roll (i.e jelly roll), filling, two ice creams and a fudge sauce, we were able to play around with our own recipes and flavors.  I don't have an ice cream maker and Sunita had made her two recipes (vanilla and chocolate) without the use of a machine so I stuck with her ice cream recipes. I also stayed with her recipe for the filling and the fudge sauce.  Really, the only thing I changed was that I used a Chocolate Swiss Roll recipe from Betty Crocker.
Chocolate Swiss Roll Cake
3 eggs
1 cup granulated sugar
1/3 cup water
1 teaspoon coffee-flavored liqueur   I used vanilla paste in place of the liqueur
3/4 cup Gold Medal® all-purpose flour
1/4 cup unsweetened baking cocoa
1 teaspoon baking powder
1/4 teaspoon salt
Unsweetened baking cocoa
2 tablespoons coffee-flavored liqueur **omitted this ingredient
     Heat oven to 375°F. Line 15x10x1-inch pan with foil; generously grease. In large bowl, beat eggs with electric mixer on high speed about 5 minutes until thick and lemon colored. Gradually beat in granulated sugar. Beat in water and 1 teaspoon liqueur on low speed. Gradually add flour, 1/4 cup cocoa, the baking powder and salt, beating just until batter is smooth. Pour into pan.
     Bake 12 to 15 minutes or until toothpick inserted in center comes out clean. Run knife around edge of pan to loosen cake; turn upside down onto towel sprinkled generously with cocoa. Carefully remove foil. Trim off stiff edges of cake if necessary.
While hot, carefully roll cake and towel from narrow end. Cool on cooling rack at least 30 minutes.

3. Unroll cake carefully and remove towel


For the filling-
2C / 500 mls/ 16 fl oz of whipping cream
1 vanilla pod, cut into small pieces of about ½ cm (or 1 tsp vanilla extract)
5 tblsp / 70gms/2.5oz of caster sugar
      Grind together the vanilla pieces and sugar in a food processer till nicely mixed together. If you are using vanilla extract, just grind the sugar on its own and then add the sugar and extract to the cream.
     In a large bowl, add the cream and vanilla-sugar mixture and beat till very thick.
     Divide the cream mixture between the completely cooled cakes.
     Open the rolls and spread the cream mixture, making sure it does not go right to the edges (a border of ½ an inch should be fine).


Roll the cakes up again, this time without the towel. Wrap in plastic wrap and chill in the fridge till needed, seam side down.


The vanilla ice cream-
2 and ½ C / 625 ml / 20 fl oz of whipping cream
1 vanilla bean, minced or 1 tsp/ 5 ml/ .15 fl oz vanilla extract
½ C / 115gms/ 4 oz of granulated sugar
     Grind together the sugar and vanilla in a food processor. In a mixing bowl, add the cream and vanilla –sugar mixture and whisk lightly till everything is mixed together. If you are using the vanilla extract, grind the sugar on its own and then and the sugar along with the vanilla extract to the cream.
      Pour into a freezer friendly container and freeze till firm around the edges. Remove from the freezer, beat till smooth and return to the freezer. Do this 3-4 times and then set completely.

The chocolate ice cream-

2C/ 500 ml whipping cream
1 C/230gms/8 oz caster sugar
3 tblsp/ 24 gms/1.5 oz of natural unsweetened cocoa powder
     Grind together the sugar and the cocoa powder in a food processor .
     In a saucepan, add all the ingredients and whisk lightly.
     Place the pan over heat and keep stirring till it begins to bubble around the edges.
     Remove from heat and cool completely before transferring to a freezer friendly container till firm around the edges. If you are using an ice cream maker, churn the ice cream according to the manufacturer’s instruction, after the mixture has cooled completely. If not using a machine; remove from the freezer, beat till smooth and return to the freezer. Do this 3-4 times and then set completely.

The Hot fudge sauce
1 C / 230gms/ 8 oz of caster sugar
3 tblsp / 24gms/1.5 oz of natural unsweetened cocoa powder
2 tblsp /15gms/ 1 oz of cornflour/cornstarch
1 and ½ C /355ml /12 fl oz of water
1 tblsp /14gms/ 1 oz butter
1 tsp/5 ml / .15 fl oz vanilla extract
     In a small saucepan, whisk together the sugar, cocoa powder, cornflour and water.
     Place the pan over heat, and stir constantly, till it begins to thicken and is smooth (for about 2 minutes).
     Remove from heat and mix in the butter and vanilla. Keep aside to cool .

Assembling your ice cream cake
 Cut the Swiss rolls into 20 equal slices ( approximately 2 cms each ).
Cover the bottom and sides of the bowl in which you are going to set the dessert with cling
film/plastic wrap.
 Arrange two slices at the bottom of the pan, with their seam sides facing each other. Arrange the Swiss roll slices up the bowl, with the seam sides facing away from the bottom,
 to cover the sides of the bowl. Cover the bowl with plastic wrap and freeze till the slices are firm (at least 30 minutes).
 Soften the chocolate ice cream. Take the bowl out of the freezer, remove the cling film cover and add the ice cream on top of the cake slices. Spread it out to cover the bottom and sides of the bowl. Cover the bowl with plastic wrap and freeze till firm                    ( at least 1 hour)
Add the fudge sauce over the vanilla ice cream, cover and freeze till firm . ( at least an hour)
 Soften the Vanilla ice cream and spread it over the fudge sauce. Cover with plastic wrap and freeze for at least 4-5 hours till completely set .

 Remove the plastic cover, and place the serving plate on top of the bowl. Turn it upside down and remove the bowl and the plastic lining. If the bowl does not come away easily, wipe the outsides of the bowl with a kitchen towel dampened with hot water. The bowl will come away easily.