Saturday, February 27, 2010

Mud Puddle Cookies


I no longer remember where I got this recipe from. It has been in my MasterCook program for... well, ever since MC came out! This is one of my favorite cookies as they remind me of brownie bites. I've seen other recipes for Mud Puddle Cookies, but they are not the same as these cookies. I'm guessing that the creator of these cookies named them mud puddles because of their soft center.

It took me several attempts at these cookies before realizing that the centers, of the cookie, were designed to be soft, with a fudge brownie type consistency. At first I thought that they were not being cooked long enough but getting the centers to be less soft caused the outer edges to be well over done. The texture in the center is so different from the outer edges that it isn't uncommon for me to have to explain that these cookies are not undercooked. They are quite addictive and once people get used to the texture, it is hard to keep them away from them.

Mud Puddle Cookies

1/4 cup butter
2 cups milk chocolate chips
14 ounces sweetened condensed milk
1 1/2 cups all-purpose flour
1 cup powdered sugar
1/2 teaspoon vanilla
4 teaspoons milk

Directions:

Heat oven to 350 degrees Fahrenheit. Melt butter and chocolate chips in a 2-quart saucepan over low heat, stirring constantly until smooth. Remove from heat.


Add condensed milk and stir until smooth. Add flour and mix well. The dough will be soft like brownie batter would be.

Shape rounded teaspoonfuls of dough into 1-inch balls. Place dough1-inch apart onto ungreased cookie sheets. I like to use my silicon baking sheets to prevent sticking. Bake for 8 minutes. 
Cool completely

Meanwhile combine powered sugar and vanilla in small bowl. Gradually stir in enough milk for desired glazing consistency. Drizzle over cookies
This recipe yields 3 1/2 dozen cookies.


Print Friendly and PDF

Wednesday, February 24, 2010

Cake Decorating the Wilton way... more or less

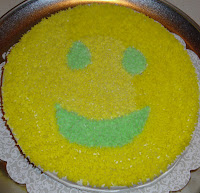
For my birthday my in-laws gave me and my husband a gift certificate to take lessons in cake decorating. We signed up through a course that our local Michael's gave for course 1. It's an enjoyable class and our teacher is fantastic! I have two complaints; the first one is the frosting we are to use is icky tasting... blech. It leaves a greasy coating in your mouth. The second complaint has to do again with the frosting. It is the recipe that is posted in the Wilton lesson book, but it doesn't take in to consideration that Crisco no longer has transfats in its product. The frosting does not produce smooth edges and easily cracks. Our instructor told us to use milk and not water for the liquid. However, even after trying these, the results are poor. Even she (the instructor) continues to be baffled as to how we can rectify the problem.  Frosting aside, we are having fun and have signed up to take the  level 2 class.  Just for fun, I thought I would share with you some of our projects.

The Creme Brulee that wasn't

Today is such a gorgeous, sunny day that I can't imagine why any person would want to spend their day indoors. Alas, there were cupcakes to be made for tomorrow night's cake decorating class and the tantalizing smell of vanilla made me think of Crème Brulee. It is one of the food projects I've wanted to make since hubby bought me the supplies December of 2008, for my birthday. Talk about time getting away from you! As luck would have it, I had all the supplies on hand to make Paula Deen's Crème Brulee from Food Network.


Paula Deen's Crème Brulee
2 cups heavy cream
1 vanilla bean, split lengthwise
4 large egg yolks
1/4 cup, plus 1 tablespoon sugar
1/3 to 1/2 cup white granulated or light brown sugar

Directions
Preheat oven to 300 degrees F.

In a heavy-bottomed medium non-reactive saucepan, heat cream with vanilla bean over medium-low heat for 15 minutes, stirring to ensure it does not burn; do not let boil. Remove from heat and let steep for 15 minutes. Remove and discard the vanilla bean, or save for another use. Strain cream through a fine mesh sieve.

Meanwhile, in a mixing bowl, beat egg yolks with an electric mixer on high speed for 5 minutes, or until light and fluffy. Gradually beat in 1/4 cup plus 1 tablespoon sugar. Add about half the cream mixture, a little at a time, to the egg mixture, whisking until well blended. Then pour the egg mixture into the remaining cream mixture. Stir until completely blended.

Pour the custard into 4 (9-ounce) ramekins or custard cups. Place the dishes in large baking pan. Pour enough hot water into the pan to come halfway up the sides of the ramekins( I added food coloring to the water so that you could see). Bake for 35 to 40 minutes or until the mixture is set in the center (it should still wiggle when shaken). Carefully remove the dishes from the baking pan. Let cool to room temperature and then refrigerate for at least 2 hours, or up to 24 hours. Let creme brulee stand at room temperature 20 minutes before serving.

Divide 1/3 to 1/2 cup white or light brown sugar in a thin, even layer over each custard, covering it completely. To caramelize the sugar, light a propane torch* and hold it so the flame just touches the surface. Start at the center and spiral out toward the edges of the ramekins. If the sugar begins to burn, pull the torch away and blow on the sugar to extinguish the flame. Serve immediately.

Alas, my poor dessert failed to set and came out with the texture of the vanilla coffee creamer you might use.  When I took them out of the oven the dessert appeared to be the right consistency, but evidently it wasn't.  Doing a net search I found that some recipes require boiling water to set the ramekins in before baking and I am wondering if that was the cause.  I can't quite check this one off my list, yet.  I'm going to try another recipe on another day and will share those results with you.

Friday, February 12, 2010

Heavenly Angel Food Cake


We were supposed to be having a birthday dinner for my lovely mother-in-law. Unfortunately, a stomach virus has hit me and the dinner was canceled. Dear hubby was excited about the opportunity for a made from scratch angel food cake, so he went ahead and made one and took pictures so I could blog it. Thanks hubby! He is made one that he adapted from a recipe Alton Brown has on the the food network web site.

Let's get started!

Alton Brown's Angel Food Cake
Adapted by Neil Thiele

1 3/4 cups sugar
1/4 teaspoon salt
1 cup cake flour, sifted
12 egg whites (the closer to room temperature the better)
1/3 cup warm water
1 teaspoon vanilla extracts or extract of your choice
1 1/2 teaspoons cream of tartar


Directions:

Wash all your utensils, bowl and cake pan to make sure they are free from any oils. Be sure to use a stainless steel or glass bowl and not any plastic bowls. Separate your eggs and let them come to room temperature (about an hour).

Preheat oven to 350 degrees F. Oven rack placement is important; Alton Brown's recipe doesn't say anything about it. However, an Internet search confirmed my original belief that removing one rack and baking on the lowest oven rack gives better results for Angel food cakes.

In a food processor spin sugar about 2 minutes until it is superfine. Sift half of the sugar with the salt the cake flour and set aside. Sift the remaining sugar but keep separate from the flour sugar mixture and set aside.

 Preheat oven to 350 degrees F.  Oven rack placement is important, Alton Brown's recipe doesn't say anything about it.   However, an Internet search confirmed my original belief that removing one rack  and baking on the lowest oven rack  gives better results for Angel food cakes.

In a food processor spin sugar about 2 minutes until it is superfine. Sift half of the sugar with the salt the cake flour and set aside.  Sift the remaining sugar but keep separate from the flour sugar mixture and set aside..

In a large bowl, use a mixer of your choices (I like using my hand mixer when making anything that requires stiff peaks but hubby used the Kitchen aid) and mix on low to thoroughly combine egg whites, water, vanilla extract, and cream of tartar. After 2 minutes, slowly add the sifted reserved sifted sugar, beating continuously at medium speed.


Once you have achieved medium peaks, sift enough of the flour mixture in to dust the top of the foam. Using a spatula fold in gently (I was taught to never ever never use plastic when making angel food cake but hubby used it!). Continue until all of the flour mixture is incorporated.


Carefully spoon your mixture into an ungreased tube pan. Cut through the batter with a knife to remove air pockets. Bake for 35 minutes before checking for doneness with a wooden skewer. (When inserted halfway between the inner and outer wall, the skewer should come out dry).  The instructions said to "Cool upside down on cooling rack for at least an hour before removing from pan", however, my mother taught me to invert the pan over the top of a narrow bottle and so I choose to continue with that method.


Garnish with fruit, whipped cream, caramel, chocolate or whatever catches your fancy... we chose caramel and whipped cream with sprinkles (of course! have to have my sprinkles!)  Grab a fork and
Enjoy!


Print Friendly and PDF

Monday, February 8, 2010

Fifteen Recipes to Make Before You Die

I kept seeing this posted on some favorite foodie blogs and I just had to go visit the article they were referring to myself at myrecipes.  I'm rather pleased with myself that I have done most of the fifteen foods they gave:

1.   Yeast Breads   Yep, I have made my own yeast breads.  In fact, my favorite bread book at this moment is called "Healthy Breads in Five Minutes" which you can read more about here at artisanbreadinfive.com.

2.   Beef Tenderloin Steaks   Not sure if I made these before or not since we always go for the less expensive meats.  Will have to put this on my to do list.

3.   Créme Brûlée   Last year my husband bought me the torch to make this and I still haven't done it! For shame on me!  (Success!  July 18, 2011  Check out my Chai Tea Creme Brulee recipe!)

4.   Cream Pie   Lemon Meringue and Chocolate Cream pies are favorites in this house.  Check this one off the list.

5.   Fudge   Every Christmas fudge gets made.

6.   Cream Puffs   While I have made the pastry before, I have not made an honest to goodness tradtional filling.  This one goes in the must make pile.    completed 5/2010

7.   Crown Roast   I know this isn't in my current food budget so will put this one in the "dream on" pile! 

8.   Fried Chicken   Hubby's favorite meal but I want to try making the chicken soaking it over night in butter milk.  In my to do list.  Made the chicken with buttermilk 3/10

9.   Roux   Oh yeah... Roux and I are old time buddies

10.  Pasta and Cream Sauce   I've made several cream sauce and pasta dishes and have the thighs to show for it.

11.  Roasted Turkey and Gravy   Turkey doesn't scare me!  We have roasted turkey several times through out the year. 

12.  Chocolate Pudding   Make this often but still seeking the one killer recipe I know is out there.

13.  Layer Cake   Yep. Been there, done that.

14.  Souffle   On my to do list     completed 11/2010

15.  Chicken Stock   I've made it and it isn't worth the effort (in my opinion). **Update** March 2010 made Alton Brown's Chicken stock for a daring cooks challenge and it is to die for!!

        Since I have made so many of these foods I went in search of other recipes I would like to make before I die and came up with these:

16.   Poulet au Porto [Roast Chicken Steeped with Port Wine, Cream, and Mushrooms

17.   Beef Bourguignon

18.   Mayonnaise

19.   Coq au Vin

20.   Beef Wellington

21.   Croquembouche  completed 5/2010

22.   Graham crackers

23.   Baked  Alaska   completed 8/2010

24.   Marshmallows  completed 12/10
 
     I have my work cut out for me! Will keep you posted as I try my hand at these recipes.  I love to be in the kitchen as it brings me such joy - which reminds me of one of my favorite Bible verses:
Philippians 4:4   Rejoice in the Lord always. I will say it again: Rejoice!
    
My little grandbaby is one of my biggest joys... isn't she a cutie!

Sunday, February 7, 2010

Meringues on a rainy day


     As much as I liked the idea of doing my own blog, my insecurities arise and I chickened out posting last week.  I'm not fabulous with a camera and have no give aways to draw people in.  I had to go back and reflect upon my reasoning for starting this blog. I'm in this to have fun and keep my creative juices motivated. 

Let's move on.
This is my second week following a diet from "Curves".  I have to consume way too much protein for my taste but I still get my yummy carbs.  I just don't know what I would do if I couldn't have my fruit!  I was craving something sweet today and also in the mood for some baking, but, and this is a biggie, it had to remain low in carbs.  So ultimate brownies is out the window but surely there had to be another option.  I quick search in allrecipes and I found some delightful recipes for meringues and chose this one called " Authentic French Meringues," by RANDIVH.  Browsing through the comments I made some of my own adaptations to the recipe. 

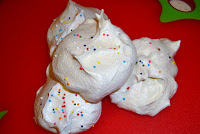
One thing I forgot about making a meringue is that it comes out best on non-humid days... guess what its doing right now?? Yep, its raining.  It took 29 minutes for my egg whites to reach the stiff peak stage and silly me decided today would be the day to whip out the hand mixer.  It also took extra time in the oven to get the meringue to be fully set.  In the end, while they turned out to be fabulous in texture, I found this recipe to be nothing more than tasting of confectioner's sugar.  I will try another recipe in the future using regular granulated sugar. 


Authentic French Meringues
                adapted by Vivian Thiele

4 egg whites   (I had about 1/2 a cup using large eggs)
1/4 teaspoon Cream of Tartar
1 1/4 Confectioners' sugar
1 teaspoon vanilla.

Directions:

1.Preheat the oven to 200 degrees F (95 degrees C). Place the oven racks up to the highest possible position.  Line a baking sheet with parchment paper.

2.In a glass or metal bowl, whip egg whites until foamy using an electric mixer. Sprinkle in sugar a little at a time, while continuing to whip at medium speed. Add cream of tartar and vanilla.  When the mixture becomes stiff and shiny like satin, stop mixing, and transfer the mixture out onto the lined baking sheet by dropping spoonfuls (use a metal spoon only, not plastic!) or you may pipe the mixture onto the parchment paper.

3. Reduce oven temperature to 185 Degrees F and bake for 3 hours without opening the oven to check on them.  After the 3 hours, check to see if  the meringues are dry, and can easily be removed from the pan. If not, place them back in the oven for additional drying time.  Allow cookies to cool completely before storing in an airtight container at room temperature.


Here is what my stiff peaks looked like.  It took me almost thirty minutes to get them to peak because of the humidity! Print Friendly and PDF