Saturday, August 27, 2011

August 2011 Daring Bakers' Challenge: Candylicious!


This month were were given the challenge to make two types of candy...gooey, melt in your mouth candy. One of the candies was to be made with tempered chocolate and the other could be our choice. I actually made three types of candy: hard candy, homemade rolo candies and milky way bars. 

The August 2011 Daring Bakers’ Challenge was hosted by Lisa of Parsley, Sage, Desserts and Line Drive and Mandy of What the Fruitcake?!. These two sugar mavens challenged us to make sinfully delicious candies! This was a special challenge for the Daring Bakers because the good folks athttp://www.chocoley.com offered an amazing prize for the winner of the most creative and delicious candy!

Tempering chocolate is rather easy; it just seems intimidating.  I'll get into the "how to" of tempering in another post, right now I'll share how I made the three candies
 Rolo Candies
Caramel filling:
1 cup sugar
3/4 cup light corn syrup
1 cup evaporated milk
1/4 cup margarine
1/2 teaspoon vanilla
Chocolate coating:
1 pound dark chocolate,  tempered and ready to use

Directions:Combine sugar, corn syrup, milk and margarine in a saucepan.  Stir an heat to 248 degrees F.  Remove from heat, add vanilla and pour onto a well butter cookie sheet.  Set aside to cool.  At this point you can score into sections the size you desire. I took sections and rolled them into small marble size pieces and covered with chocolate .
Using your chocolate mold, coat the bottoms and sides of the mold with chocolate.  Turn it over and let the excess flow off.
When chocolate has hardened, fill with the caramel pieces and top with additional chocolate.


You will need to use a heavy duty mixer to make these! I gave my Kitchen Aid mixer 
a real work out!

Homemade Milky Way Bars
3 cups granulated sugar
3/4 cup light corn syrup
3/4 cup water
1/8 teaspoon salt
3 egg whites
1/3 cup semisweet chocolate chips, melted


Directions
In large saucepan over medium heat, combine sugar,corn syrup, water and salt.  Heat, while stirring constantly, until mixture begins to boil.  Continue cooking, stirring periodically, until temperature of candy thermometer reaches 270 degrees F. or soft crack stage.
Using a non-plastic bowl, whip the egg whites until stiff peaks form.
Once the sugar mixture reaches 270 degrees F., remove from heat and carefully pour in thin streams over the egg whites, blending completely with mixer set on low speed.Continue to cook until mixture becomes thick like dough. I had to hold my machine down during this process because my mixer was taking a bit of a beating! The entire beating process took me close to twenty minutes!
Once mixture has thickened and become the consistency of dough, add the melted chocolate chips. After the melted chips have been blended through, press mixture into greased 9-inch square pan. I like to line the bottom and sides with plastic wrap, then grease. Having the plastic wraps makes it easier to remove.
Refrigerate until firm. Remove from pan and cut into desired bar sizes. I made 18 pieces.


At this point the candy is ready to be dipped in chocolate and you would have a candy like the 3 Musketeers.  I still had some of the caramel left over so I topped the nougat with a layer of the caramel before dipping into the chocolate.

Using tempered chocolate, dip your candy into the chocolate and coat completely  place on wax paper.
Cool at room temperature. 


Hard Candy
2 cups granulated sugar
2/3 cup light corn syrup
3/4 cup water
1 teaspoonful candy flavoring  (I used sour apple)
1/2 teaspoon liquid food coloring

Combine sugar, corn syrup and water in 2-qt saucepan.  Stir over medium heat until sugar dissolves.  Bring mixture to a boil without stirring. When syrup temperature reaches 260 degrees F, add color.  Do not stir; boiling action will incorporate color into syrup.  Remove from heat at 300 degrees F.  Stir in flavoring.  Pour syrup into lightly oiled candy molds or onto greased cookie sheet and score with knife to form bite-size pieces.  When cool, break into pieces and dust with powdered sugar to prevent sticking.

Thursday, August 25, 2011

curry revisited


     Last month's Daring kitchen challenge was to do a traditional Southern Indian dish.  No problem, right?  Wrong! I found that the meat dishes all involved curry leaves... not to be confused with curry powder. It took a trip to out of state to find this elusive ingredient! Ok, so we didn't go out of state to just get curry leaves.  We went on a mini vacation and for us that involves either hitting an amusement park or visiting all the ethnic markets we can find.  We couldn't find any curry leaves in Portland but our lovely Indian hotel manager advised us to go to his favorite market in Vancouver, Washington. There I was not only able to find curry leaves but I gathered up several other interesting items off the shelves as well. Unfortunately, these leaves needed to be kept frozen.  I bought a small package and hoped and prayed that using our tiny cooler would keep them fresh enough.
     We later drove on up to Seattle to visit our son.  One of the best things about Seattle is their Pike Street Market.  I love browsing through all the fresh vendors! There are literally hundreds of shops throughout Pike street and right across the street we found an Indian market.  They carried dried curry leaves so I bought a package in case my frozen ones did not survive.  There are tons of ethnic markets in Seattle we just didn't have enough time to visit all of them.  Looks like we will have to do a return visit!
    Luckily, now that I have my ingredients, the August Monthly Challenge was to make an ethnic dish.  I wish to revisit the curry challenge and make a curry dish using the curry leaves. Totally worth the effort of seeking out the ingredients!  Yes, all of these ingredient can be bought online, but really, is there any fun in that?

Marsala Beef With Ginger and Curry Leaf
adapted recipe from allrecipes.com
Ingredients:
3 bay leaves
1 (1 inch) piece cinnamon stick 
5 cardamom pods
2 whole cloves  (recipe called for 4 but I am not a huge clove fan)
2 teaspoons fennel seeds
10 whole black peppercorns
2 pounds cross rib roast, cubed
3 cups chopped onion, divided
2 pasilla peppers,chopped
1 (1 1/2 inch) piece fresh ginger root, grated
6 cloves garlic,chopped fine
1/2 teaspoon ground turmeric
1 teaspoon salt
2 tablespoons oil
1 teaspoon whole mustard seeds
4 fresh curry leaves
1/2 cup coconut butter
1/2 lemon, juiced
1 teaspoon ground black pepper

DIRECTIONS:
1. To make the masala powder: Grind the bay leaves, cinnamon, cardamom, cloves, fennel seeds and peppercorns in a spice grinder until mixture is a fine powder. I used a coffee grinder that I set aside for grinding spices only.
2. Place the beef cubes, masala powder, 2 cups chopped onion, green chiles, grated fresh ginger, garlic and turmeric in a large, heavy pot. Add water to cover (about 1 cup) and bring to a boil. Reduce heat and simmer for 30 minutes until beef is cooked through. Add salt. Stir and continue to simmer about 10 minutes or until mixture is almost dry, but do not allow it to burn (add a bit more water, if necessary). Set aside.
3.  Over a large skillet over medium-high heat, add oil and mustard seeds; cook until they begin to pop. Immediately add remaining 1 cup chopped onion and stir over medium heat until onions soften and begin to brown, about 10 to 12 minutes. Add curry leaves and cook until brown, about 3 minutes. Add coconut butter ( used the butter found at the top of an unshaken can of coconut milk)

4.Stir in the beef mixture and black pepper,. Cook until heated through. Top with lemon juice just before serving.

Monday, August 22, 2011

Secret Recipe Club: Mahogany Pork and Veggies with Oven Baked Polenta


Its time again for the great "Secret Recipe Club" reveal.  If you haven't heard about SRC, it is another food challenge.  SRC assigns you a blog, which you secretly lurk on to, and find a recipe to make for yourself. This month the Secret Recipe Club assigned me http://pennypinchingprovisions.blogspot.com .
I had a great time browsing through her website and making a final decision on what to make was difficult.  Since I had never tried polenta before, I decided to go with her dish of Mahogany Pork and Veggies with Oven Polenta.  While I did make a few adjustments, I pretty much stuck with her recipe and everything was amazing!  My hubby can be a rather fussy eater and even he said to make everything again!  
I had a bigger piece of pork loin so I doubled the marinade and added half into a bowl of the meat, and the other half I used to marinate the vegetables.  For the polenta I used the sharp cheddar I had on hand instead of the Parmesan cheese. Thank you for giving me a new meal to put on our food rotation.  Absolutely fabulous! 

Mahogony Pork and Veggies
see the original recipe here
2 pound pork tenderloin, cut into strips
3 tablespoons olive oil
2 tablespoons brown sugar
4 teaspoons soy sauce
2 teaspoons hot pepper sauce
4 cloves garlic, minced
1 large red onion (I just cut the onion into 1/8 chunks)
2 large red or orange bell peppers, sliced

Directions:
Slice vegetables and Combine brown sugar, soy sauce, hot pepper sauce, olive  and garlic: mix and set aside
In a medium bowl add the peppers and onion and pour half of the marinade over it.  Mix together and set aside.  In another bowl add the meat, add some fresh ground black pepper (to taste) and pour the remaining marinade over the meat; toss to coat.  Let set for no longer than 1/2 hour.

Preheat skillet to Medium-High... you want a nice hot pan so that the vegetables will slightly carmalize and not steam cook.  Add the vegetables with the marinade and cook about 8 minutes, stirring occasionally, until tender.  Remove, cover and keep warm

Let the pan preheat again, add meat to the skillet, cook about 5 minutes.  Stir occasionally until done. Pour meat over veggies to serve.

Oven Polenta
1-1/2 cup chicken or vegetable broth (I used chicken broth)
1 cup milk
1/2 cup cornmeal
1 Tbl olive oil
1/4 tsp salt
1/4 cup shredded sharp cheddar cheese
Preheat oven to 350* Grease 8x8 dish. Combine all ingredients except cheese. Bake 50 minutes, stirring once.Stir in cheese. Bake 10 more minutes. Let stand 10 minutes before serving.  We didn't wait the ten minutes... we were too hungry!

Saturday, August 20, 2011

Spanish Style Quinoa


 My first experience with quinoa was not going to be my last! I was afraid it was going to be like cous cous - not a favorite of mine; However, it was a bit nutty and more like brown rice. I used a recipe from allrecipes.com for Spanish-Style Quinoa and served it up with some skillet enchiladas. Even my picky husband liked it!


Spanish Style Quinoa 

2 tablespoons vegetable oil 
1 cup uncooked quinoa 
1 medium onion, finely chopped
3 cloves garlic, minced 
1 small green bell pepper, chopped
1 (8 ounce) can tomato sauce
2 1/2 cups water 
1 teaspoon chili powder
1/4 teaspoon garlic powder
1/4 teaspoon ground cumin 


Directions

Heat the vegetable oil in a large saucepan over medium-high heat. Stir in the quinoa, onion, garlic, and green pepper. Cook and stir 5 to 10 minutes until the onion is tender, and the quinoa has lightly toasted.
Stir in the tomato sauce and water, then season with the chili powder, garlic powder, and cumin.
Bring to a boil, then reduce heat to medium-low, cover, and simmer until the quinoa is tender, and the liquid is absorbed, about 30 minutes. Stir the quinoa occasionally as it cooks.

Friday, August 19, 2011

Chocolate Pudding Bars

Print Friendly and PDF
I just returned from a fabulous weekend getaway with my husband.  We visited around the Portland, Oregon area then went up to visit our son in Seattle, Washington.  There was a garlic festival in North Plains, Oregon (not far from Portland) and we tried some interesting things such as garlic ice cream and garlic chocolate truffles.

The trip was great and was much needed.  I found some great books at the Borders Book stores we visited.  Sad that they are closing their stores but I was quite happy with the bargains I found on cookbooks.  One of the books I picked up was "Sandra Lee Bake Sale Favorites." I'm not a huge fan of using all the convenience foods she uses but the recipes seemed like good ones that I could easily adapt with home made products (instead of cake mixes or cookies mixes, etc.). One recipe really called out to me... Chocolate Pudding Bars.  I pretty much followed the recipe using the cake mix and pudding mix. I was feeling lazy from our trip but seriously craving chocolate! Her recipe calls for  using a butter recipe chocolate cake mix and I substituted for what I had on hand with a vanilla cake mix.  Those of us that ate it agreed that using the vanilla cake mix made the other chocolate ingredients really pop out in flavor. I think using a chocolate cake mix would have been a bit much, but feel free to use which ever one you like!
Chocolate Pudding Bars

12 ounces semisweet chocolate chips
3/4 cup heavy cream
1 package (18.25 ounces) vanilla cake mix
2 eggs
1/2 cup butter, melted
2 cups chocolate milk
1 package (5.9 ounces) instant chocolate pudding mix

Directions
Place chocolate chips in a medium bowl: set aside.  In a small sauce pan, heat cream until just about boiling. Pour the hot cream over the chocolate chips and let set for three minutes before stirring.  Mix until smooth; set aside to cool and thicken
Preheat oven to 375 degrees F.  Spray a 9x13-inch baking pan with cook-86
75.ing spray and set aside.
In a large bowl, combine cake mix, eggs, and melted butter; stir until mixed.  Batter will be thick. Spread in prepared baking pan.
Bake about 15 or until toothpick inserted in center comes out with a few sticky crumbs on it.  Cool in pan on wire rack.  
In a large bowl, combine chocolate milk and pudding mix; whisk together until slightly thickened. Spread pudding mixture evenly over the cooked cake.  
Top the pudding layer with an even layer of the thickened chocolate mixture.  Chill about 2 hours or until top sets.  Cut into bars and serve chilled or at room temperature.
Yields 16 servings.


Wednesday, August 17, 2011

Steamed Green Beans with Bacon on the Grill


I like to have variety in my vegetables... I mean, if you have to eat them then you better find ways to "user" friendly! Fresh green beans were on sale and hubby was planning on grilling steaks for dinner.  I tossed the green beans (a bit over a pound)in about 1 tablespoon olive oil, added three cloves crushed garlic and then placed three pieces of uncooked bacon over it.
raw bacon
I wrapped it all up in a sheet of tin foil and placed on the grill for twenty five minutes.  The bacon was cooked through (though not crunchy) and the beans were cooked with a bit of crunch left to them.
cooked bacon
I had used some bacon in another dish and had set aside some crisp pieces to top the green beans with before serving.  

Hope you enjoy!

Sunday, August 14, 2011

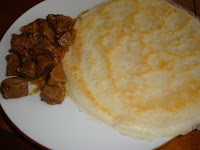
THE DARING COOKS, AUGUST 2011 CHALLENGE--Appam and Curry

Print Friendly and PDF


blog check in line:  Mary, who writes the delicious blog, Mary Mary Culinary was our August Daring Cooks’ host. Mary chose to show us how delicious South Indian cuisine is! She challenged us to make Appam and another South Indian/Sri Lankan dish to go with the warm flat bread 


The appams, and at least one South Indian/Sri Lankan accompaniment, or more, if you like! You must use the appam recipe in the challenge.


     I love living in a small-ish town, but it does have its down side.  One of the most frustrating things is the lack of ethnic ingredients.  some of the time I am lucky enough to find the ingredients in Spokane, but unfortunately this was not the case for the August challenge.  Thankfully it was only the ingredients for a curry dish that I struggled with and not the appam.  I did to a version of beef curry, but I know, from looking at other curry recipes, that without the curry leaves it was not a true curry dish.  Curry leaves are supposed to give a bold flavor that is not to be confused with curry powder.  Much of my research shows that curry powder was created by the British... go figure.  I just always figured curry powder equaled Indian cuisine!


    I know that the next time I venture into Seattle I will be able to find curry leaves but who knows when that will be.  Until then, I will have to stick with the beef curry recipe I found that didn't use the leaves. 


Appam
Servings: Makes about 15. I find 3-4 are enough for a serving
Ingredients:
1 ½ cups (360 ml/300 gm/10½ oz) raw rice
1 ½ teaspoons (7½ ml/5 gm) active dry yeast
2 teaspoons (10 ml/9 gm) sugar
½ cup (120 ml) of coconut water or water, room temperature
1 ½ tablespoons (22½ ml/18 gm) cooked rice
½ teaspoon (2½ ml/3 gm) salt
about ½ cup (120 ml) thick coconut milk (from the top of an unshaken can)
Directions:
1. Soak the raw rice in 4 to 5 cups of water for 3 hours.
2. Dissolve the sugar in the coconut water or plain water and add the yeast. Set aside in a warm area for 10-15 minutes, until very frothy.
3. Drain the rice and grind it in a blender with the yeast mixture to make a smooth batter. You can add a bit of extra water if needed, but I did not. Add the cooked rice, and grind/blend to combine well. You can see that it is not completely smooth, but very thick—that’s about right.

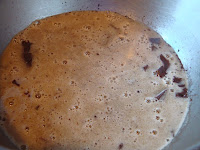
4. Pour into a large bowl, cover and leave in a warm place for 8-12 hours. You not only want the mixture to rise and collapse, but to ferment. When it is ready, it will have a slightly sour and distinctly yeasty smell. Don’t worry--they are mild tasting when cooked!
after the mixture has been set over-night
5. Add the coconut milk and salt, and a bit of water if necessary, so that you have a batter that is just a bit thicker than milk.I recommend test-cooking one before thinning the batter.  I had to add quite a bit of extra liquid, but others had to add little, to no extra liquid.
the coconut milk, unshaken
 6. Heat your pan over medium heat. Wipe a few drops of oil over it using a paper towel. Stir the batter and pour in 3-4 tablespoons, depending on the size of the pan. Working quickly, hold the handle(s) and give the pan a quick swirl so that the batter comes to the top edge. Swirl once only, as you want the edges to be thin and lacy.
7. Cover the pan and cook for about 2 minutes. Uncover and check. The center should have puffed up a bit, and will be shiny, but dry to the touch. When ready, loosen the edges with a small spatula and serve immediately. These need to be served hot out of the pan.
8. Make another, and another... Here you can see some that were made in regular skillets.
9. I have found that the leftover batter can be refrigerated for a day or 2.

Beef Curry
adapted from food and wine magazine


3 tablespoons cooking oil
1 onion, diced
1 tablespoon minced ginger
2 1/2 teaspoons ground coriander
1/2 teaspoon curry powder
1/4 teaspoon red pepper flakes
1/8 teaspoon turmeric
1 1/2 pounds sirloin steak, cut into 1-inch cubes
3 tablespoons fresh cilantro, chopped
1/4 cup coconut milk


Directions:

  1. In a large frying pan, heat the oil over moderate heat. Add the onion and cook, stirring occasionally, until translucent, about 5 minutes. Add the garlic and ginger and cook, stirring, for 1 minute.
  2. Meanwhile, in a small bowl, combine the coriander, cumin, red-pepper flakes, turmeric, salt, and water. Add the paste to the onion and cook, stirring, for 1 minute.
  3. Add the meat to the pan and cook, stirring, for 3 minutes. Raise the heat to moderately high and cook to your taste, stirring, about 2 minutes longer for medium rare.  Add the coconut milk and stir in the cilantro.
  4. Serve over rice or with appam.

Monday, August 8, 2011

Betty Crocker Cooky Book


Do you have a cookbook that gives you great recipes, but also fond memories?  I was in the kitchen along side my mom from the time I could walk.  We were baking buddies then, and still are today.  I grew up using the Betty Crocker Cooky Book... it is sooooooo 1960's with its groovy color choices!  That being said, it is my first "go to" cookie book.  I've never had a recipe fail, although there have been a few that I have not cared for because of taste preferences.
Unfortunately, my mom ended up tossing this cook book after it got all ratted and torn. I didn't realize this until after I had married and went to borrow the book from her.  This was before the days of Amazon and I thought I had lost this book forever.
In 1996, I was visiting a good friend and her daughter was making pig shaped cookies.  They turned out really cute so I asked her where she got the idea from.  Much to my surprise it was from the Betty Crocker Cooky Book!  She had found it at a garage sale.  I shared with her my memories and we both got a laugh from it.  Much to my surprise, on Mother's Day my dear friend turned over this precious book to me for a gift.
This book does give me fond memories not only of baking, but also of my friend who lost the battle with breast cancer a few years ago.  Now when I look through the pages I not only remember the moments of cooking along side my mom, but also of the laughter and tears my friend and I shared.  I hope that everybody has a special cookbook that they hold near and dear to their hearts... we all need one.

Sunday, August 7, 2011

The Cookie Carnival: Wild Blue Energy Chews


July's Cookie Carnival gave us two choices, Wild Blue Energy Chews and  Double Espresso Cookies.  I couldn't decide on which one to make so I made both.  I've always been a bit indecisive!  The Double Espresso Cookies are awesome and you can find that recipe here.

Although The original recipe, for the Wild Blue Energy Chews, called for a package of Betty Crocker oatmeal cookie mix, I used my own recipe for oatmeal cookies.  

Wild Blue Energy Chews
1 3/4 cups all-purpose flour
1 teaspoon soda
1 teaspoon salt
1/4 cup toasted wheat germ
2 cups rolled oats
1/2 cup shortening
2 eggs
1/3 cup molasses
1 1/4 cups sugar
1/2 cup dried blueberries
1/4 chopped almonds
2 ounces bittersweet baking chocolate, chopped

Directions:
Heat oven to 4degrees F.  Mix shortening, sugar, eggs and molasses thoroughly.  Sift together flour, soda and salt together, blend in to creamed mixture.  Add oatmeal and toasted wheat germ, mix until blended.  Add blueberries, chopped almonds and chopped chocolate.  Mix until blended.
Drop dough by rounded tablespoonfuls about 2 inches apart on lightly greased baking sheet.  
Bake 8 to ten minutes or until lightly browned.
yields about 3 dozen depending on the size you make them.  

Saturday, August 6, 2011

Salted Chocolate Tart


  • I wanted to do a celebration dinner for my daughter's new job and needed a dessert. Making a chocolate tart has been high on my "to do" list for sometime now so I did a bit of web surfing and came across this recipe for a Salted Chocolate Tart.  It is a very rich dessert but every bite is a taste of heaven!  Add the salt to the individual servings and not to the entire pie or else the salt will just melt into the leftover pieces.
Salted Chocolate Tart
  • Chocolate crust:
  • 6 tablespoons unsalted butter, softened
  • 3/4 cup powdered sugar
  • 1 1/4 cups all-purpose flour, plus more for rolling
  • 1/4 cup unsweetened cocoa powder (not Dutch-processed)
  • large egg yolks
  • Chocolate filling:
  • 8 ounces extra-bittersweet top-quality chocolate, such as Callebaut or Valrhona, chopped
  • 3/4 cup unsalted butter
  • 1/3 cup plus 1 tbsp. sugar
  • 1/4 cup brewed coffee
  • large eggs
  • Chocolate glaze:
  • 4 ounces extra-bittersweet top-quality chocolate, such as Callebaut or Valrhona, chopped
  • 2 tablespoons light corn syrup
  • 1/3 cup heavy whipping cream
  • 2 tablespoons unsalted butter, softened
  • Maldon sea salt for sprinkling (see Notes)

Preparation

  • 1. For the crust: In a stand mixer fitted with a paddle attachment, beat butter and sugar on medium speed until smooth. In a separate bowl, sift together flour and cocoa powder, then add to butter mixture and mix until combined. Add yolks and mix on low speed just until dough comes together. If small pieces remain, knead dough to blend them in. Form dough into a disk and wrap in plastic wrap. Chill for at least 1 hour and up to 3 days.
  • 2. Unwrap dough and set on a lightly floured work surface. With short strokes from center outward, roll into a 12-in. circle. Transfer dough to a 9 1/2-in tart pan and, using your thumb, press into sides and bottom corner. Trim dough flush with top edge. Line shell with parchment paper, completely fill with dried beans or pie weights, and chill at least 30 minutes. Meanwhile, preheat oven to 350°.
  • 3. Bake dough 10 minutes, then remove parchment and beans and return to oven until dough looks dry, about 5 minutes. Set on a rack to cool slightly.
4. For the filling: Put chocolate in a medium-size heatproof bowl. In a medium saucepan, combine butter, sugar, and coffee and bring to a boil over medium heat. Pour hot liquid over chocolate and let sit 3 to 4 minutes, then gently stir until smooth. Break eggs into a large bowl and slowly pour in warm chocolate mixture, whisking constantly until incorporated
  • 5. Pour warm filling into still-warm tart shell. Bake until filling has risen slightly, appears dry on surface, and seems firm when shaken slightly, about 10 minutes. Set on a rack and let cool completely.
  • 6. For the glaze: Put chocolate and corn syrup in a medium bowl. In a microwave-safe container, heat cream to boiling; pour over chocolate. Add butter and stir slowly until smooth, working in one direction to prevent air bubbles from forming (if butter doesn't melt completely, microwave in 5-second intervals to warm slightly).
  • 7. Pour glaze onto center of tart and use a small spatula to push glaze to edges. Let sit at least 15 minutes to set up before slicing. Serve with a larger flake salt, I used Kosher salt, for sprinkling.


Thursday, August 4, 2011

Southwest Frito Pie


I was searching through my Taste of Home magazine trying to come up with something quick and easy to make for dinner.  To be honest, I was a bit out of ingredients in my house but was too lazy to go shopping.  When I came across the recipe for the Southwest Frito Pie, the picture alone enticed me.  I changed it up a bit and it was a pretty good dish.  I wish I would have had some fresh tomato and avocado, but there's always another day!  The original recipe called for only one can of beans but I wanted it to be more substantial so used two cans of beans.

Southwest Frito Pie
adapted from a recipe of Janet Scoggins, Taste of Home magazine

2 pounds extra lean ground beef  
1/2 onion, diced 
3 Tablespoons chili powder
1 teaspoon cumin
2 tablespoons all purpose flour  
1 teaspoon salt
1 teaspoon garlic powder
2 cups water
1 can (15 ounce) pinto beans, rinsed and drained
1 can (15 ounce) black beans, rinsed and drained
Frito brand corn chips
Optional Toppings:
2 cups lettuce, chopped
1 1/2 cups  shredded Mexican cheese mix
1 can diced tomatoes with chili peppers
Sour cream
fresh minced cilantro

Directions:
In a large skillet, or dutch oven, cook ground beef and onion over medium heat until no longer pink: drain off grease if you have an excess of grease. I didn't need to drain off anything because I used extra lean ground beef.
Stir in the chili powder, flour,cumin, salt and garlic powder until blended: gradually stir in water.
Add the beans and bring to a boil.  Reduce heat: simmer, uncovered for 12-15 minutes or until thickened (may need to add a bit more flour to get the consistency you like), stirring occasionally.
To serve, place chips inside bowls, top with been mixture and desired toppings.
Serves 6
I put the chips on the bottom and around the sides