Showing posts with label cake decorating. Show all posts

Monday, August 6, 2012

candied lemons

I had a huge wedding order for both cupcakes and a wedding cake.  Her colors were yellow and green and the entire decor just suited her perfectly!  Since we were going to do the lemon cupcake with lemon curd filling I needed to do something for the decoration; candied lemon.  It was a lot easier than I thought it would be and was pretty gosh darn tasty.  My only problem was getting them to dry.  Even after fifteen hours they were still very, very sticky so I put them into my dehydrator and dried them that way.  I was quite pleased with the results and my mom hasn't been able to keep her hands off the left overs.
To candy the lemon I followed the directions from here.  Here are some tips I learned along the way:
Make sure your pieces of lemon are even.  I used my mandolin and did they 1/8 inch thick as it didn't seem to mangle them as much.
I would blanch the lemon longer than one minute.  The peel was very tough and I think the extra blanching time (maybe a minute longer) would help that out.
I have a glass top stove and my first batch cooked in the sugar water absolutely burned.  It was NASTY! Throughout the remaining batches I had to keep a very close eye on things.  The second I started to see it getting even slightly bubbly, I turned off the heat to let things cool down.  The process still only took a bit over an hour but it certainly saved things from burning and browning.

Saturday, May 12, 2012

Bridal shower

A good friend's daughter is getting married today.  It worked out to where the shower for her was on Tuesday and the wedding is just a few days later.  Her colors are lovely, orange, yellow and black but it did make it interesting to decorate and not have it look like Halloween.  Thankfully I have my Cricut machine and was able to create a few decorations.

I have to say that the most ingenious was what my friend Joy did.  She took a yellow paper plate, cut it out and glued it on top of an orange paper plate.

  I made the shower cake as well as cheesecake balls. While my skills are rather modest, I was pleased with the end results.  I'll be sharing the recipe I used for the cake balls later this week.  Right now I have to go finish up the 150 cupcakes I agreed to make for her wedding!


Sunday, April 8, 2012

Happy Easter Everyone!!!! Father, Son and Holy Spirit Cupcakes

My mom's Sunday School class has been working on learning about how 
God is Father, Son and Holy Spirit and she asked me to make cupcakes with a representation of them.... uh sure, no problem. Thinking of a way to do that should be easy peasy! Here's what I came up with.....
Exodus 3:5 "Do not come any closer," God said. "Take off your sandals, for the place where you are standing is holy ground." 6Then he said, "I am the God of your father, the God of Abraham, the God of Isaac and the God of Jacob." At this, Moses hid his face, because he was afraid to look at God.

Luke 3: 22 and the Holy Spirit descended on him in bodily form like a dove. And a voice came from heaven: "You are my Son, whom I love; with you I am well pleased."

Matthew 27:35 When they had crucified him, they divided up his clothes by casting lots.
 Have a Happy Easter everyone!!!!!!

Sunday, March 18, 2012

Have the Cake Challenge - Pots of Gold Cake Pops

I've had Bakerella's Cake Pop book since it was released... but have I ever made cake pops before??? Nooooooo.  I was excited about this month's challenge (Have the Cake) because it forced me out of my comfort zone and into the land of cake pops.  Aside from having to make my own black colored chocolate, these really weren't that difficult to make.  Of course, these simple pots of gold are nothing at all like the beautiful creation in the Cake Pop book.  I used a simple cake mix for my cake and had leftover home made Malted Frosting left over from a cake I made last month.  These were a big hit with my Sunday school class.
  Thanks for the challenge!

Wednesday, January 4, 2012

Snowmen treats

I'm sure that these ideas are old to most of you.  However, I'm a grandma now and get
 to do all these fun things that were too "babyish" for my grown kids.  
Sure I have my Sunday school kids and the Cubbies Preschoolers....
 there's just something special about doing it for you own
 little one and seeing the delight in her eyes!
The first snowman we made for gifts for the Sunday School children. 
My fabulous hubby wrote a poem for us to attach on the bag. 
 He is amazing and his this gift for just being able to whip up a poem whenever I need one.
Feel free to use the poem yourself but please give Neil Thiele credit for writing it.
  A link back to my blog would be awesome too!


I’d like to make a snowman, that wouldn’t melt away,                                             
I’d make him with my own two hands so with him I could play.                            
I’d love him and he’d love me.  Together we’d have fun,                                        
sharing our adventures until the day was done.                                                       

But Winter doesn’t last all year, and I begin to think                                                          
the snowy friend that I had made, will soon begin to shrink.                                             
His face will start to sag and droop, almost as if he’d felt                                         
the sun that shines upon his face and causes him to melt.                                         
I know that I will miss my friend but I will have no fear,                                         
‘cause I can make another when it snows again next year.                                       
           
But Jesus is a better friend, which never goes away                                                  
He made me with his own two hands, exactly just this way.                                    
I’ll love Him ‘cause He loves me, together Gods’ own son                                      
will share in everything I do, whether it be sad or fun.                                              

He’ll never move away from me, and in my heart He’ll stay                                    
‘cause I believe God sent His son, and for my sins He’d pay.                                  
 He shines his face upon me, and I can say I’ve felt                                                 
                                           That Jesus let me truly see and caused my heart to melt.                                                                                                  
Now the Lord is with me, of that here is no end.                                                    
His love is always with me, Jesus my best friend.                                                     
 Written by Neil Thiele 
12/22/2011

This next snowman was for a snack for my grandsweetie.  She is really big on
Frosty the Snowman these days.... seriously big on it.  Like seven times a day
she wants to watch it, big.
This was so simple to make and it really made her day.


Tuesday, June 7, 2011

Marshmallow flower cupcakes

Recently I had organized a ladies tea at our church. Each table was assigned a hostess that would decorate their own table. I knew that several young girls were coming (pre-teens) and wanted them to have their own special table.  I made them cupcakes and topped them off with marshmallow flowers then placed them inside tea cups.  I thought they turned out pretty cute and they were not that complicated to make.  I did cheat and used a cake mix for the cupcakes, but for the marshmallow flowers you will need...
1 marshmallow per flower
Colored sugar ( found that coarse sugar worked best)
M&M candies or Skittles

Take one marshmallow and cut into five pieces using a pair of dampened kitchen scissors. To get equal pieces, I found that if I cut off one slice first, then cut the marshmallow in half and cut each half into two pieces, it worked out best.  Sprinkle each piece of marshmallow with colored sugar.  Arrange on cupcakes in flower shape and place candy piece in center of each flower.


Saturday, May 28, 2011

been busy....

May has been a crazy month... I did a bridal shower for a young lady who ha been attending our church for several years.  Her colors were plum, silver and ivory... yeah, try finding bridal shower decorations in THOSE colors!!!  Thank goodness for my cricut machine as I made decorations for her using that.  Cupcakes with a super vanilla frosting and topped with a blackberry.


I also made their wedding cake.  Though not necessarily what I would have wanted the bride and her family were very pleased and that's all that truly matters!


 Then we went on vacation where we spent four days in Los Angeles.
While visiting the Kodak theater we tried out the new "Soul Daddy's" Restaurant.  This was the restaurant that won from the television show "America's Next Great Restaurant."  Yeah... not so much.  If this was the best that they had from all the contestants than the other food must have really tanked!  I also tried the Wolfgang Puck Bistro at Universal Studios.  I was unimpressed and was saddened by that.  Hubby and I agree that my meatloaf and tomato soup are much better than what we had there.  Overall though, the trip was fantastic!

Thursday, March 24, 2011

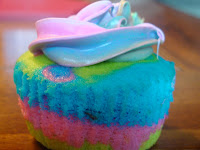
tie dye cupcakes


Standing in the checkout line my eyes glanced over and I saw a picture of the most amazing looking cupcakes. Betty Crocker has a small booklet out titled "Best Cupcakes and Cakes," available until April first, and let's face it... if it has cupcakes on it than I'm on it!
 While a bit tedious, it was rather simple to do.  You take a basic white cake mix and make the batter according to the instructions.  Next, divide the batter into 3 to 6 colors... the Betty Crocker version has six colors but I only wanted to work with three.  Add a different food color to each  bowl. Place 1 level teaspoon of each color batter into each muffin cup, layering your colors until all the batter is gone.  It is important to not stir the batter in the muffin cups!!! 

Each cup will be only about half full.... I find that to be a good amount especially for when I use a boxed cake mix.  Bake at 350degrees F.  for 15 to 20 minutes or until a toothpick comes out clean.  Cool completely before frosting,

Now here comes the tricky part... use the largest size of disposable decorating bag that you can find.  I only had a small size one and getting my three colors of frosting in there was a real pain!  Unfortunately I do not have any pictures showing the frosting technique as I was unable to juggle both the decorating and the frosting at the same time.  I used my Wilton 1M star tip, but the instructions call for the #6 star tip.  I also cheated and used the 2 containers of Betty Crocker Rich and Creamy white frosting that the instructions called for... yes, a store bought frosting. Although I prefer a homemade frosting, It is perfectly ok to go the lazy route from time to time; especially when its for kids! LOL!
Place spoonfuls of each color of frosting (I used the same three colors I used for my cake batter and the instructions only used 3 colors as well) side by side in bag, alternating colors and working up from tip of bag.  Do not stir colors together.  Pipe frosting clockwise for 3 rotations, working toward the center and ending in a small peak.   


They turned out pretty cool and the kids loved it!!!!

Monday, September 27, 2010

The Daring Baker: September challenge Get Creative

Print Friendly and PDF
The September 2010 Daring Bakers’ challenge was hosted by Mandy of “What the Fruitcake?!” Mandy challenged everyone to make Decorated Sugar Cookies based on recipes from Peggy Porschen and The Joy of Baking.

Part of this challenge was to decorate the cookies as you seemed fitting for the month of September.  It was awesome seeing everyones approach to the particular theme.  Many of the Daring Bakers are from all over the world so while we Americans are in the autumn season, it has just turned spring for others! Some other bakers approached the theme by seeing September as a birthday, anniversary or even thank you month.  As you can see, for me its all about the leaves turning colors, apple picking and snuggling up with my husband while drinking hot chocolate and munching on candy corn.

I tried a new recipe for the royal icing and, sorry Martha, was not impressed.  The icing lacked the shine I get with my other recipe.  I'm not even going to bother sharing Martha Stewart's recipe but it is available on her website if you would like to have it.

We were able to use whatever royal icing we wanted but had to make the given recipe for the sugar cookies.  While time consuming, the cookies were incredibly easy to roll out and tasted great.

Basic Sugar Cookies:
Makes Approximately 36x 10cm / 4" Cookies

200g / 7oz / ½ cup + 6 Tbsp Unsalted Butter, at room temperature
400g / 14oz / 3 cups + 3 Tbsp All Purpose / Plain Flour
200g / 7oz / 1 cup Caster Sugar / Superfine Sugar
1 Large Egg, lightly beaten
5ml / 1 tsp Vanilla Extract / Or seeds from 1 vanilla bean

Directions

• Cream together the butter, sugar and any flavourings you’re using. Beat until just becoming
creamy in texture.
• Tip: Don’t over mix otherwise you’ll incorporate too much air and the cookies will spread during
baking, losing their shape.
• Beat in the egg until well combined, make sure to scrape down the sides of the bowl.
Add the sifted flour and mix on low until a non sticky dough forms.
• Tip: I don’t have a stand mixer so I find it easier to switch to dough hooks at this stage to avoid
flour flying everywhere.
• Knead into a ball and divide into 2 or 3 pieces.
• Roll out each portion between parchment paper to a thickness of about 5mm/1/5 inch (0.2 inch)
• Refrigerate for a minimum of 30mins.
• Tip: Recipes commonly just wrap the whole ball of dough in clingwrap and then refrigerate it for an
hour or overnight, but by rolling the dough between parchment, this shortens the chilling time and
then it’s also been rolled out while still soft making it easier and quicker.
• Once chilled, peel off parchment and place dough on a lightly floured surface.
• Cut out shapes with cookie cutters or a sharp knife.
• Arrange shapes on parchment lined baking sheets and refrigerate for another 30mins to an hour.
• Tip: It’s very important you chill them again otherwise they’ll spread while baking.
• Re-roll scraps and follow the above process until all scraps are used up.
• Preheat oven to 180°C (160°C Fan Assisted) / 350°F / Gas Mark 4.
• Bake until golden around the edges, about 8-15mins depending on the size of the cookies.
• Tip: Bake same sized cookies together otherwise mixing smaller with larger cookies could result in
some cookies being baked before others are done.
• Tip: Rotate baking sheets half way through baking if your oven bakes unevenly.
• Leave to cool on cooling racks.
• Once completely cooled, decorate as desired.
• Tip: If wrapped in tinfoil/cling wrap or kept in airtight containers in a cool place, un-decorated
cookies can last up to a month.

Thursday, September 16, 2010

Owl Cupcakes

"Whoooo" are you?  That was our theme for the first day of our Sunday school class.  It was move up Sunday and I had some new kids join our class.  I always like to make our first day special since it is a new routine the kids will be learning.  It can be a bit overwhelming for the little ones at first since they are no longer preschoolers but kindergartners and first graders.  They learned a few new songs, played some getting to know you games and then we taught the lesson on "Who they are in Christ."  Wrapping up this fun filled time I gave them some owl cupcakes I made( Hello, Cupcake!).  They were a big hit and the kids enjoyed their sugar high (sorry parents!!).  Thankfully our Sunday school was followed up with a big church picnic and the children were able to play outdoors.

Tuesday, July 20, 2010

Tinkerbell Cake

   My beautiful, charming, delightful grand daughter just celebrated her first birthday.  Time flies! I was blessed enough to be at her birth (forever thankful to that experience!!) and babysit her four days a week.  To see the changes that take place in her week to week is just a God gift. 
     Hubby and I made her birthday cake.  Hubby is so talented with molding the fondant!  He did this awesome model of Tinkerbell! I made the "smash" cake for her and did the decorating on the Fairy cake. I found some candy the looks like river rock and some jelly bean boulders that really jazzed up the cake. The cat tails are made from dried spaghetti pasta and fondant wrapped around them.  And aren't the mushrooms adorable! I was really pleased how they turned out. Overall the cake was a success - although I fretted about it all weekend.  I'm terribly critical of the work I do and feared it would be a disappointment. As my husband frequently reminds me, I am my own worst enemy. Why I stress myself out of a family birthday cake... for a one year old mind you... is just so not neccesary.
    I'm just going to share some pictures with you now.  Enjoy!
   

Thursday, June 17, 2010

Taking a class with Allison


Wilton has revamped the courses and I was curious about the changes so I convinced my daughter to take the course 1 class with me.  She's ever my little rebel but I love her to pieces!  Just thought I would share with you the first cake she did for the class using the elongated piping skills we learned.  She didn't like any of the patterns that came with the kit (cupcake, hamburger or fish) so I found her a skull and crossbones clip art piece and she did that instead. She used electric pink and green(duff's new colors that michael's carries now) and black.

I made this hamburger cake for my son, Darren, who would eat burgers every day of his life! 

Wednesday, June 9, 2010

Darren's 22nd birthday cake


Darren loves cats... and when we came across this cake of a cat on top of a ball of yarn, Neil and I knew we had to do something like it for Darren.  However, Darren's dessert of choice happened to be a chocolate cream pie and not cake; so instead I rolled rice krispy cereal treats in to a tight ball and covereed it with thin strips of fondant giving it the appearance of yarn.  Of course it was my husband who did the fabulous molding job of the cat! 
  New recipes coming soon!

Friday, May 28, 2010

Wilton Course three: Fondant and Tiered Cakes


This was my project for the final in course three.  Wilton will no longer be teaching this class since they have reformated all their courses.  I've signed up to redo the basics class with my daughter.  I know the techniques but she doesn't and it gets her some time out of the house away from baby and gives me practice. 

The cakes for this project I used this recipe called Ultimate Vanilla Pound Cake from "All You" magazine and filled the bottom layer with lemon curd sauce I found at this website.  Hey, you have to have some flavor with a fondant covered cake!  Winnie the Pooh is totally made out of fondant as are the daisies and ribbon.
Ultimate Vanilla Pound Cake
adapted from All You magazine
2 cups all-purpose flour
3/4 teaspoon salt
2 sticks unsalted butter, at room temperature
1 1/2 teaspoons vanilla extract
1 1/2 cups sugar
5 large egss, at room temperature
Directions:
Preheat oven to 325 F. Grease bottom and sides of a 9-inch loaf pan. Line bottom and sides with parchment, leaving about an inch of overhang on both sides. Grease and flour paper and pan, tapping out excess.
Sift flour and salt together into a small bow. Set aside. Put butter, vanilla and sugar in bowl of an electric mixer and beat on medium speed until light and pale, 3-5 minutes. Add eggs one at a time, beating well and then scraping bowl between each.
With mixer on low, ad flour to mixture gradually until it is fully incorporated; do not overmix. Pour batter into prepared pan and smooth top with spatula. Bake until a toothpick inserted in center of cake comes out clean, about 1 hour and 15 minutes.
Cool cake on a wire rack for 15 minutes. Run a knife along unlined sides of pan and use parchment to carefully lift cake onto wire rack to cool completely. Serve with whipped cream and berries, if desired.

Lemon Curd (makes 1 cup)

4 large egg yolks
1/2 cup + 2 tablespoons sugar
3 ounces fresh lemon juice
4 tablespoons unsalted butter, softened
2 teaspoons lemon zest
pinch salt
Directions:
Beat the egg yolks and sugar together in a heavy saucepan. Make sure the sugar and yolks are well combined; otherwise the yolks will curdle when the lemon juice is added. Add all other ingredients except the lemon zest and cook over medium heat, stirring constantly. Do lot let the mixture reach a boil. When the curd has thickened and turned an opaque yellow color, remove from heat and pour through a strainer. Stir in the lemon zest and allow to cool. The curd will thicken as it cools. Can be stored for up to three weeks in the refrigerator.