Showing posts with label gift giving. Show all posts

Friday, December 23, 2011

Four Cheese Cornmeal Stix


Monday was the perfect day to make a hearty soup and what's better to go with soup than crackers? Or in this case, "Stix." Rolled out thin and cut into squares these would be ideal for crackers but I was looking more towards cheese straws.  Easy to make and quite yummy.  These would be a lovely gift to make and give along with with some home made soup.

Four Cheese Cornmeal Stix
adapted from BHG Cheddar Cornmeal Sticks

                                                           (or just use plain sharp cheddar)
1/2 cup butter
1 1/4 cups all-purpose flour
1/4 cup yellow cornmeal
1/4 teaspoon salt
1/4 teaspoon cayenne pepper
1/4 teaspoon ground nutmeg

Directions: 
Preheat oven to 350 degrees F.  
Lightly grease two baking sheets; set aside.
In a bowl, combine cheese and butter and allow to stand at room temperature for 1 hour.
  Beat with an electric mixer until well mixed.  
Stir in flour, cornmeal, salt, cayenne and nutmeg.  
Divide dough in half.

On a lightly floured surface, roll each dough half into 
about 1/8-inch to 1/4-inch thickness, cut into strips, and gently twist.
Or,roll small amounts of dough into a long tube 
about the width of a straw and cut in desired lengths.

Arrange the strips on prepared baking sheets.  
Bake about fifteen minutes or until bottoms are light brown.
Keep stored in airtight container for up to 3 days
or freeze up to 3 months.
Yields about 24 of the 12 -inch stix

Wednesday, December 7, 2011

Crazy Cooking Challenge:Dark chocolate Kahlua Mudslide Fudge


Once again Tina, from the Crazy Cooking Challenge, has given us a task: find a blog that has fudge and recreate it.  Oh my but there are so many wonderful sounding fudge recipes out there!  I wanted to try them all, but my thighs stopped me.  On Pinterest I had pinned a recipe for Kahlua fudge.  This recipe had been pinned many times. I don't expect that I am the only one that will make this recipe, but I did make some adjustments that may separate me from the others.

 Before I get to those changes, please give a big thanks to La Phemme Phoodie.  She has a wonderful blog that just so happened to feature these delectable bits of fudge-y happiness! Click on the above link and give her some blogger love!
This fudge is fantastic.  Its creamy, and not overly sweet.  Even my mom, who dislikes dark chocolate, gives it two thumbs up!  I added a teaspoon of espresso powder right before I added the chocolate.  The original recipe calls for 3 cups total of chocolate but I only did 2 cups and I omitted the nuts (yes dear, I did that for you sweet husband of mine!)  be sure to click on her link to see the original recipe!


Kahlua Creamy Fudge (Adapted from La Phemme Phoodie)
INGREDIENTS:
1 1/3 cup granulated sugar
1 (7 0z) jar marshmallow creme*
2/3 cup evaporated milk
1/4 cup salted butter
1/3 cup Kahlua Mudslide
1/4 teaspoon salt
1 teaspoon espresso powder
2 cups semi-sweet chocolate pieces
1 teaspoon vanilla

DIRECTIONS:
Line an 8 inch square pan with baking foil.or parchment paper.
In a 3 1/2 quart saucepan combine sugar, marshmallow, milk, butter, Kahlua and salt. Bring to a rapid boil, stirring constantly for 5 minutes. Remove from heat; add the espresso powder and chocolate. Stir until melted. Add vanilla. Turn into prepared pan.
Cool on wire rack for 30 minutes and then refrigerate until firm. To serve cut into squares.
Serving: Approximately 2 1/2 pounds

 Here's a tip; make the length of the foil, or parchment, a bit longer  This way all you need to do is cut around the pan and pull out the fudge!.


Friday, November 25, 2011

Caramels


Next to baking, making candies is an all time favorite thing to do.  However, I have a confession to make... I absolutely hate having to wrap candies!  BORING!  The sad fact is, if you don't wrap some candies, caramels for instance, you have nothing but one big sticky mess.
This recipe has been in my family for years and is from an old candy making book (How to Make Candy; Culinary Arts Institute 1983). If you like soft chewy caramels then this is the recipe to try.
Caramels
2 cups sugar
1 1/2cups light corn syrup
2 cups evaporated milk (I use the skim evaporated milk and works just fine)
1/2 cup margarine
1 teaspoon vanilla

Combine sugar and corn syrup in heavy saucepan.  Stir occasionally and heat to 300 degrees F.  Add evaporated milk and margarine.  Stirring continuously, cook to 250 degrees F.  Remove from heat and add vanilla.  Pour onto a lightly buttered baking sheet.  Cut and wrap individually in wax paper.

Monday, October 31, 2011

Tootsie Roll Fudge


I always hit the candy aisles after holidays.  I can get my candy as much as 75% off regular price and I then use it for decorating cakes, cookies, cupcakes, etc throughout the year.  Yes, I will admit that I do eat a teeny, tiny portion of it (I see those eyes rolling!!!!) but honestly, I do it because I want to be thrifty!.  Last year I had finally found those little Tootsie Rolls on clearance and was able to make a recipe that I had stored away from many years ago.  Tootsie Roll fudge is an easy recipe and its a great way to get the kids involved (hey, somebody has to unwrap all those candies!)
Tootsie Roll Fudge
Ingredients
2 tablespoons butter
2 tablespoons peanut butter
3-3/4 cups confectioners' sugar
2 tablespoons milk
1 teaspoon vanilla extract
Sprinkles

Directions
Line a 9-in. square pan with foil. Grease the foil with 1 teaspoon butter or spray with nonstick cooking spray; set aside. 
In a heavy saucepan, melt the Tootsie Rolls, peanut butter and remaining butter over low heat, stirring constantly.
 Gradually stir in the confectioners' sugar, milk and vanilla (mixture will be very thick). 
Spread into prepared pan. Using a sharp knife, score the surface into 1-in. squares. 
Top with sprinkles or you may choose to top with holiday M&M candies. Cool. 
Using foil, remove fudge from pan; cut into squares. Store in an airtight container. 
Yield: about 2 pounds.

Sunday, June 19, 2011

Chocolate Apricot Bark


If I wanted to make this candy look super pretty then I would have to painstakingly place each piece of dried apricot, cranberry and cashew on top of the melted chocolate to give it color and presence. There's just one problem with that... see, I am critical of the way my things turn out.  Some people can toss upon their ingredients and create an elegant dish.  Alas, I am not one of them!  I sit there with my tweezers and place each piece gingerly down and still think it looks funky.  In all honesty, I tend to just give it up and toss the whole think into a bowl and mix it all up.... it keeps me sane.
The trick to making a good chocolate bark is using a good quality chocolate.  A rookie mistake is using the flavored barks that are often sold around the holiday season for candy making.  While they do melt nicely, they don't taste all that fabulous.  I like to stock up on the Ghiradelli candy bars when I find them on sale.
I like to use the 60% cacao bittersweet and their semi sweet chocolate for use in this recipe.
Chocolate Apricot Bark

  • 8 ounces semisweet chocolate, finely chopped
  • 8 ounces very good bittersweet chocolate, finely chopped
  • 1 cup whole roasted, salted cashews
  • 1 cup chopped dried apricots
  • 1/2 cup dried cranberries or Craisins

Line a  small sheet pan with parchment paper; the bigger the sheet of paper, the thinner the bark will be.  I like to keep my paper trimmed down to about 9inch x 10inch.

Chop the chocolates and melt the 2 chocolates in a heatproof bowl set over a pan of simmering water, melt completely. Add the cashews, apricots and cranberries and mix together.  

Pour the melted chocolate over the paper and spread to form a rectangle, drizzle with white chocolate if desired. Let set for about 2 hours. Cut the bark into desired size and serve.  Can be stored at room temperature in container with tight fitting lid.

Monday, November 8, 2010

homemade peanut butter cups

Print Friendly and PDF
We've been making homemade peanut butter cups for years now using a recipe that required graham cracker crumbs.  This is a recipe I recently came across that does not use the graham crackers and it was oh so creamy and good!  You do not need candy molds in order to make these, however, I find it easier to coat the molds with the chocolate rather than cupcake liners.  If you've never tried home made versions of your favorite candies but have always wanted to try, this is an easy beginners recipe!
Homeme Resees peanut butter cups     For the chocolate:
1 1/2 cups chopped semisweet chocolate (you can use chocolate chips but the chocolate won't stay firm unless it is kept refrigerated.)
2 tablespoons peanut butter  (you may use natural peanut butter only add a pinch of salt)
     For the filling:
3/4 cup peanut butter (add a pinch of salt if using natural peanut butter)
1/3 cup powdered sugar
1/2 teaspoon vanilla extract

Combine chocolate, peanut butter  in a double boiler and melt thoroughly. Put 2 teaspoons melted chocolate in each cupcake liner or  inside of each candy mold (this is using a mold that will give you the size of a regular Resees peanut butter cup. If using a smaller mold, use less chocolate). Carefully spread the chocolate with the back of a spoon at the bottom and only 1/4 of the way up the cupcake line, or all the way up a candy mold.  Repeat with all 12 liners, or molds. Place the chocolate-covered liners onto a plate in the fridge, or freezer to firm up. 
Prepare the filling: Stir together peanut butter, sugar, optional crumbs, and optional salt.
Divide the peanut butter paste into all 12 liners, about 1 heaping tablespoon per liner (less if using smaller molds) , pressing down gently to make sure the paste goes everywhere.
Top with 2 teaspoons melted chocolate, spreading carefully so that none of the peanut butter can be seen. The cups should firm up in fridge for at least one hour before eating.  If you are impatient, like I am, let them set in the freezer for about 10 minutes. Can be stored in fridge or freezer.
Yield: 12 candies

Wednesday, September 1, 2010

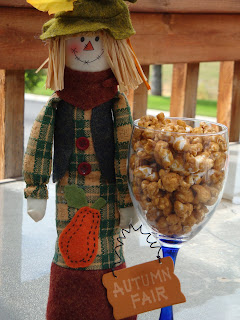
Fall is in the air and Caramel Corn season is here!

Print Friendly and PDF


For some people the end of summer means back to school, the start of football season, harvesting, etc.  In our family it means its time to start making caramel corn.  My husband and son can eat it by the gallons.... I'm serious, they do!!

Don't you wish you could reach right in and grab some??
I've had this book on how to make candy for over twenty years now and it has the best recipe for caramel corn. I've made it using real butter as well as margarine, dark brown sugar or light brown sugar - whatever your preferences are, go with it. 
Hints:
I've tripled this recipe with success.  If you attempt to make more it does become more of a challenge to stir. 
Be sure to lightly coat your pots with cooking spray for easier cleanup!  I use my big stock pot or canning pot to mix in.
 Its best to use air popped or popcorn popped on stove.  The microwave popcorn's I have found to have too tough a texture.

Delicious Caramel Corn
adapted by Vivian from the
"How To Make Candy Book"

6 quarts popped corn
2 cups brown sugar
1 cup margarine
1/2 cup light corn syrup
Dash of salt
1/2 teaspoon baking soda

Preheat oven to 250 degrees F.  Place popcorn in lightly sprayed pot (big enough too hold the amount you are making!).
Combine the brown sugar, margarine, corn syrup and salt in a heavy 2-quart saucepan.  Bring to a boil over medium heat, stirring frequently.  Continue to cook at a boil for five minutes.
Remove from heat and add baking soda.  Be sure to stir quickly as this will begin to foam up and may over flow!
Pour syrup slowly over popcorn and gently stir to be sure all popped corn is covered.
Bake for 10 minutes, remove from oven and gently stir.  Rotate pans and repeat process after another 10minutes  Continue baking using this method for a full 40 minutes maximum (only rotate and stir a total of four times with a ten minute baking period between each rotation)
Remove from oven and let cool.  When cooled, gently break apart and put into an air tight container.
Sweet Indulgence