Showing posts with label vegetarian. Show all posts

Sunday, July 22, 2012

Oven Corn on the Cob with Molasses Cilantro butter

  Nope... I have drifted off into the wild blue blog-o-sphere.  I'm still here!  I've had a few rough months and blogging is the last thing I've had on my mind.  I've got yet another surgery coming up this Tuesday and hopefully that will bring me some much needed relief from pain.
I'm still facing eating challenges but its slowly improving.  I've not done much cooking... lack of appetite, pain and eating issues just killed my desire.  Unfortunately, its also played havoc on our finances!  Time for me to get my but in gear and start making meals for the family again and staying on budget.
Yesterday was another hot and muggy day... perfect burger weather!  Homemade hamburgers are THE best.  I would rather have a burger cooked on the grill at home than any fast food or restaurant burger.  Maybe its the touch of my husband... man, does he cook a good burger!  I had some corn on the cob and tried a new technique; for me it was a new technique. It was pretty darn good corn!

Keep the corn in its husk and preheat the oven to 350 degrees F.  I just laid the corn straight on the oven racks; no sense getting more dishes dirty!  Let the corn cook for thirty minutes.  Remove from the oven and shuck.  Easy Peasy.

I was going to leave it like that but figured for my blogging friends I would go the extra mile... hey! You're worth it!  I found a recipe for a Molasses Cilantro Butter and while it looked icky (sorry, brown is just not the eye appealing color for food unless its chocolate!) the flavor was a nice touch to the sweet corn.

I found the original recipe here at delish.com    I had to substitute dried cilantro for the fresh since mine isn't growing too well yet and I really wanted that molasses flavor so I upped the amount.  
2 tablespoons unsalted butter
1 tablespoon molasses (it originally calls for 1 teaspoon)
1/8 teaspoon cayenne
1/2 teaspoon salt
1 1/2 teaspoons dried cilantro

Combine ingredients to blend completely.  The recipe says it makes enough for eight ears of corn.  We used about a teaspoon on the butter mix per ear of corn.  We really liked the extra molasses addition but I think starting off with the 1 teaspoon and adding more to taste would be ideal for most people.

Tuesday, February 14, 2012

The Daring Kitchen: Black Bean Burgers


Blog-checking lines: The Daring Cooks’ February 2012 challenge was hosted by Audax & Lis and they chose to present Patties for their ease of construction, ingredients and deliciousness! We were given several recipes, and learned the different types of binders and cooking methods to produce our own tasty patties!
I've been wanting to try my hand at making black bean burgers for a long time now.  Pure laziness on my part is the only reason why I haven't made them yet.  Man, I could kick myself for not making them sooner!  These burgers were AWESOME!  They will definitely be something that I will make to keep on hand for myself.  Don't worry dear husband... your patties will forever be with meat :-)  I used canned black beans and rinsed and drained them.  The trick is to let them drain completely.  You do not want to be adding excess moisture to these.

Annies Eats even had a recipe for Light Brioche Burger Buns that I made... Supper yummy!  What a great challenge this was.

Black Bean Burgers
adapted from Annies Eats

Yield: 6 burgers
Ingredients:

for the crumbs:
1 cup panko
 2 tsp. olive oil

For the bugers
2 (15 oz.) cans black beans, drained and rinsed, divided
2 large eggs
1 tablespoon olive oil
1 1/2 tsp. ground cumin
1 tsp. salt
1/2 teaspoon freshly ground black pepper
1/2 tsp. cayenne pepper (I like the added heat so increased it from the original 1/4 teaspoon)
1 red bell pepper, stemmed, seeded and finely diced
1 1/2 teaspoons dried cilantro flakes, (you could easily add 1/4 cup fresh chopped cilantro but I'm not that huge of a fan and prefer the taste of the dried)
1 small onion, finely diced

Directions:
I think this was the key to making these burgers over the top, so don't omit this step! Toast the panko in a skillet, over medium high heat with 2 teaspoons of olive oil.  Stir frequently until the crumbs turn a light golden brown.
In a large bowl, mash 2 1/2 cups of the beans until almost smooth.  I had to use a fork to get them started and then was able to use a potato masher to finish it up.  Whisk together the two large eggs; add to beans. Add the remaining ingredients, including the toasted panko, and blend well (I used my hands for this).

Divide the mixture into 6 equal portions, about ½ cup each. Lightly pack into 1-inch thick patties. Heat 1 tablespoon olive oil in a large skillet over medium heat. Cook until well browned on both sides, about 8-10 minutes total.  Serve warm.

Burgers can be made and refrigerated ahead of time, up to 24 hours.  


Friday, February 10, 2012

Oh So Yummy Green Beans!

As I am learning this whole blogging thing... (yes, I've been doing it for almost two years but I am a slow learner!) I'm learning about blog etiquette. Its frustrating to want to do the right thing when your computer isn't letting you.  I apologize for not responding to comments.  Honestly, I can't begin to express the joy I get when I have a comment to my post.  I'm working with blogger help to get this resolved (God Bless those marvelous patient people!) but not having much luck finding the problem. Keep writing though... please!

As my Fibromyalgia has been battling me and my knees are screaming, the doctor and I agree that its time for me to drop some weight.  Why is it that even though I went into the doctor with a firm conviction to speak with her about dieting, the minute the doctor tells me I should lose weight , I get the attitude of "YOU can't tell me what to do!"  After I had my short burst of rebellion (maybe it lasted a few days :-)) I spoke with my husband about a new plan.  I've struggled with an eating disorder and and having "Forbidden" foods is a trigger for me.  So we decided that we would just implement more fruits and veggies into our diet.  Mind you, I'm not a huge vegetable fan but I will tolerate some.  I found some fresh green beans down at our local Costco and wanted to jazz them up a bit.  On Allrecipes.com I found a recipe called Green beans with Almonds and Caramelized  Shallots.  I was totally game with it but had to do a bit of fussing with it. Part of the reason is because I had only one shallot on hand so had to substitute regular onion.  The other reason being I like to add Cayenne pepper to my vegetables.
Oh So Yummy Green Beans
adapted from this recipe this recipe
1/4 blanched slivered almonds or chopped almonds (see note to learn how to blanch your almonds!)
1 tablespoon butter
1 small onion, thinly sliced
1 orange bell pepper, chopped (can substitute using red or yellow bell pepper)
2 teaspoons white sugar
1 teaspoon salt (more if desired)
1/2 teaspoon black pepper (more if desired)
1/8 teaspoon cayenne pepper (omit if desired)
1 1/2 pounds fresh green beans, trimmed and snapped

Directions
In a dry skillet, over low heat, place the almonds and cook and stir continuously until they are lightly toasted.  Almonds can quickly go from tasted to burnt so be sure to pay attention!  It took me only three minutes to get mine toasted. Remove from pan and set aside.
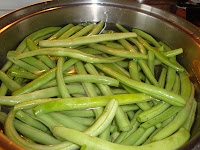
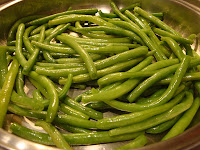
Insert a steamer into a saucepan and fill with water to just below the steamer.  Bring water to a boil.  Add the green beans, cover and steam until tender enough to pierce with a fork.  I like my beans a little less done... I want a bit of a crunch so I steamed for five minutes.  Drain the green beans and set aside.
While green beans are steaming; using a skillet, heat butter overmedium-low heat; add onions and bell pepper until softened.  This took me about eight minutes.  Reduce heat to low and add sugar, salt, pepper and cayenne pepper.  Cook until sugar is dissolved and onions have caramelized, about 5 to 8 minutes.
Add the green beans to the skillet, mix well and stir in the toasted almonds.


Serves 6

Note: how to blanch almonds
Place almonds in a bowl.
Pour boiling water to barely cover almonds.
Let the almonds sit for 1 minute and no longer.
Drain, rinse under cold water, and drain again.
Pat dry and slip the skins off.


Monday, October 17, 2011

Secret Recipe Club: A trip to Debbi does dinner healthy!


      Its reveal time for Group B of the Secret Recipe Club!  This has been such a satisfying challenge group to participate in.  Not only do you get to explore many different blogs but  you also get the joy of passing along some blogger love.  I mean, who doesn't like having their blog complemented? If you are looking for a way to increase your blog visitation than I suggest you check into SRC.
     Holidays are quickly approaching and I always gain a few pounds. This month my secret blog challenge was Debbi does dinner healthy.  I had a challenge just choosing something to make!! Debbi's blog is one I'm going to have to seriously follow.  I love that she has a slight obsession with sweet potatoes and I've got a handful of those recipes save to try on a future date.  And her Buffalo Chicken Shepherds Pie sounds like a massive plateful of YUM!
     I finally narrowed my choices down to two recipes: Butternut Squash Bake and Asian Style Fresh Green Beans. I have this turkey that needed to get used up and I felt that the squash and green beans would be an excellent accompaniment.
The Butternut squash bake is to die for!  It has just the right hint of heat and the crisp topping reheats even reheats well.  While we all loved the flavor of the Asian Style Fresh green beans, we thought that they were too firm.  I even slightly boiled them before stir frying them and  they were still firm... I'm still getting the feel of my new stove and am sure that the error is on my end and not on Debbi's.   I will make the recipe again but definitely add a longer cooking time.  

Butternut Squash Bake
adapted from Debbi Does Dinner Healthy
1 large butternut squash, about 2 pounds, peeled and cubed (I used some squash that I had roasted and stored in my freezer.)
1/2 cup mayonnaise
1 large onion, chopped
1 clove garlic, minced
1/4 teaspoon hot sauce
1 egg
15 Ritz Crackers, crushed
1/4 cup Parmesan cheese
3 tablespoons butter, divided
1 tablespoon fresh oregano,  chopped fine
salt and pepper

Heat a large pot of water to boiling, ad squash and cook until soft, about 15-20 minutes. If using frozen squash, thaw and drain liquid. 
In a small saucepan, melt 2 tablespoons butter; add in crushed crackers, cheese and oregano.  Season with salt and pepper; stir well.  Remove from heat and set aside.
Melt remaining 1 tablespoon butter in another small saucepan; cook onion until translucent and just beginning to brown; add garlic, saute for a few more minutes and remove from heat.
When the squash is cooked, drain the water and toss the squash in a bowl.  Add mayonnaise, onion, garlic, hot sauce and egg. Mash together well. 
Pour into an 8x8-inch pan or casserole dish; top with cracker cheese mixture and cover with foil.  Bake for 30 minutes at 375 degrees F.  Remove foil and bake for an additional five minutes.


Asian Style Fresh Green Beans
adapted from Debbi Does Dinner Healthy
1 pound fresh green beans, both ends snapped off and removed
2 cloves garlic, minced
1/4 teaspoon crushed red pepper flakes
1 tablespoon sesame oil
3 tablespoons soy sauce
1 1/2 teaspoon seasoned rice vinegar
1 tablespoon brown sugar
salt and pepper, to taste
sesame seeds for garnish


  Debbie's recipe didn't call for this part but I know my picky boys would have preferred this first step. Bring a large pot of water to a boil and add a big pinch of salt. Add in green beans and cook 2-3 minutes, just until slightly tender and bright green. Drain, and plunge quickly into a bath of ice water to stop the cooking. Drain the green beans and dry them
      Heat sesame oil in pan, saute green beans for about 3 minutes; add garlic and red pepper flakes.  Stir fry for about 2-3 minutes.  Add in soy sauce, rice vinegar, brown sugar, salt and pepper until beans are coated.


Saturday, August 20, 2011

Spanish Style Quinoa


 My first experience with quinoa was not going to be my last! I was afraid it was going to be like cous cous - not a favorite of mine; However, it was a bit nutty and more like brown rice. I used a recipe from allrecipes.com for Spanish-Style Quinoa and served it up with some skillet enchiladas. Even my picky husband liked it!


Spanish Style Quinoa 

2 tablespoons vegetable oil 
1 cup uncooked quinoa 
1 medium onion, finely chopped
3 cloves garlic, minced 
1 small green bell pepper, chopped
1 (8 ounce) can tomato sauce
2 1/2 cups water 
1 teaspoon chili powder
1/4 teaspoon garlic powder
1/4 teaspoon ground cumin 


Directions

Heat the vegetable oil in a large saucepan over medium-high heat. Stir in the quinoa, onion, garlic, and green pepper. Cook and stir 5 to 10 minutes until the onion is tender, and the quinoa has lightly toasted.
Stir in the tomato sauce and water, then season with the chili powder, garlic powder, and cumin.
Bring to a boil, then reduce heat to medium-low, cover, and simmer until the quinoa is tender, and the liquid is absorbed, about 30 minutes. Stir the quinoa occasionally as it cooks.

Thursday, July 14, 2011

The Daring Cooks' July Challenge: My Noodle hands! Spaetzle


Blog-checking lines: Steph from Stephfood was our Daring Cooks' July hostess.  Steph challenged us to make homemade noodles without the help of a motorized pasta machine.  She provided us with recipes for Spätzle and Fresh Egg Pasta as well as a few delicious sauces to pair our noodles with!

Having made egg noodles before, I knew that I would have to create something new for this challenge.  Along with being challenged to make pasta, Steph also wanted us to do something from our heritage. I don't know why, but while I always wanted to try spaetzle, the thought of making it scared me.  I guess that in my head I just made it seem so complicated.  Well guess what.... it isn't!  And I can kick myself for not having tried this years ago!  The dough in itself is very bland but that just gives you a large canvas to experiment with.  I went for a simple Spaetzle in brown butter and sage sauce.

Spaetzle in Sage Brown Butter

3/4 cup cold milk
3 large eggs
1/4 teaspoon ground nutmeg
1 teaspoon salt
2 cups all purpose flour
1/2 cup unsalted butter
4 fresh sage leaves, Chiffinod
2 fresh sage leaves


Bring to a boil a large pot of salted water. Combine milk, eggs, and nutmeg in processor; blend until smooth, about 30 seconds. Add salt and flour pulsing until batter is just smooth, about 30 seconds (batter will be very thick and sticky). Since I don't have a food processor, I just whisked the eggs and blended in the nutmeg and flour.  


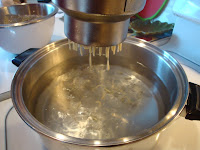
Working in batches, pour batter through slotted spoon or grater held above boiling water, pressing with spatula to form strands. Stir gently to prevent sticking.  Simmer until Spaetzle float to surface, then continue cooking 1 minute longer.Using slotted spoon, transfer spaetzle to large buttered baking dish. (Can be made 2 hours ahead). Let stand at room temperature.)


Cook butter and Sage in heavy large skillet over medium  heat until golden brown, about 3 minutes.  Add Spaetzle and toss until heated through.  Season with salt and pepper.

Divide among plates. garnish with fresh sage.
Optional: One small sautéed onion diced in the butter.

You can see the butter starting to brown

Grab a fork and dig in!

Saturday, June 25, 2011

Monthly Challenge Blogaversary: Black Bean Enchiladas


The June Monthly Challenge was to recreate a recipe from the blog.  I chose the Black Bean Enchiladas that had originally been posted in May of 2009. 

The changes I made was to use the entire recipe for the black bean mixture, made more own corn tortillas and enchilada sauce.
The recipe is from the Food Network Magazine  and can be found here.  The used the black bean mixture for two recipes; once for burgers and then using the remaining mixture for the enchiladas.  I used all of the recipe for the enchiladas... I like ours filled! The bean recipe by itself was rather bland and I would definitely have to spice it up if I was to use it in burgers.  However, the enchilada sauce I used worked well with it and gave it lots of flavor.

Black Bean Burgers:

  • 1/2 medium yellow onion, roughly chopped
  • 1 tablespoon chopped garlic
  • 2 (15-ounce) cans black beans, rinsed and drained, divided
  • 2 tablespoons freshly chopped cilantro leaves
  • 2 teaspoons freshly chopped parsley leaves
  • 1 egg
  • 1/2 teaspoon red pepper flakes
  • 1/2 cup bread crumbs
    • 8 corn tortillas
    • 1 cup leftover black bean burger mixture
    • 1 can enchilada sauce (or try my recipe which follows!)
    • 1/2 cup shredded Cheddar
    • Salt and fresh ground black pepper
  • In a food processor, pulse onion and garlic until finely chopped. Add 1 can black beans, cilantro, parsley, egg, and red pepper flakes and pulse to combine.
    Transfer mixture to a large mixing bowl, add the remaining can of black beans and the bread crumbs. Season with salt and pepper, to taste, and mix until well combined.
    Preheat oven to 350 degrees F.
    Pour half the of the enchilada sauce into the bottom of a baking dish.
    Warm tortillas by wrapping in a damp paper towel and heating in microwave for 45 seconds or until soft and pliable.
    Place 2 tablespoons of black bean burger mixture onto the bottom third of a tortilla. Roll the tortilla up and place seam side down into the baking dish. Repeat with remaining black bean burger mixture and tortillas. Pour the remaining enchilada sauce over the filled tortillas. Top with the Cheddar and bake in the preheated oven for 15 to 20 minutes or until the cheese is browned and bubbly.
  • this is my recipe for Enchilada Sauce.... I have had it for years and don't recall where the recipe came from

1 tablespoon vegetable oil
1 onion, diced or minced whichever you prefer
3 tablespoons chili powder
3 cloves garlic, minced
2 teaspoons cumin
2 teaspoons sugar
15 ounce can tomato sauce or 2 (8-ounce) cans if that's what you have on hand
1/2 cup water
salt and pepper to taste
     Heat the oil and and cook the onion until it is soft.  Add the chili powder, garlic, cumin and sugar,tomato sauce and water.  Simmer and cook until it is thickened. 

Thursday, February 24, 2011

roasted cauliflower

Print Friendly and PDF

      I am not a huge vegetable fan.  I can eat them when they are covered in sauces and some of them I'll eat raw, but to be honest with you, vegetables have not been my highest priority.  In fact, the only reason vegetables get served every day is because my mother lives with us and she loves her vegies!  
     One reason I decided to take on food challenges is to enrich my palate and try things I might not have ever tried.  Traveling to other countries has also helped increase my digestive adventures!  Slowly my toleration of vegetables is expanding and one recipe I have recently tried was a huge hit; roasted cauliflower.  Cauliflower just is icky not very tasty.... well, that has always been my opinion anyway!
      I researched several recipes and combined what I thought would be most appealing to my family. Most recipes just called for either olive oil only or butter.  I combined a bit of both, since I knew the butter would help crisp up the cauliflower, as well as adding a bit of finely grated Parmesan cheese.  This recipe will definitely be served again!

Roasted Cauliflower
1 head cauliflower
2 tablespoons butter, melted
olive oil ( I mixed the butter with about 3 tablespoons and had plenty of the mixture left over)
Salt and pepper 
finely ground Parmesan cheese ( I used 1/4 cup)
Directions:
Preheat oven to 400 degrees F.  
Cut the Cauliflower into florets, I cut them into half so that I had a flat side to lay flat against the baking sheet. I gently rinsed off the florets in a colander so that the cauliflower didn't get soggy.  I went with the method of lining the baking sheet with tinfoil then I lightly coated the tinfoil with the olive oil and butter mixture. Next, in a single layer, place the florets flat side down.  Using a pastry brush, coat the florets with the remaining butter/oil mixture using as little or much as you desire.  Sprinkle the florets with some salt and freshly ground pepper (again, to taste).
Place baking sheet on the bottom rack of the oven and cook for 15 minutes.  Transfer baking sheet to the top rack of the oven and bake for another 5 minutes (or until the tops get the carmelization that you desire.  Remove from oven and Sprinkle with Parmesan cheese.  Best if served warm.

Wednesday, June 16, 2010

The Daring kitchen: Tricolor Vegetable Pâté

Print Friendly and PDF
Pâté... never have had the want to try this delicacy (or so am told it is!!). I mean, the thought of eating liver makes me shiver and now add to it mushed liver??? No thank you!!! So after reading that pâté was this month's challenge I was strongly considering taking a pass this month. But wait... isn't the whole point of doing a "challenge" is to challenge yourself. So I kept on reading and the skies opened and the angels sang; there, right before my eyes was the answer to my anguish..... vegetable pâté. I like vegetables (well, most any way!) and so this was certainly going to be doable.
Our hostesses this month, Evelyne of Cheap Ethnic Eatz, and Valerie of a The Chocolate Bunny, chose delicious pâté with freshly baked bread as their June Daring Cook’s challenge! They’ve provided us with 4 different pate recipes to choose from and are allowing us to go wild with our homemade bread choice.
 
Our choices for the pâté were:
Three Spice Liver Pâté: adapted from Ravenous Couple, which was inspired by White on Rice Couple.
Chicken Liver Pâté: slightly adapted from Stéphane Reynaud’s Terrine
Tricolor Vegetable Pâté: from Bon Appétit Oct 1993 on Epicurious
Trout and Shrimp Pâté: unknown (handed down to Valerie from someone, who got it from someone else, etc.)

For my bread I went with my tried and true French Bread favorite from Better Homes and Gardens.  It has a nice crunchy crust and is still moist on the inside.  The recipe makes 2 loaves of french bread or four baguettes and I've always had success with freezing the loaves I don't use right away. 

The mandatory guidelines of this challenge were to prepare one pâté recipe and one bread recipe of your choice. The pâté has to 1) be baked or refrigerated (or both) for a significant amount of time, so that 2) you have to be able to unmold it onto a serving dish. This is to avoid the possibility of someone puréeing a bunch of vegetables, putting the mixture in a jar, and calling it “vegetable pâté”: that is not a pâté, that is a spread.

Tricolor Vegetable Pâté
Yields one 25 by 12,5 cm (10 by 5 inch) terrine or loaf pan
Line your pan with plastic wrap, overlapping sides.
To make the White Bean Layer  use:
2 x 15-ounce / 900 ml cans cannellini (white kidney beans), rinsed, drained thoroughly
1 tbsp / 15 ml fresh lemon juice
1 tbsp / 15 ml olive oil
1 tbsp / 15 ml minced fresh oregano or 1 teaspoon dried
2 garlic cloves, pressed

Mash beans in large bowl. Add lemon juice, olive oil, oregano and garlic and blend until smooth. Season to taste with salt and pepper. Spread bean mixture evenly on bottom of prepared pan.
Next make the Red Pepper Layer:
7-ounce / 210 ml jar roasted red bell peppers, drained, chopped
3/4 cup / 180 ml crumbled feta cheese (about 4 ounces)

Combine peppers and feta in processor and blend until smooth. Spread pepper mixture evenly over bean layer in prepared dish.

Your final layer will be the Pesto Layer:
2 garlic cloves
1 cup / 240 ml fresh basil leaves
1 cup / 240 ml fresh Italian parsley leaves
1/4 cup / 60 ml toasted pine nuts
3 tbsp / 45 ml olive oil
1/2 cup / 120 ml low-fat ricotta cheese

First thing is to toast the pine nuts if you have purchased raw pine nuts.  I toasted mine in a frying pan using a teaspoon of butter. Over low heat I stirred the pine nuts until they were a nice golden color. Mince garlic in processor. Add basil, parsley and toasted pine nuts and mince. With machine running, gradually add oil through feed tube and process until smooth. Mix in ricotta. Spread pesto evenly over red pepper layer. Cover with plastic wrap.

Next step is to be patient. You need to let the pâté refrigerate for at least eight hours or overnight. 
To unmold, invert pâté onto serving platter. Peel off plastic wrap from pâté. Garnish with herb sprigs and serve with bread slices.

French Bread
5-1/2 to 6 cups all-purpose flour
2 packages active dry yeast
1-1/2 teaspoons salt
2 cups warm water (120 degrees F to 130 degrees F)
Cornmeal
1 egg white, slightly beaten
1 tablespoon water

Directions:
In a large mixing bowl stir together 2 cups of the flour, the yeast, and salt. Add the warm water to the flour mixture. Beat with an electric mixer on low to medium speed for 30 seconds, scraping bowl constantly. Beat on high speed for 3 minutes. Using a wooden spoon, stir in as much of the remaining flour as you can.

Turn dough out onto a lightly floured surface. Knead in enough remaining flour to make a stiff dough that is smooth and elastic (8 to 10 minutes total). Shape dough into a ball. Place in a lightly greased bowl, turning once to grease surface. Cover; let rise in a warm place until double in size (about 1 hour).

Punch dough down. Turn dough out onto a lightly floured surface. Divide dough in half. Cover; let rest for 10 minutes. Meanwhile, lightly grease a baking sheet. Sprinkle with cornmeal.

Roll each portion of the dough into a 15x10-inch rectangle. Roll up, starting from a long side; seal well. Pinch ends and pull slightly to taper. Place seam side down on prepared baking sheet. In a small bowl stir together egg white and water. Brush some of the egg white mixture over loaves. Let rise until nearly double in size (35 to 45 minutes).

Preheat oven to 375 degrees F. Using a sharp knife, make 3 or 4 diagonal cuts about 1/4 inch deep across the top of each loaf. Bake for 20 minutes. Brush again with some of the egg white mixture. Continue baking for 15 to 20 minutes more or until bread sounds hollow when lightly tapped. Immediately remove bread from baking sheet. Cool on wire racks. Makes 2 loaves (28 slices).

Baguettes: Prepare as above, except divide dough into 4 portions. Shape into balls. Cover; let rest 10 minutes. Meanwhile, lightly grease 2 baking sheets or 4 baguette pans; sprinkle with cornmeal. Roll each portion of the dough into a 14x5-inch to 16x5-inch rectangle. Roll up, starting from a long side; seal well. Pinch ends and pull slightly to taper. Place seam side down on prepared baking sheets or baguette pans. Continue as directed, except reduce the second baking time to 8 to 10 minutes. Makes 4 baguettes (56 slices).