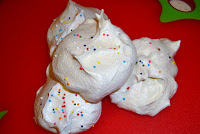
We were supposed to be having a birthday dinner for my lovely mother-in-law. Unfortunately, a stomach virus has hit me and the dinner was canceled. Dear hubby was excited about the opportunity for a made from scratch angel food cake, so he went ahead and made one and took pictures so I could blog it. Thanks hubby! He is made one that he adapted from a recipe Alton Brown has on the the food network web site.
Let's get started!
Alton Brown's Angel Food Cake
Adapted by Neil Thiele
1 3/4 cups sugar
1/4 teaspoon salt
1 cup cake flour, sifted
12 egg whites (the closer to room temperature the better)
1/3 cup warm water
1 teaspoon vanilla extracts or extract of your choice
1 1/2 teaspoons cream of tartar
Directions:
Wash all your utensils, bowl and cake pan to make sure they are free from any oils. Be sure to use a stainless steel or glass bowl and not any plastic bowls. Separate your eggs and let them come to room temperature (about an hour).
Preheat oven to 350 degrees F. Oven rack placement is important; Alton Brown's recipe doesn't say anything about it. However, an Internet search confirmed my original belief that removing one rack and baking on the lowest oven rack gives better results for Angel food cakes.
In a food processor spin sugar about 2 minutes until it is superfine. Sift half of the sugar with the salt the cake flour and set aside. Sift the remaining sugar but keep separate from the flour sugar mixture and set aside.
Preheat oven to 350 degrees F. Oven rack placement is important, Alton Brown's recipe doesn't say anything about it. However, an Internet search confirmed my original belief that removing one rack and baking on the lowest oven rack gives better results for Angel food cakes.
In a food processor spin sugar about 2 minutes until it is superfine. Sift half of the sugar with the salt the cake flour and set aside. Sift the remaining sugar but keep separate from the flour sugar mixture and set aside..
 In a large bowl, use a mixer of your choices (I like using my hand mixer when making anything that requires stiff peaks but hubby used the Kitchen aid) and mix on low to thoroughly combine egg whites, water, vanilla extract, and cream of tartar. After 2 minutes, slowly add the sifted reserved sifted sugar, beating continuously at medium speed.
 Carefully spoon your mixture into an ungreased tube pan. Cut through the batter with a knife to remove air pockets. Bake for 35 minutes before checking for doneness with a wooden skewer. (When inserted halfway between the inner and outer wall, the skewer should come out dry). The instructions said to "Cool upside down on cooling rack for at least an hour before removing from pan", however, my mother taught me to invert the pan over the top of a narrow bottle and so I choose to continue with that method.
Garnish with fruit, whipped cream, caramel, chocolate or whatever catches your fancy... we chose caramel and whipped cream with sprinkles (of course! have to have my sprinkles!) Grab a fork and
Enjoy!


