Tuesday, January 31, 2012

Lemon Crinkles


Nothing beats the winter blahs than lemon. I don't know why this is exactly only that lemon just reminds me of sunny, happy times.  I found Laurenslatest blog through Pinterest.  I strongly encourage you to visit her blog as its just amazing.  I take absolutely no credit for this recipe... but they are sure tasty!  Stop by her blog and tell her how much you enjoyed them!
Lemon Crinkle Cookiesyield: 2-3 dozen
from Lauren's latest
Ingredients:
½ cups Butter, Softened
1 cup Granulated Sugar
½ teaspoons Vanilla Extract
1 whole Egg
1 teaspoon fresh Lemon Zest (I used the zest of one small lemon)
1 Tablespoon Fresh Lemon Juice ( I used the small lemon and it was about 1 1/2 tablespoons)
¼ teaspoons Salt
¼ teaspoons Baking Powder
⅛ teaspoons Baking Soda
1-½ cup All-purpose Flour
1/2 cups Powdered Sugar  (for rolling dough into, not for the cookie dough itself!)
Directions:
Preheat oven to 350 degrees. Lightly grease baking sheets with non stick cooking spray or use your Silpat.  I found that they worked well even using parchment paper and eliminated the greasing step all together.
Cream butter and sugar together until light and fluffy, this will take about three minutes if your butter is soft enough.  Add in vanilla, egg, lemon zest and juice. In a separate bowl, combine allthe dry ingredients (except the powdered sugar) and whisk together. Add to creamed mixture until just combined.  I used my tablespoon cookie scoop and rolled the balls of dough into the powdered sugar.... the recipe said 1/2 cup but I didn't use that much.  I would start with 1/4 cup and add more if needed.  
Bake the cookies for 9-11 minutes or till lightly browned on bottoms.  Let cool before removing from sheet unto cooling racks.

Friday, January 27, 2012

Daring Bakers Challenge: Scones AKA Buttermilk Biscuits

Blog-checking lines: Audax Artifex was our January 2012 Daring Bakers’ host. Aud worked tirelessly to master light and fluffy scones (a/k/a biscuits) to help us create delicious and perfect batches in our own kitchens!

I was trying to think of a way to explain this challenge but my friend, Audax, gives a very clear explanation. So I quote, "For our North American members I wish to clarify what this challenge is all about and try to avoid any confusions. Scones in North American are nearly always triangular in shape have a slightly crisp crust usually covered in sugar and have a soft interior crumb and sometimes are laced with dried fruit (these baked goods in Australia and England are called “rock cakes” since they are usually made to look like “rocky” cakes not wedges), meanwhile biscuits in North American are a round shaped buttery slightly flaky baked good usually eaten with meals (these items in Australia and England are called “scones” and are eaten with butter and jam usually with cups of tea or coffee as a sweet snack). So this challenge (using the North American name) is to make biscuits. Or using the Australian or English name this challenge is to make scones.

To further clarify for our North American bakers this month's challenge is to make biscuits (also called baking powder biscuits) if you choose to make your biscuits using buttermilk as the liquid you are making what are known as “Southern” Biscuits which are one of the most famous examples of home cooking in the Southern States of America (that is they are a baking powder biscuit made with buttermilk). In Australia and England “Southern” Biscuits would be called buttermilk scones. So restating the above, the challenge is to make scones (using the Australian/English name) or to make biscuits (using the North American name). Incidentally if you use cream as your liquid in the challenge recipe the final baked good would be called a cream biscuit in North America or a cream scone in Australia and England." unquote.

Do you see now why I leave it to the professionals! I love it when there is such a great difference in the way we Americans speak as compared to other countries! Even in our own United States there is confusion in words. To this day my daughter still can't understand why a simple sandwich is called a Grinder in Boston. Took her forever and a day to order a sandwich there!

Basic Scones (a.k.a. Basic Biscuits)
Servings: about eight 2-inch (5 cm) scones or five 3-inch (7½ cm) scones
Recipe can be doubled

Ingredients:
1 cup (240 ml) (140 gm/5 oz) plain (all-purpose) flour
2 teaspoons (10 ml) (10 gm) (⅓ oz) fresh baking powder
¼ teaspoon (1¼ ml) (1½ gm) salt
2 tablespoons (30 gm/1 oz) frozen grated butter (or a combination of lard and butter)
approximately ½ cup (120 ml) cold milk
optional 1 tablespoon milk, for glazing the tops of the scones

Directions:
1. Preheat oven to very hot 475°F/240°C/gas mark 9.
2. Triple sift the dry ingredients into a large bowl. (If your room temperature is very hot refrigerate the sifted ingredients until cold.)
3. Rub the frozen grated butter (or combination of fats) into the dry ingredients until it resembles very coarse bread crumbs with some pea-sized pieces if you want flaky scones or until it resembles coarse beach sand if you want tender scones.
4. Add nearly all of the liquid at once into the rubbed-in flour/fat mixture and mix until it just forms a sticky dough (add the remaining liquid if needed). The wetter the dough the lighter the scones (biscuits) will be!
5. Turn the dough out onto a lightly floured board, lightly flour the top of the dough. To achieve an even homogeneous crumb to your scones knead very gently about 4 or 5 times (do not press too firmly) the dough until it is smooth. To achieve a layered effect in your scones knead very gently once (do not press too firmly) then fold and turn the kneaded dough about 3 or 4 times until the dough has formed a smooth texture. (Use a floured plastic scraper to help you knead and/or fold and turn the dough if you wish.)
6. Pat or roll out the dough into a 6 inch by 4 inch rectangle by about ¾ inch thick (15¼ cm by 10 cm by 2 cm thick). Using a well-floured 2-inch (5 cm) scone cutter (biscuit cutter), stamp out without twisting six 2-inch (5 cm) rounds, gently reform the scraps into another ¾ inch (2 cm) layer and cut two more scones (these two scones will not raise as well as the others since the extra handling will slightly toughen the dough). Or use a well-floured sharp knife to form squares or wedges as you desire.
7. Place the rounds just touching on a baking dish if you wish to have soft-sided scones or place the rounds spaced widely apart on the baking dish if you wish to have crisp-sided scones. Glaze the tops with milk if you want a golden colour on your scones or lightly flour if you want a more traditional look to your scones.
8. Bake in the preheated very hot oven for about 10 minutes (check at 8 minutes since home ovens at these high temperatures are very unreliable) until the scones are well risen and are lightly coloured on the tops. The scones are ready when the sides are set.
9. Immediately place onto cooling rack to stop the cooking process, serve while still warm.

Wednesday, January 18, 2012

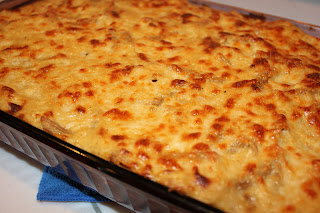
Smoked Gouda and Swiss Rigatoni and Cheese with bacon

Although my kids had always preferred the box mac and cheese, I was never overly fond of it.  Being on a budget, of course, meant that we ate a lot of it while the kids were growing up. I was ever so thankful when I was able to start making homemade macaroni and cheese.  Hubby likes it to be super creamy and would rather it not be baked.  No problem! I wanted to try making a recipe using smoked Gouda (don't know why really, it just sounded like something fun to say!) and I  came a cross this recipe here at Cooker Girl's blog.
I switched it up just a tiny bit using ingredients I had on hand.  The end result was this creamy, smokey, rich mac and cheese.  It was the perfect meal for such a bitter cold day.
Print Friendly and PDF
Smoked Gouda and Bacon Rigatoni & Cheese 
1 pound rigatoni
1 Tbsp extra-virgin olive oil 
2 Tbsp unsalted butter 
1 shallot, finely chopped 
2 garlic cloves, minced 
1 1/2 Tbsp all-purpose flour 
1/4 tsp cayenne pepper 
1/2 tsp smoked paprika 
1 1/2 cup whole milk 
1/2 cup chicken broth
4 oz shredded smoked Gouda 
4 oz shredded swiss
1 1/2 tsp Dijon mustard 
Freshly ground black pepper 
4-6 slices crispy cooked bacon, crumbled 

Bring a large pot of water to a boil. While the water is heating up, cook, drain and crumble the bacon. Once the water is boiling, add salt to season the cooking water, then add the pasta. Cook for 8 minutes or until pasta is cooked al dente. Drain well and return to the pot. 

While the pasta cooks, heat a medium sauce pot over medium-low heat. Add the olive oil and heat with the butter until it melts. Add the shallot and garlic; cook for 3-5 minutes to sweat them out... watch so that the garlic does not burn! Raise the heat a bit, then whisk in the flour, cayenne, and paprika. Whisk together until the roux bubbles up, then cook for 1 minute more. Whisk in the milk and stock and raise the heat a bit higher to bring the sauce to a quick boil. Once it bubbles, drop the heat back to a simmer and cook until the sauce thickens, 3 to 5 minutes. 

Add the cheeses to the thickened sauce and stir to melt it, a minute or so. Stir in the mustard and bacon and season the sauce with salt and pepper. Pour over the cooked pasta and toss to combine. Adjust the seasonings to your taste and serve immediately.

Saturday, January 14, 2012

Daring Cooks Challenge: Green Chile Chicken Tamales


Blog-checking lines: Maranda of Jolts & Jollies was our January 2012 Daring Cooks hostess with the mostess! Maranda challenged us to make traditional Mexican Tamales as our first challenge of the year!


Green Chile Chicken Tamales:
Servings: About 24 tamales

Ingredients
1 – 8 ounce (225 gram) package dried corn husks (If you cannot find corn husks, you can use parchment paper or plastic wrap.)

For filling:
1 pound (455 gram) tomatillos (can sub mild green chilies – canned or fresh)
4 – 3 inch (7½ cm) serrano chiles, stemmed and chopped (can sub jalapeno)
4 large garlic cloves, chopped
1 ½ tablespoons (22½ ml) Extra Virgin Olive Oil
2 cups (480 ml) low sodium chicken broth
4 cups (960 ml) (400 gm/14 oz) cooked and shredded chicken
2/3 cup (160 ml) (30 gm/1 oz) roughly chopped fresh cilantro (also known as coriander)

For the masa dough:
1 1/3 cups (320 ml) (265 gm/9⅓ oz) lard or vegetable shortening
1 ½ teaspoons (7½ ml) (10 gm/1/3 oz) salt (omit if already in masa mixture)
1 ½ teaspoons (7½ ml) (8 gm/¼ oz) baking powder (omit if already in masa mixture)
4 cups (960 ml) (480 gm/17 oz) masa harina (corn tortilla mix), I used instant masa mix
1 ½-2 cups (360 ml – 480 ml) low sodium chicken broth

Directions:

1. Place the dried corn husks in a large pot and cover with water.
2. Place a heavy plate or a smaller pot full of water on top of husks to keep them in the water. Let soak for 3 hours or up to 1 day, flipping occasionally until husks are softened.
3. Once husks are softened, boil chicken about 20 minutes or until fully cooked.
4. Immediately place hot chicken into the bowl of an electric mixer with the paddle attachment. Turn mixer on high to shred chicken (this takes about 3-5 seconds).
5.  Place the jalapenos and chilies a food processor;  Add the garlic and process until smooth.
6. Heat the olive oil in a medium saucepan over medium high heat.
7. Add the chile puree and boil, stirring continuously, for 5 minutes (it should turn thick like a paste).
8.Add in the chicken broth, stir to mix well. Reduce heat to medium low and allow to simmer, stirring occasionally until mixture coats the back of a spoon and is reduced to about a cup (240 ml).
9.  Stir in the chicken and cilantro. Salt to taste

10. Prepare the dough. In the bowl of an electric mixer, on medium high heat, cream together the lard or vegetable shortening, baking powder and salt.
11. Mix in the masa harina, one cup (240 ml) at a time.
12..Reduce the mixer speed to low, gradually add in 1 ½ cups (360 ml) of the chicken broth.
13. If the mixture seems too thick (you can taste it for moistness) add up to ½ cup (120 ml) more of the broth 2 tablespoons (30 ml) at a time. (The dough should be a cookie dough like texture).
14. Take 3 large corn husks and tear them into ¼ inch (6 mm) strips. (I would suggest you put these back in the water until use because they dry out and start breaking when you try to work with them.

15.Take a large pot with a steamer attachment. Pour about 2 inches (5 cm) of water into the bottom of the pot, or enough to touch the bottom of the steamer. Line the bottom of the steamer with corn husks.
16. Unfold 2 corn husks onto a work surface. Take ¼ cup (60 ml) of dough and, starting near the top of the husk, press it out into a 4 inch (10 cm) square, leaving 2-3 inches (5 -7½ cm) at the bottom of the husk. Place a heaping tablespoon (15 ml) of the filling in a line down the center of the dough square.
17. Fold the dough into the corn husk. And wrap the husk around the dough.Fold up the skinny bottom part of the husk and secure it with one of the corn husk ties.

18.Stand them up in the steamer. If there aren’t enough tamales to tightly pack the steamer, place crumpled aluminum foil in the excess space.
19. Steam the tamales for about 40 minutes or until the dough deepens in color and easily pulls away from the husk.


Thursday, January 12, 2012

Easy Whole Wheat Sesame Bread


 Bread happens to be my Kryptonite.  Its high up on my list... right up there with chocolate.  Since I like bread, I try to do it healthy-ish... makes it a tiny bit guilt free.  I have a favorite No knead recipe for white bread  so was thrilled when I came across this recipe for a No Knead Wheat and Sesame Bread.  Personally, I didn't think the sesame added much too it... perhaps toasted sesame seeds would add more depth.  I can see adding flax seed or wheat germ to this bread as well.
No-Knead Wheat and Sesame Yeast Bread
from the book 100% Pleasure

2 packages dry yeast
2 teaspoons salt
3 cups all-purpose white flour, divided
1 1/3 cups water
1 cup plain nonfat yogurt (I used Greek Yogurt)
3 tablespoons canola oil
3 tablespoons mild honey
2 1/3 cups whole wheat flour
4 tablespoons sesame seeds, divided

Directions
     In a large mixer bowl, combine the yeast, salt and 2 and  3/4 cups of the white flour; Mix together.
In a medium saucepan, stir together the water, yogurt, oil and honey.  Over medium heat, warm the mixture to 125 degrees F.  With the mixer on low speed, beat the yogurt mixture into the flour until blended.  Scrape down the sides of the bowl.  Raise the speed to high and beat for 7 minutes.]
Using a large wooden spoon, stir in the whole wheat flour, 2 tablespoons of the sesame seeds and the remaining 1/4 cup white flour until evenly incorporated.
Stir or knead the dough in the bowl until the flour is smoothly incorporated; if necessary to keep the dough from being sticky, add a bit more whole wheat flour.  Transfer the dough to a very large, lightly oiled bowl.  Lightly coat the top of the dough with oil.
Tightly cover the bowl with plastic wrap and set aside in a warm place for 50 minutes, or until the dough doubles in bulk.
Coat two 1 1/2 quart round casseroles or souffle dishes with non stick spray (I used one round dish and one loaf pan).  
Punch down the dough.  Divide in half and transfer to the prepared dishes.  Lightly oil your hands, then press and smooth the dough evenly into the dishes.  Sprinkle each portion with 1 tablespoon of the remaining sesame seeds; pat lightly to embed them just slightly.
Loosely cover with plastic wrap and set aside in a warm place for 20 to 30 minutes, or until the dough rises almost to the point of touching the plastic.  Carefully remove the plastic, being careful not to deflate the dough.  Let rise a little longer until the dough is about 1" above the pan tops.
Preheat oven to 375 degrees.  Transfer pans to the center oven rack.  Bake for 28 to 35 minutes, or until the tops are nicely browned and the loaf bottoms are firm and sound hollow when the loaves are removed from the pans and tapped.
Transfer the loaves to wire racks and let stand until coooled.  Cut into wedges or thick slices.
Yields 2 loaves

Tuesday, January 10, 2012

Cake Mix Cinnamon Rolls


 This month's Have the Cake challenge was to make cinnamon rolls.  We frequently eat these at our house so my challenge was to find a different recipe.  I came across this recipe on a site called Yummly.com.  I made a few changes such as using brown sugar instead of granulated sugar and drizzling with Karo syrup.  I thought I had a box of French Vanilla Cake mix and that would have taken this recipe through the roof!  The boys all gave it a thumbs up so I guess its a keeper!

Cake Mix Cinnamon Rolls
5 cups all-purpose flour
18 1/4 ozs cake mix (yellow)
1/2 oz yeast
2 1/2 cups warm water (120 to 130 degrees f/50 degrees c)
1/4 cup melted butter
1/2 cup brown sugar
2 tsp ground cinnamon 
3 tablespoons Karo Syrup (optional)

 In a mixing bowl, combine 4 cups flour, dry cake mix, yeast and warm water until smooth. Add enough remaining flour to form a soft dough. Turn onto a lightly floured surface; knead until smooth and elastic, about 5 minutes. Place in a greased bowl, turning once to grease top. Cover and let rise until doubled, about 45 minutes.


Punch dough down. Turn onto a lightly floured surface; divide in half. 


Roll each portion into a 14-in. x 10-in. rectangle. Brush with butter; sprinkle with sugar and cinnamon... I also like to drizzle 3 tablespoons of Karo Syrup over it.


 Roll up jelly-roll style, starting with a long side. Cut each roll into 12 slices; place cut side down in two greased 13-in. x 9-in. x 2-in. baking pans. 


Cover and let rise until almost doubled, about 20 minutes.


Bake at 400 degrees F for 10-15 minutes or until golden brown. Cool for 20 minutes.

Yields 24


Monday, January 9, 2012

Pastitsio - pasta with warm winter spices!


For me, a winter comfort food would either be a soup or a casserole.  Not only are they generally big on flavor, but they are usually easy on the wallet.  I'm not talking about the Campbell soup casseroles either... you know, the type where you just open up a couple cans and throw in some rice or noodles.  While those will do in a pinch, they are not what I look for when I think comfort.  No, I'm talking about deep, full flavors.  This recipe for Pastitsio certainly fit the bill.  You have layers of tomato sauce that has just a hint of cinnamon and another layer that is more of a white sauce with a touch of nutmeg.  Incredibly easy and full of flavor, this is a casserole that makes you forget all about all the others!

Pastitsio
2 lean ground beef
6 garlic cloves, minced and divided
4 teaspoons ground cinnamon
2 teaspoons ground oregano
1/2 teaspoon red pepper flakes
salt and ground black pepper, to taste
1 (28-ounce) can crushed tomatoes
1 (8-ounce) can tomato sauce
1/4 to 1/2 cup red wine (or water if you prefer)
1 pound penne pasta
1 (12-ounce) can evaporated milk (I used skim)
1 1/2 cups vegetable or beef broth (I used beef)
3 tablespoons butter
1/3 cup all-purpose flour
1 1/2 cups grated Parmesan cheese
1/4 teaspoon ground nutmeg
2 large eggs

Directions:
Preheat oven to 425 degrees F.
Heat a pan over medium-high heat; add ground meat.  Cook until is browned.
Add Four of the minced garlic cloves, the cinnamon, oregano, pepper flakes and a
 generous sprinkling of salt and pepper.  Cook until fragrant and spices are 
well incorporated, about 2 minutes.  Add tomatoes, sauce and enough wine, or water,
 to make a sauce that is suitable to your taste but still not too thin. You will be
 layering the sauce as you would for a lasagna so keep in mind that thickness. 
Bring to a boil, reduce heat to medium-low and continue to simmer, partially covered,
 until sauce is thick and richly flavored, about 20 minutes.
Cook pasta according to package directions; drain and set aside.

Microwave milk and broth in a quart measuring cup, cover lightly with plastic wrap
 and cook until steamy and hot.  How long this takes will depend on your microwave. 
 Mine only took 4 minutes.
In a medium saucepan; heat butter and remaining 2 cloves minced garlic until garlic
 is slightly golden.  Whisk in flour until well blended.  Pour in hot milk mixture while 
whisking vigorously until sauce is smooth and starts to thicken.  Stir in 1/2 cup of
 the Parmesan cheese and nutmeg; season to taste with salt and pepper. In a separate
 bowl, whisk together the two eggs; add a ladle full of the broth mixture to the eggs 
and whisk to combine.  Add the egg mixture to the remaining broth in the 
sauce pan and whisk to fully incorporate.
Add a ladle full of tomato sauce mixture to bottom of a 9 x 13-inch baking pan.  
Spread half of the pasta over the the pan and top with remaining tomato mixture; 
sprinkle with 1/2 cup Parmesan cheese.
Top with remaining pasta and pour over the top the milk/broth mixture; 
cover top with remaining Parmesan cheese.
Cover pan with foil; bake 30 minutes.  Remove foil and turn oven to broil.  
Watching carefully, broil until tops is spotty brown, 3-5 minutes.  
Remove from oven and let stand to set 10-15 minutes.  Cut into portions and serve.
Yields: 8 serving


Sunday, January 8, 2012

Scotch Eggs

 Deep Fried sausage rolled eggs.... talk about cholesterol on a plate!  But oh, it was indeed quite yummy! I've seen Scotch Eggs mentioned in several food magazines of late and had to admit my family and I were quite intrigued. I finally caved in when another food magazine came in and once again the Scotch Eggs were shown.  I sat back and enjoyed a glass of wine while my hubby and daughter put this dish together.  Its called living the good life :-)

Scotch Eggs
makes 4
adapted from Bon Appetit magazine

6 large egs
1 cup all-purpose flour
1 cup finely crushed corn flakes
1/2  package Jimmy Dean sausage
Vegetable oil for frying
Kosher salt, freshly ground pepper
mustard, for serving

Directions:

 Place4 eggs in a small saucepan; add cold water to cover.  Bring to a boil; remove from heat, cover and let stand for 3 minutes.  Carefully drain, then fill pan with ice water to cool eggs.  Gently crack shells and carefully peel under cold running water.  Place eggs in a bowl of cold water; cover and chill until cold
Place flour in a wide shallow bowl and crushed corn flakes in another wide shallow bowl.  Divide sausage into 4 equal portions.  Pat 1 portion of sausage into a thin patty over the length of your palm.  Lay 1 soft-boiled egg on top of sausage and wrap sausage around egg, sealing to completely enclose.  Repeat with remaining sausage and eggs.
 Whisk remaining 2 eggs in a medium bowl to blend.  Working gently with 1 sausage-wrapped egg at a time, dip eggs into flour, shaking off excess, then coat in egg wash.  Roll in corn flakes to coat.
This can be made 1 day ahead.  Keep refrigerated and uncovered.


 Attach a deep-fry thermometer to side of a large heavy pot.  Pour in oil to a depth of 2" and heat over medium heat to 375 degrees F.  Fry eggs turning occasionally and maintaining oil temperature of 350 degrees F. until sausage is cooked through and breading is golden brown and crisp, about 5-6 minutes.

Use a slotted spoon to transfer eggs to paper towels to drain.  Season lightly with salt and pepper.  Serve warm with mustard.

Saturday, January 7, 2012

Crazy Cooking Challenge: Shaker Chicken Noodle Soup

This month's Moms Crazy Cooking Challenge (the brainchild of  Tina Messick-Hudgens) was to find a recipe for chicken noodle soup.  The challenge isn't necessarily making the recipe, for me it is in finding a recipe.  You see, we have to use a recipe from someone's blog that isn't a professional blog (ie Pioneer Woman, Paula Deen, etc.) While there are a gazillion recipes for chicken soup out in the world wide web, finding one that wasn't originally from on of those professional sites.  Deep into my search I came across this wonderful blog called  Kitchen Trial and Error and found the perfect soup recipe.  This is a recipe that was handed down to her from her mother. It was on a photocopied piece of paper that did not include who it originally came from.
The only change I made was to make my own noodles.  I also leave the noodles cooked, but stored on the side.  If you leave the noodles in the soup they can become mushy and absorb too much liquid.  I put some in a bowl and then ladle on the soup.
Shaker Chicken and Noodle Soup
serves 8
13 cups chicken stock, divided
1/4 cup dry vermouth
1/4 cup unsalted butter
1 cup heavy cream
1 cup diced celery
1 cup diced carrot
12 ounces dry egg noodles (I made my own noodles for which the recipe follows)
2 cups cooked diced chicken
1 1/2 cups water
1/2 cup all purpose flour

in a small saucepan, combine 1 cup stock, vermouth, and butter. bring to a simmer and cook until reduced to about a quarter cup, about 20 minutes. the mixture will darken and be thick and syrupy. remove from heat and stir in the heavy cream. set aside.

see how much it reduces!!


coat the bottom of a stock pot with olive oil and set over medium heat. saute the celery and carrot until softened, about five minutes. add the remaining 12 cups of chicken stock and bring to a boil.
.Stir in the chicken and cook until heated through and bring back to a boil.
whisk together the 1 1/2 cups water and 1/2 flour until no lumps remain. Add a ladle of hot broth to the mixture and whisk to combine.while continuously stirring the soup, add the flour and water mixture. cook, stirring continuously for about 2 minutes, or until slightly thickened. do not let the soup boil.
Stir in the reserved reduced stock, vermouth, butter, and cream mixture. taste and season with salt and pepper. Serve immediately and do not let the soup boil.stir in the reserved reduced stock, vermouth, butter, and cream mixture. taste and season with salt and pepper. serve immediately and do not let the soup boil. leftovers reheat perfectly.

Easy Peasy Homemade Pasta
1 egg
3 egg yolks
3 tablespoons cold water
about 1 tablespoon salt
2 cups flour

Beat the egg and egg yolks until light. Add water and salt; beat in.
Work the flour into the mixture, with your hands, to make a stiff dough.  Cover with plastic wrap and let rest at least 10 minutes.
Cut into three equal parts. Lightly dust a board with flour and roll out one part of the dough as thin as you desire.... I like mine not too thin, but it can't be too thick either.  Using a sharp knife, cut into 1/4-inch wide strips.  strips

Spread them out on a cookie sheet and let dry.  You aren't looking for a totally dry noodle, but one that has lost most of its surface dampness.  I generally let mine dry at least fifteen minutes.
Bring a large pot of salted water to a rolling boil.  Boil noodles until just tender... this can take 5-to minutes depending on the thickness.  Drain water and serve.


Photobucket

Friday, January 6, 2012

Playtime with Lyra- Sensory Box

My little grandsweetie is getting so big!  We babysit her while mommy works so I am always trying to think of something else to do rather than play princess or watch Frosty, again. As I've mentioned before, I've become a big fan of Pinterest.  As if my plate wasn't full enough, I know have a bulletin board showing me all that I've not yet done! LOL! There are some great ideas to use with kids and I thought I would share with you something we've done. One blog I've pinned a ton from is Play at Home Mom.  While Lyra has some small choking hazard items in this, she only plays with this when we are sitting at the table.  I've got some bigger items for her to find when she plays alone.
While I could have used plain colored rice, I opted to use my neon food colors and give her some color.  After the rice was colored I laid it on to a cookie sheet and dried it in the oven.
 Be prepared to sweep up after this project!  Rice can get a bit all over the place.
I'm a lot less anal about messes now that I'm a grandma!
God Bless!!