Monday, October 31, 2011

Tootsie Roll Fudge


I always hit the candy aisles after holidays.  I can get my candy as much as 75% off regular price and I then use it for decorating cakes, cookies, cupcakes, etc throughout the year.  Yes, I will admit that I do eat a teeny, tiny portion of it (I see those eyes rolling!!!!) but honestly, I do it because I want to be thrifty!.  Last year I had finally found those little Tootsie Rolls on clearance and was able to make a recipe that I had stored away from many years ago.  Tootsie Roll fudge is an easy recipe and its a great way to get the kids involved (hey, somebody has to unwrap all those candies!)
Tootsie Roll Fudge
Ingredients
2 tablespoons butter
2 tablespoons peanut butter
3-3/4 cups confectioners' sugar
2 tablespoons milk
1 teaspoon vanilla extract
Sprinkles

Directions
Line a 9-in. square pan with foil. Grease the foil with 1 teaspoon butter or spray with nonstick cooking spray; set aside. 
In a heavy saucepan, melt the Tootsie Rolls, peanut butter and remaining butter over low heat, stirring constantly.
 Gradually stir in the confectioners' sugar, milk and vanilla (mixture will be very thick). 
Spread into prepared pan. Using a sharp knife, score the surface into 1-in. squares. 
Top with sprinkles or you may choose to top with holiday M&M candies. Cool. 
Using foil, remove fudge from pan; cut into squares. Store in an airtight container. 
Yield: about 2 pounds.

Friday, October 28, 2011

Puffernutters


One of my favorite parts of The Food Network magazine is near the last page.  they don't include it every month, but often enough they will provide the reader with a recipe and asks for help in providing the recipe with a name.  I have never had one of my names chosen (and winning names win a prize) but I will persevere... who knows if I could be a winner!
We keep lots of Kix cereal in our house.  My grand sweetie calls it her "crunchy" when she asks for it. She even helped me pour in the ingredients!  I'm told that I was just about her age when I started baking with my mom so maybe she will follow in her grandma's footsteps!  (I just love being called grandma!!!!) Take my advice though, if baking with a two year old you must have much patience!  Everything has to be sampled :-) Trust me when I say that it is my son's worst OCD nightmare!  I never bake with her when I know my son will be eating the food.

Puffernutters
adapted from foodnetwork.com
Ingredients
1 cup chopped peanuts
6 tablespoons unsalted butter, at room temperature
1/2 cup peanut butter
1/4 cup honey
1/4 cup granulated sugar
1/4 cup packed light brown sugar
1 large egg
1/2 teaspoon baking soda
1/2 teaspoon baking powder
1 teaspoon ground cinnamon
1 1/2 teaspoon vanilla extract
4 cups puffed corn cereal (such as Kix)
1 cup chocolate chips (milk, dark or semisweet)

Directions
Position 2 racks in the middle of the oven; preheat to 325 degrees F. Spread the almonds on a baking sheet and bake until lightly toasted, about 5 minutes; transfer to a bowl. Wipe the baking sheet clean.
Beat the unsalted butter, almond butter, honey, granulated sugar and brown sugar in a bowl with a mixer on medium speed until smooth, about 3 minutes. Beat in the egg. Add the baking soda, baking powder, cinnamon, and vanilla and almond extracts and beat until combined, about 1 minute.
Add the cereal, chocolate chips and half of the almonds to the dough and mix with a wooden spoon.
a sticky but yummy mess!
Form tablespoonfuls of dough into 2-inch balls and arrange on 2 ungreased baking sheets, about 3 inches apart. (Do not line the baking sheets with parchment paper-the cookies may stick to the paper.) Top each with some of the remaining almondsBake until the cookies spread out and turn brown, about 12 minutes, rotating the baking sheets halfway through. Let the cookies cool 5 minutes on the baking sheets, then carefully remove to a rack to cool completely. (If you have difficulty removing the cookies from the baking sheets, return them to the oven for 1 to 2 minutes to soften.) The cookies will crisp as they cool.


.

Thursday, October 27, 2011

daring bakers: Povitica


Fall and winter are just perfect for making bread so I was thrilled when our October Daring Baker Challenge was to make Povitica. No, I have never had Povitica before but it looked like a bit of a cinnamon roll so I just knew it couldn't be bad! I usually hesitate at anything that takes so many step to make but I soon realized it was so that Jenni could give us a great visual of how to make the bread.
The original recipe made four loaves of bread! Thankfully it was also broken down for making options for half batch and a quarter batch.  I opted to make the quarter batch (or one loaf)

Blog-checking lines: The Daring Baker’s October 2011 challenge was Povitica, hosted by Jenni of The Gingered Whisk. Povitica is a traditional Eastern European Dessert Bread that is as lovely to look at as it is to eat!
Quarter Batch Dough Ingredients (Makes one loaf 1.25 lbs/565 grams)
To activate the Yeast:
½ Teaspoon (2½ ml/2¼ gm) Sugar
¼ Teaspoon (1¼ ml/¾ gm) All-Purpose (Plain) Flour
2 Tablespoons (30 ml) Warm Water
1½ Teaspoons (7½ ml/3½ gm/0.125 oz/½ sachet) Dry Yeast

Dough:
½ Cup (120 ml) Whole Milk
3 Tablespoons (45 ml/43 gm/1½ oz) Sugar
¾ Teaspoon (3¾ ml/9 gm/0.17 oz) Table Salt
1 Large Egg
1 tablespoon (30 ml/30 gm/¼ stick/1 oz) Unsalted Butter, melted
2 cups (480 ml/280 gm/10 oz/0.62 lb) All-Purpose Flour, measure first then sift, divided

Topping:
2 Tablespoons (30 ml) Cold STRONG Coffee
1½ Teaspoons (7½ ml/7 gm/¼ oz) Granulated Sugar
Melted Butter

Quarter Batch Filling Ingredients (enough filling for one loaf)
1¾ Cups (420 ml/280 gm/10 oz) Ground English Walnuts
¼ Cup (60 ml) Whole Milk
¼ Cup (60 ml/58 gm/½ stick/2 oz) Unsalted Butter
1 Egg Yolk From A Large Egg, Beaten
¼ Teaspoon (1¼ ml) Pure Vanilla Extract
½ Cup (120 ml/115 gm/4 oz) Sugar
¼ Teaspoon (1¼ ml/1 gm) Unsweetened Cocoa Powder
¼ Teaspoon (1¼ ml/¾ gm) Cinnamon

To Activate Yeast:
1. In a small bowl, stir 2 teaspoons sugar, 1 teaspoon flour, and the yeast into ½ cup warm water and cover with plastic wrap.
2. Let rest five minutes
Yeast should bubble up and foam, like this
To Make the Dough:
3. In a medium saucepan, heat the milk up to just below boiling (about 180°F/82°C), stirring constantly so that a film does not form on the top of the milk. You want it hot enough to scald you, but not boiling. Allow to cool slightly, until it is about 110°F/43°C.
4. In a large bowl, mix the scalded milk, 3 tablespoons sugar, and the salt until combined.
5. Add the beaten eggs, yeast mixture, melted butter, and 1 1/2 cupsof flour.
6. Blend thoroughly and slowly add remaining flour, mixing well until the dough starts to clean the bowl.
7. Turn dough out onto floured surface and knead, gradually adding flour a little at a time, until smooth and does not stick.
8. Place dough in lightly oiled bowls, cover loosely with a layer of plastic wrap and then a kitchen towel and let rise an hour and a half in a warm place, until doubled in size.

To Make the Filling
9. In a large bowl mix together the ground walnuts, sugar, cinnamon and cocoa.
10. Heat the milk and butter to boiling.
11. Pour the liquid over the nut/sugar mixture.
12. Add the eggs and vanilla and mix thoroughly.
13. Allow to stand at room temperature until ready to be spread on the dough.
14. If the mixture thickens, add a small amount of warm milk.

To Roll and Assemble the Dough:

15. Spread a clean sheet or cloth over your entire table so that it is covered.
16. Sprinkle with a couple of tablespoons to a handful of flour (use flour sparingly)17. Place the dough on the sheet and roll the dough out with a rolling pin, starting in the middle and working your way out, until it measures roughly 10-12 inches (25½ cm by 30½ cm) in diameter.
18. Spoon 1 to 1.5 teaspoons (5ml to 7 ½ ml/4 gm to 7 gm) of melted butter on top.
19. Using the tops of your hands, stretch dough out from the center until the dough is thin and uniformly opaque. You can also use your rolling pin, if you prefer.
20. As you work, continually pick up the dough from the table, not only to help in stretching it out, but also to make sure that it isn’t sticking.
21. When you think it the dough is thin enough, try to get it a little thinner. It should be so thin that you can see the color and perhaps the pattern of the sheet underneath.
22. Spoon filling (see below for recipe) evenly over dough until covered.
23. Lift the edge of the cloth and gently roll the dough like a jelly roll.
24. Once the dough is rolled up into a rope, gently lift it up and place it into a greased loaf pan in the shape of a “U”, with the ends meeting in the middle. You want to coil the dough around itself, as this will give the dough its characteristic look when sliced.
25. Brush the top of each loaf with a mixture of 2 tablespoons of cold STRONG coffee and 1 1/2 teaspoons of sugar. If you prefer, you can also use egg whites in place of this.
26. Cover pans lightly will plastic wrap and allow to rest for approximately 15 minutes.
27. Preheat oven to moderate 350°F/180°C/gas mark 4.
28. Remove plastic wrap from dough and place into the preheated oven and bake for approximately 15 minutes.
29. Turn down the oven temperature to slow 300°F/150°C/gas mark 2 and bake for an additional 45 minutes, or until done.
30. Remove bread from oven and brush with melted butter.
31. Check the bread at 30 minutes to ensure that the bread is not getting too brown. You may cover the loaves with a sheet of aluminum foil if you need to.
32. Remove from the oven and allow to cool on a wire rack for 20-30 minutes, still in the bread pan. Remember, the bread weighs about 2.5 and it needs to be able to hold its own weight, which is difficult when still warm and fresh out of the oven. Allowing it to cool in the pan helps the loaf to hold its shape.
33. It is recommended that the best way to cut Povitica loaves into slices is by turning the loaf upside down and slicing with a serrated knife
.

Monday, October 24, 2011

Chocolate Fudge Butterfingers Cookies


Butterfinger candy bars are absolutely wonderful!  I know that there are people out there that disagree and we are all entitled to our opinions :-)  Someday I would like to try and recreate the candy bar itself, but for right now I am not that ambitious.
Blog hopping, I came across a recipe for Butterfinger cookies and I just knew that I had to give the recipe a go.  I went to the store and bought three candy bars.... the recipe called for two but I had to make sure that they were a quality product, didn't I? I even ate the candy bar in the parking lot. I had to be sure that I was getting the best available!
Once home I set about following the recipe and was pleased with the ooey, gooey, chewy outcome.  I'll be looking for Halloween candy clearance sales to see if I can get a deal on more candy bars.... this is a keeper recipe!
I found the recipe for Chocolate Fudge Butterfingers at barbarabakes.com .  She posted this recipe as part of a twelve weeks of Christmas Cookies Blog Hop.  I spent a bit of time browsing through her blog.  She is also a daring kitchen baker so she and I have that in common.  I fully credit this to her (which she adapted from the Picky Palate) and she would be thrilled if you made it and thanked her for the recipe (here)!  I did change the recipe slightly and you can see my changes written in the italics.
Chocolate Fudge Butterfinger Cookies
slightly adapted from Picky Palate
1 3/4 cups flour1 1/4 cups cocoa powder (I used Hershey's Special dark  cocoa)
2 tsps. baking soda1/2 tsp. salt
1 cup (2 sticks) unsalted butter, softened
1 cup granulated sugar    (I reduced sugar to 3/4 cup)
3/4 cup brown sugar
2 eggs1 tsp. vanilla
2 Full size Butterfinger Bars, crushed
1 1/2 Cups semi sweet chocolate chips

Directions
Preheat oven to 350 degrees F. and line cookie sheets with parchment or silpat liners.In a medium bowl, combine the flour, cocoa, baking soda and salt. Set aside.In a large bowl, cream together the butter and sugars until light and fluffy. Add eggs one at a time. Add vanilla and mix until well combined
Stir in flour mixture until just combined. I did the dry mixture in three additions just so I wouldn't have a floury mess with my stand mixture.  Then stir in crushed Butterfinger and chocolate chips.
Using a medium cookie scoop, drop by rounded spoonfuls onto prepared cookie sheets. Bake for 9-11 minutes, should still be soft in center. Allow cookies to cool on baking sheet for 5 minutes before removing to a wire rack to cool completely.
Yields 3 dozen cookies

Sunday, October 23, 2011

Chocolate Whopper Cookies


Hi, my name is Vivian and I am a chocoholic.  Well, chocolate is just one of my addictions... I have a serious sprinkle addiction too.  But today we will focus on my chocolate- really, focus Vivian, focus (Now I want to get up and grab a handful of whoppers!).  I recently bought some Carnation Chocolate Malt powder.  I cannot for the life of me remember why I bought it.  I suppose a recipe popped up that looked good but I haven't a clue which one it might have been.  Organization has to become one of my goals.....sigh.
In any case, I had this malt powder and felt it was time to use it.  Several recipes popped up on Google that used malt powder or extract but they seemed flat. Not quite what I was looking for.  Plus, most didn't include Whoppers and it just wouldn't be any fun to not include those!  Further research led me to All Home Made Cookies which had a Chocolate Malt Cookie that used malted milk balls but not the powder.  If I didn't get those cookies made soon all my Whoppers were going to be gone.  I decided to just revamp their recipe and they turned out quite yummy!       

                    
 Chocolate Malt Cookies
adapted from AllHomemadeCookies.com
Ingredients:
3/4 c. sugar
3/4 c. butter, softened
1/2 tsp. vanilla
1 egg
1 1/4 c. Pillsbury Best® All Purpose Flour
1/4 cup Carnation Chocolate Malt Powder
2 T. unsweetened cocoa
1 tsp. baking powder
1/4 tsp. salt
2 T. sugar
42 chocolate malted milk balls

 Directions:
Cream together 3/4 c. sugar and butter, in a large mixing bowl. 
Add vanilla and egg, blending well. Add the next 5 ingredients and mix until blended well. 
Shape dough into 1-inch balls and roll around in remaining 2 T. of sugar until lightly coated.
Place cookie balls onto an ungreased cookie sheet(I prefer to use parchment paper) and bake for 7-10 minutes at 400 degrees, or until edges are set.
Remove cookies from oven and press 1 malted milk ball into the center of each cookie. 
Cool for 2-3 minutes and remove from pan.
Makes about  3 1/2 dozen cookies

Saturday, October 22, 2011

The cookie Carnival


Fudgy Cats was the selection I made for this months Cookie Carnival (found at midwest living. com).  To be honest, the fudgy brownie was just "eh".  You know, the not bad but not exceptional either type. I like the idea of cutting out cats, or in my case spiders, but I would not make this recipe again.  While not every cookie (or brownie) recipe is a success story, I have found several "keeper" recipes through the Cookie Carnival.   Tami does a fantastic job keeping the momentum going and we are always on the lookout for members.  Come check her blog out here!

Fudgy Cats
1 cup all-purpose flour
3/4 cup unsweetened cocoa powder
1/2 teaspoon ground cinnamon
1/4 teaspoon salt
2 cups granulated sugar
1 cup butter, melted
3 eggs
1 teaspoon vanilla
1/3 cup powdered sugar
2 teaspoons unsweetened cocoa powder1 teaspoon miniature semisweet chocolate pieces

Directions

1. Line a 15x10x1-inch baking pan with foil. Grease the foil; set pan aside.
2. In a small mixing bowl, stir together the flour, the 3/4 cup cocoa powder, cinnamon and salt.
3. In a large mixing bowl, combine granulated sugar and melted butter. Stir in eggs and vanilla. Add the flour mixture to butter mixture and stir until combined.
4. Spread evenly into the prepared pan. Bake in a 350 degree F oven for 25 minutes or until a toothpick inserted near center comes out clean. Cool in pan on wire rack. Cover and chill 3 to 24 hours.
5. Uncover the brownie layer. Lift from pan using foil. Cut into cat shapes using a 3-inch cookie cutter or a knife. In a small bowl stir together the powdered sugar and 2 teaspoons cocoa powder. Sprinkle over cat cutouts. Press 2 chocolate pieces into each cutout for the eyes. Makes 14, 3-inch cookies.

Friday, October 21, 2011

Chex Brittle


Fall season at the Thiele household means snacking.  OK, you got me... any season for us is snacking season.  But in the fall I tend to gravitate towards crunchy handfuls of snack foods.  A particular favorite of ours is caramel corn (find the recipe here )  Lately I have been craving salty/sweet and I was really hoping to find a snack mix that would fulfill that itch.  While this is a pretty darn good tasting recipe, it wasn't what I was looking for.  I tossed it with some popcorn salt after it came out of the oven, which made a big difference, and I added some caramel candy corn.  
Chex Brittle
adapted from chex.com
8 cups Chex Rice cereal
1 cup salted peanuts
1 (14 ounce) can sweetened condensed milk
1 teaspoon vanilla
popcorn salt, optional
candy corn, optional
Heat oven to 325 degrees F.  Spray two 15x10x1-inch pans with cooking spray.
In a large bowl, mix cereal, peanuts, condensed milk and vanilla until evenly coated.
  Spread in pans making a single layer.
Bake 12 minutes.   Remove from oven and lightly sprinkle with popcorn salt, if desired. Spread on waxed paper to cool, about fifteen minutes.  Break into pieces and add candy corn.  Store in airtight container


Monday, October 17, 2011

have the cake challenge:carbonation


I've not been inspired to bake with carbonation as other food items I have tried, using soda, have been sickeningly sweet.  However, our Have the Cake challenge for October was to bake an item using carbonation.   I had cola, root beer and mountain dew in my pantry and since plain old cola seems... well, face it - plain old cola is boring! I remember parents panicking the time my husband brought Mountain Dew to the classroom and didn't want that reaction again.  That left me with the root beer. Many of the recipes I found used cake mix and or root beer extract, neither of which I wanted to use.  Thankfully I came across this recipe at The Prepared Pantry and went about getting the cake made.  I'm a batter licker... I know, I know, food illness ect... but I just can't help myself!  It had a mild, but yummy, taste of root beer.  I suppose that the mild flavor was due to my substituting vanilla extract for the root beer flavoring.  I made a butter cream frosting and topped with some pop rocks.  My Sunday school kids are going to love this!
Note:  The cupcakes rose beautifully and then flattened out. I'm not sure what caused it.  I ended up having to cut the cupcakes out of the pan by cutting off the flattened tops.  Utter failure.  But they did frost up beautifully and they tasted really good

Root Beer Chocolate Cake Recipe
3/4 cup shortening
1 3/4 cups granulated sugar
2 large eggs
1/2 tablespoon root beer flavor (or vanilla but will not have as deep of root beer flavor to the cake)
2 2/3 cups all-purpose flour
1/4 cup Dutch-processed cocoa
1/2 teaspoon salt
1 teaspoon baking soda
1/2 cup buttermilk
1 12-ounce can root beer, not sugar-free

Preheat the oven to 350 degrees.
 Cream the shortening and sugar together. Add the eggs one at a time, beating well after each. Beat for five or six minutes so that the mixture is light and fluffy. Add the extract.
In another bowl, mix the flour, cocoa, salt, and soda together.
In three or four additions, alternately add the dry ingredients and the liquids to the creamed mixture starting and ending with the dry ingredients. Mix only until smooth.
Pour the batter into the prepared pan. Bake a 9x13 inch pan for 35 to 40 minutes, cupcakes for 15 minutes, or until the cake tests done with a toothpick. Cool completely before frosting with the frosting of your choice.
Baker’s Note: When making a cake such as this, you are mixing oil (shortening) and water (soda pop and buttermilk)—which don’t mix. The egg yolks act as an emulsifier, a bonding agent between the oil and water molecules and the flour absorbs much of the water. That is why you start with the flour addition—so that the water doesn’t overload the fat mixture before the flour is there to start absorbing water. It’s also why you add the liquids in stages between the flour additions.

Secret Recipe Club: A trip to Debbi does dinner healthy!


      Its reveal time for Group B of the Secret Recipe Club!  This has been such a satisfying challenge group to participate in.  Not only do you get to explore many different blogs but  you also get the joy of passing along some blogger love.  I mean, who doesn't like having their blog complemented? If you are looking for a way to increase your blog visitation than I suggest you check into SRC.
     Holidays are quickly approaching and I always gain a few pounds. This month my secret blog challenge was Debbi does dinner healthy.  I had a challenge just choosing something to make!! Debbi's blog is one I'm going to have to seriously follow.  I love that she has a slight obsession with sweet potatoes and I've got a handful of those recipes save to try on a future date.  And her Buffalo Chicken Shepherds Pie sounds like a massive plateful of YUM!
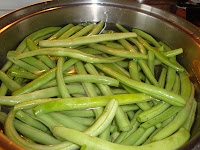
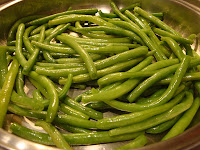
     I finally narrowed my choices down to two recipes: Butternut Squash Bake and Asian Style Fresh Green Beans. I have this turkey that needed to get used up and I felt that the squash and green beans would be an excellent accompaniment.
The Butternut squash bake is to die for!  It has just the right hint of heat and the crisp topping reheats even reheats well.  While we all loved the flavor of the Asian Style Fresh green beans, we thought that they were too firm.  I even slightly boiled them before stir frying them and  they were still firm... I'm still getting the feel of my new stove and am sure that the error is on my end and not on Debbi's.   I will make the recipe again but definitely add a longer cooking time.  

Butternut Squash Bake
adapted from Debbi Does Dinner Healthy
1 large butternut squash, about 2 pounds, peeled and cubed (I used some squash that I had roasted and stored in my freezer.)
1/2 cup mayonnaise
1 large onion, chopped
1 clove garlic, minced
1/4 teaspoon hot sauce
1 egg
15 Ritz Crackers, crushed
1/4 cup Parmesan cheese
3 tablespoons butter, divided
1 tablespoon fresh oregano,  chopped fine
salt and pepper

Heat a large pot of water to boiling, ad squash and cook until soft, about 15-20 minutes. If using frozen squash, thaw and drain liquid. 
In a small saucepan, melt 2 tablespoons butter; add in crushed crackers, cheese and oregano.  Season with salt and pepper; stir well.  Remove from heat and set aside.
Melt remaining 1 tablespoon butter in another small saucepan; cook onion until translucent and just beginning to brown; add garlic, saute for a few more minutes and remove from heat.
When the squash is cooked, drain the water and toss the squash in a bowl.  Add mayonnaise, onion, garlic, hot sauce and egg. Mash together well. 
Pour into an 8x8-inch pan or casserole dish; top with cracker cheese mixture and cover with foil.  Bake for 30 minutes at 375 degrees F.  Remove foil and bake for an additional five minutes.


Asian Style Fresh Green Beans
adapted from Debbi Does Dinner Healthy
1 pound fresh green beans, both ends snapped off and removed
2 cloves garlic, minced
1/4 teaspoon crushed red pepper flakes
1 tablespoon sesame oil
3 tablespoons soy sauce
1 1/2 teaspoon seasoned rice vinegar
1 tablespoon brown sugar
salt and pepper, to taste
sesame seeds for garnish


  Debbie's recipe didn't call for this part but I know my picky boys would have preferred this first step. Bring a large pot of water to a boil and add a big pinch of salt. Add in green beans and cook 2-3 minutes, just until slightly tender and bright green. Drain, and plunge quickly into a bath of ice water to stop the cooking. Drain the green beans and dry them
      Heat sesame oil in pan, saute green beans for about 3 minutes; add garlic and red pepper flakes.  Stir fry for about 2-3 minutes.  Add in soy sauce, rice vinegar, brown sugar, salt and pepper until beans are coated.


Friday, October 14, 2011

the daring kitchen: Moo shu pork


Its time for the Daring Cooks Challenge and one, I must confess, I was not thrilled with. Cooked cabbage and I are not friends. I don't like the smell nor do I care for the taste. Also, bamboo shoots are just plain icky. I'm totally blessed to have my mom living with us and it is times like these that I am especially thankful for her being here since she loves cooked cabbage and bamboo shoots! I halved the recipe of the Moo Shu Pork and made the recipe the traditional way. I made another batch not cooking the vegetable ingredients and leaving out the bamboo shoots. For the second batch I used the vegetables raw and just wrapped them in the pancake. Mom said the traditional way was delicious and both hubby and I loved the second method!'

Blog-checking lines: The October Daring Cooks' Challenge was hosted by Shelley of C Mom Cook and her sister Ruth of The Crafts of Mommyhood. They challenged us to bring a taste of the East into our home kitchens by making our own Moo Shu, including thin pancakes, stir fry and sauce.

Thin Pancakes:
Makes 24-30 pancakes
Preparation time: about 10 minutes plus 30 minutes' standing time
Cooking time: 45-50 minutes
Ingredients
4 cups (960 ml) (560 gm) (19¾ oz) all purpose flour
About 1½ cup (300ml) (10 fl oz) boiling water
1 teaspoon (5 ml) vegetable oil
Dry flour for dusting

Directions:
Sift the flour into a mixing bowl. Gently pour in the water, stirring as you pour, then stir in the oil. Knead the mixture into a soft but firm dough. If your dough is dry, add more water, one tablespoon at a time, to reach the right consistency. Cover with a damp towel and let stand for about 30 minutes.
Lightly dust the surface of a worktop with dry flour. Knead the dough for 6-8 minutes or until smooth, then divide into 3 equal portions. Roll out each portion into a long sausage and cut each sausage into 8-10 pieces. Keep the dough that you are not actively working with covered with a lightly damp dish cloth to keep it from drying out.
I used my tortilla press for the next step... I pressed, rotated, pressed again, rotated and pressed for a third time.

Place an un-greased frying pan over high heat. Once the pan is hot, lower the heat to low and place the pancakes, one at a time, in the pan. Remove when little light-brown spots appear on the underside. Cover with a damp cloth until ready to serve.


Moo Shu Pork:
Serves 4
Preparation time: 25-30 minutes
Cooking time: 6-8 minutes
Ingredients
2/3 cup (1 oz) (30 gm) Dried black fungus   I used canned mushrooms since I had that on hand
½ lb (450 gm) pork loin or butt
¾ cup (3½ oz) (100 gm) bamboo shoots, thinly cut
3 cups (6 oz) (170 gm) Chinese cabbage (Napa cabbage), thinly cut, I used regular cabbage
3 large eggs
1 teaspoon (5 ml) (6 gm) salt
4 tablespoons (60 ml) vegetable oil
2 scallions
1 tablespoon (15 ml) light soy sauce
2 teaspoons (10 ml) rice wine
A few drops sesame oil
12 thin pancakes to serve

Directions:
Soak the fungus in warm water for 10-15 minutes, rinse and drain. Discard any hard stalks, then thinly shred.
Thinly cut the pork, bamboo shoots and Chinese cabbage into matchstick-sized shreds.
Lightly beat the eggs with a pinch of salt.
Heat about 1 tablespoon (15 ml) oil in a preheated wok and scramble the eggs until set, but not too hard. Remove and keep to one side.
Heat the remaining oil. Stir-fry the shredded pork for about 1 minute or until the color changes. Add the fungus, bamboo shoots, Chinese cabbage and scallions. Stir-fry for about 2-3 minutes, then add the remaining salt, soy sauce and wine. Blend well and continue stirring for another 2 minutes. Add the scrambled eggs, stirring to break them into small bits. Add the sesame oil and blend well.
To serve: place about 2 tablespoons (30 ml) of hot Moo Shu in the center of a warm pancake, rolling it into a parcel with the bottom end turned up to prevent the contents from falling out. Eat with your fingers.
Hoisin Sauce:
(source: http://recipes.epicurean.com/recipe/13249/hoisin-sauce.html)
Ingredients
4 tablespoons (60 ml) soy sauce
2 tablespoons (30 ml) peanut butter OR black bean paste
1 tablespoon (15 ml) honey OR molasses
2 teaspoons (10 ml) white vinegar
1/8 teaspoon (⅔ ml) garlic powder
2 teaspoons (10 ml) sesame seed oil
20 drops (¼ teaspoon) Chinese style hot sauce (optional, depending on how hot you want your hoisin sauce)
1/8 teaspoon (⅔ ml) black pepper

Directions:
Simply mix all of the ingredients together by hand using a sturdy spoon.
At first it does not appear like it will mix, but keep at it just a bit longer and your sauce will come together.


Friday, October 7, 2011

Crazy Cooking Challenge: Chocolate Chip Cookies


I love challenges and even more than that, I love being able to showcase another persons blog. With the Crazy Cooking Challenge, we are given a recipe subject (this month is chocolate chip cookies) and from there we are to just find an intriguing recipe showcasing another persons blog. This is the second month Crazy Cooking Challenge has been in place and I'm just thrilled to now be a part of it. Check it out here to see last months challenge of Macaroni and Cheese!

I've got a new blog obsession with Kristy over at Sweet Treats and More. Here photographs are phenomenal and she just has a nice relaxed way of writing. She has several tasty looking recipes using chocolate chips, but I have thus far contained myself to making the Classic Oatmeal Chocolate Chip Cookie. They were delicious! My boys and hubby just gobbled them up!

Classic Oatmeal Chocolate Chip Cookies
from Sweet treats and more

1 c. butter
1 c. brown sugar
1 c. granulated sugar
2 eggs
1 tsp vanilla
1 tsp baking soda
1 tsp baking powder
1 tsp salt
2 c. flour
2 3/4 c. oatmeal
2 c. chocolate chips

Cream together the butter and sugars. Add eggs and vanilla. Beat until light and fluffy. Add baking soda, powder, and salt and mix. Add flour, oatmeal and chocolate chips. Mix until combined. Bake at 350 degrees for 10-12 minutes.

Photobucket
>