Saturday, March 27, 2010

Daring Baker Challenge: Orange Tian


The 2010 March Daring Baker’s challenge was hosted by Jennifer of Chocolate Shavings. She chose Orange Tian as the challenge for this month, a dessert based on a recipe from Alain Ducasse’s Cooking School in Paris.
The conditions were:  you must make the tart dough, the whipped cream, the caramel sauce, citrus segments and marmalade
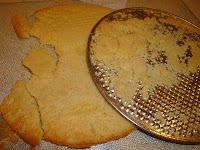
This was my first baking challenge with the Daring Kitchen and a challenge it was for me indeed! I have no idea why I struggled with these recipes but everything that could go wrong, did go wrong! I made my Pate Sablee recipe twice.  The first time I put the pastry dough onto the bottom of my springform pan and it stuck! It was not as "pretty" as I wanted it to be so I remade the dough and this time I baked the dough on my silicon baking sheet and it came out beautiful!  However, when I went to put the baked pastry on top of my dessert it shattered... perhaps I had rolled it to thin?? Anyway, I picked up the pieces and put them on top of the whipped cream.  I was tired and by this time I figured since it would be on the bottom of the dessert it really didn't matter.
I had juiced my oranges and had divided the juice so that I had the juice for my marmalade and caramel sauce separate.  In theory, this was a good idea since one used only a 1/4 cup and the other used 1 1/4 cup.  However, I grabbed  the larger amount for my marmalade (without thinking) and had to readjust my pectin to make it work. The end result was actually quite delicious so in the end my mistake turned out just fine.
For the Pate Sablee:
2 medium-sized egg yolks at room temperature
granulated sugar 6 tablespoons + 1 teaspoon; 2.8 oz; 80 grams
vanilla extract ½ teaspoon
Unsalted butter ¼ cup + 3 tablespoons; 3.5 oz; 100 grams ice cold, cubed
Salt 1/3 teaspoon; 2 grams
All-purpose flour 1.5 cup + 2 tablespoons; 7 oz; 200 grams
baking powder 1 teaspoon ; 4 grams

Directions:
Put the flour, baking powder, ice cold cubed butter and salt in a food processor fitted with a steel blade.  (I don't have a food processor so I just used my mixer)
In a separate bowl, add the eggs yolks, vanilla extract and sugar and beat with a whisk until the mixture is pale. Pour the egg mixture in the food processor.
Process until the dough just comes together. If you find that the dough is still a little too crumbly to come together, add a couple drops of water and process again to form a homogenous ball of dough. Form into a disc, cover with plastic wrap and leave to rest in the fridge for 30 minutes.
Preheat your oven to 350 degree Fahrenheit.
Roll out the dough onto a lightly floured surface until you obtain a ¼ inch thick circle. Using your cookie cutter, cut out circles of dough and place on a parchment (or silicone) lined baking sheet. Bake for 20 minutes or until the circles of dough are just golden

For the Marmalade:
Freshly pressed orange juice ¼ cup + 3 tablespoons; 3.5 oz; 100 grams
1 large orange used to make orange slices
cold water to cook the orange slices
pectin 5 grams
granulated sugar: use the same weight as the weight of orange slices once they are cooked

Directions:
Finely slice the orange. Place the orange slices in a medium-sized pot filled with cold water. Simmer for about 10 minutes, discard the water, re-fill with cold water and blanch the oranges for another 10 minutes.  Blanch the orange slices 3 times. This process removes the bitterness from the orange peel, so it is essential to use a new batch of cold water every time when you blanch the slices.
Once blanched 3 times, drain the slices and let them cool.  Once they are cool enough to handle, finely mince them (using a knife or a food processor).
Weigh the slices and use the same amount of granulated sugar . If you don’t have a scale, you can place the slices in a cup measurer and use the same amount of sugar.
In a pot over medium heat, add the minced orange slices, the sugar you just weighed, the orange juice and the pectin. Cook until the mixture reaches a jam consistency (10-15 minutes).  Transfer to a bowl, cover with plastic wrap and put in the fridge.

For the Orange Segments:
For this step you will need 8 oranges.
Cut the oranges into segments over a shallow bowl and make sure to keep the juice. Add the segments to the bowl with the juice.
[See YouTube video in the References section below for additional information on segmenting oranges.]  Using YouTube proved to be very helpful.  I was quite intimidated by this step but segmenting turned out to be easy and just tedious.

For the Caramel:
granulated sugar 1 cup; 7 oz; 200 grams
orange juice 1.5 cups + 2 tablespoons; 14 oz; 400 grams

Place the sugar in a pan on medium heat and begin heating it. Once the sugar starts to bubble and foam, slowly add the orange juice. As soon as the mixture starts boiling, remove from the heat and pour half of the mixture over the orange segments.
Reserve the other half of the caramel mixture in a small bowl — you will use this later to spoon over the finished dessert. When the dessert is assembled and setting in the freezer, heat the kept caramel sauce in a small saucepan over low heat until it thickens and just coats the back of a spoon (about 10 minutes). You can then spoon it over the orange tians.

For the Whipped Cream:
heavy whipping cream 1 cup; 7 oz; 200 grams
3 tablespoons of hot water
1 tsp Gelatine
1 tablespoon of confectioner's sugar
orange marmalade (see recipe above) 1 tablespoon

In a small bowl, add the gelatine and hot water, stirring well until the gelatine dissolves. Let the gelatine cool to room temperature while you make the whipped cream. Combine the cream in a chilled mixing bowl. Whip the cream using a hand mixer on low speed until the cream starts to thicken for about one minute. Add the confectioner sugar. Increase the speed to medium-high. Whip the cream until the beaters leave visible (but not lasting) trails in the cream, then add the cooled gelatine slowly while beating continuously. Continue whipping until the cream is light and fluffy and forms soft peaks. Transfer the whipped cream to a bowl and fold in the orange marmalade. [Tip: Use an ice cold bowl to make the whipped cream in. You can do this by putting your mixing bowl, cream and beater in the fridge for 20 minutes prior to whipping the cream.]

Assembling the Dessert:
Make sure you have some room in your freezer. Ideally, you should be able to fit a small baking sheet or tray of desserts to set in the freezer.
Line a small tray or baking sheet with parchment paper or a silicone sheet. Lay out 6 cookie cutters(if you used them to make your pastry) onto the parchment paper/silicone.
Drain the orange segments on a kitchen towel.
Have the marmalade, whipped cream and baked circles of dough ready to use.
Arrange the orange segments at the bottom of each cookie cutter(or as I did, the bottom of my springform pan). Make sure the segments all touch either and that there are no gaps. Make sure they fit snuggly and look pretty as they will end up being the top of the dessert. Arrange them as you would sliced apples when making an apple tart.
Once you have neatly arranged one layer of orange segments at the bottom of each cookie cutter, add a couple spoonfuls of whipped cream and gently spread it so that it fills the cookie cutter in an even layer. Leave about 1/4 inch at the top so there is room for dough circle.
Using a butter knife or small spoon, spread a small even layer of orange marmalade on each circle of dough.Carefully place a circle of dough over each ring (the side of dough covered in marmalade should be the side touching the whipping cream). Gently press on the circle of dough to make sure the dessert is compact. (Mine broke in my hands as I was flipping it over on to the whipped cream layer. I pieced it in!)
Place the desserts to set in the freezer to set for 10 minutes.
Using a small knife, gently go around the edges of the cookie cutter to make sure the dessert will be easy to unmold. Gently place your serving plate on top of a dessert (on top of the circle of dough) and turn the plate over. Gently remove the cookie cutter, add a spoonful of caramel sauce and serve immediately.


Tasted great and my mistakes never mattered!
Print Friendly and PDF

Saturday, March 20, 2010

Tis' the Irish Soda Bread

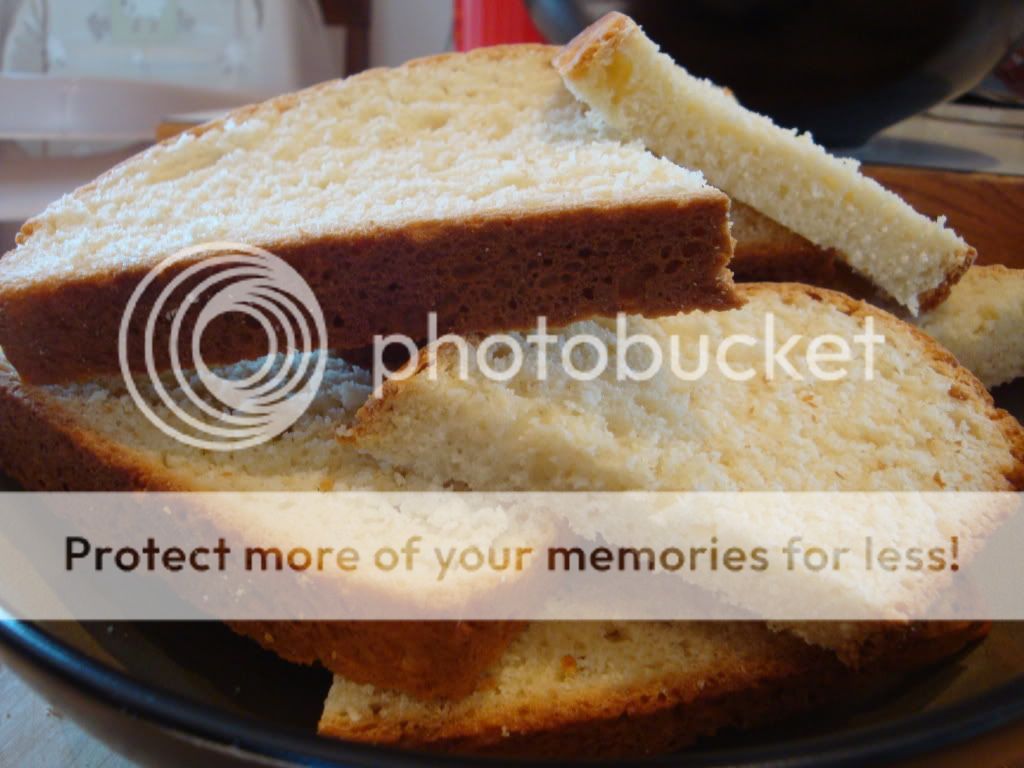
St. Patricks Day is a good day to post this recipe but believe me; any time you cook up this yum-a-licious loaf of bread.  I did make it St. Patty's day its just I didn't get around to posting it until now :-)
I found this recipe for Irish Soda Bread on Allrecipes.com.  However, my husband would kill me if I made the bread with raisins and the combination of raisin and caraway seeds just sounded weird to me.  Of course, the recipe got hundreds of good reviews so that goes to show you what I know!

Irish Soda Bread
adapted by Vivian

Ingredients needed:
1/2 cup white sugar
4 cups all-purpose flour
2 teaspoons baking powder
1 teaspoon baking soda
3/4 teaspoon salt
2 eggs, lightly beaten
1 1/4 cups buttermilk
1 cup sour cream

Directions:
Preheat oven to 350 degrees F (175 degrees C). Grease a 9 inch round cast iron skillet or a 9 inch round baking or cake pan.
In a mixing bowl, combine flour (reserving 1 tablespoon), sugar, baking powder, baking soda, salt, raisins and caraway seeds. In a small bowl, blend eggs, buttermilk and sour cream. Stir the liquid mixture into flour mixture just until flour is moistened. Knead dough in bowl about 10 to 12 strokes. Dough will be sticky. Place the dough in the prepared skillet or pan and pat down. Cut a 4x3/4 inch deep slit in the top of the bread. Dust with reserved flour .
Bake in a preheated 350 degrees F (175 degrees C) oven for 65 to 75 minutes. Let cool and turn bread onto a wire rack


Print Friendly and PDF

Friday, March 19, 2010

Sunny Day Rhubarb Crunch

A have the three most awesome children (biased, I know) and love them to death.  Our youngest is the only one left at home now and so I end up making a lot of his favorite foods.  I took a peek out our window this morning and saw that our rhubarb plant is starting to come up.  Seeing as I still had some bags of rhubarb in the freezer to use up, I thought I would put together one of my son's favorite desserts;
Grandma Helen's Rhubarb Crunch

for topping:
1 teaspoon cinnamon
3/4 cup rolled oats
1/2 cup butter or margarine
1 cup flour
1 cup brown sugar
filling:
1 cup sugar
1 cup water
2 tablespoons cornstarch
1 teaspoon vanilla extract
4 cups rhubarb, cut in 1" pieces (4 cups fresh,
but I like to use 6 cups if rhubarb is frozen)
1 pint fresh strawberries, sliced

Directions 
Preheat oven to 350 degrees F.
Crumb together topping ingredients and set aside.
If using frozen rhubarb, thaw and drain liquid and place into a 9-in x13-in baking pan;
 top with sliced strawberries.

 On stove, in medium sauce pan combine sugar, water and cornstarch. Cook until thick and clear. Remove from heat and stir in vanilla extract. Pour sauce over rhubarb and sprinkle crumb mixture over rhubarb.
Bake at 350 degrees for one hour or until golden brown and juice is bubbling.
If It's all bubbly and golden brown then its down.... MMMM. smells so yummy!
Print Friendly and PDF

Thursday, March 18, 2010

Let Everything that has breath praise the LORD!

I just have to share that God is amazing! No, my day hasn't been off the wall wonderful, but God is so good!  Last weekend my mother, who lives with us had a seizure.  It had her in a total state of unconciousness for five minutes and it scared me to death.  But we have so much to be thankful for... first off, my mom should have been driving home at that time because of volunteer work she does.  Because we had plans to attend a retreat she switched days with another volunteer and was home with me instead.  She took ill with a sinus infection and was going to pass on the retreat... here is where the second praise comes in.  I was in the kitchen grabbing up my things to leave when my mom walks in and sits down.  She tells me, "I feel dizzy." At that I told her, "that's it, I'm staying home."  I went over to check on her, she was clammy feeling and then she seized.  God is good.  She could have been driving but she wasn't.  She could have been alone in the house, but she wasn't.  Yes, she is doing fine now.  Tests have ruled out several things and they believe it was probably due to dehydration. 

Monday I'll be celebrating twenty five years of marriage with my husband.  God is good.  We had the perfect recipe for a disasterous marriage and yet it never failed.  They say that statistically speaking, married couples with special needs children divorce more often than those without.  Our youngest child was finally diagnosed with Asperger's Syndrome, Bi-polar disorder and Schizo-affective disorder when he was sixteen.  Previously undiagnosed years had us dealing with melt downs, hospital stays, suicide attempts, death threats and us just being on a horrendous roller coaster ride.  When he was four the first psychiatrist we met with told us to not get too attached and forget about him ever being education.  Well, too late! We were already attached to the kid!  He's doing well these past five years but life still presents challenges to him and us.  Throughout it all my spouse and I stood firmly together... Of course, there is the on going joke we have between us whenever some one asks how we managed to stay together through it all.  We had this agreement (seriously, this is a true agreement we had) whoever left the marriage took the kids :-)

God is amazing in his creation.  Seriously... all I have to do is look at a child and I'm amazed beyond belief on how awesome he is of a Creator. 
Lyra is 8 months old now and everyday with her is an aerobic workout!

Life may not always be a bowl of cherries, instead you may constantly swim in a bowl of pits! I'm just glad for my relationship with the Lord that I'm never alone through it all.
Psalm150:6 Let everything that has breath praise the LORD. Praise the Lord!

Sunday, March 14, 2010

The Daring Cooks’ Challenges 03/10: Risotto

The 2010 March Daring Cooks challenge was hosted by Eleanor of MelbournefoodGeek and Jess of Jessthebaker. They chose to challenge Daring Cooks to make risotto. The various components of their challenge recipe are based on input from the Australian Masterchef cookbook and the cookbook Moorish by Greg Malouf.

Yes!!! After giving it considerable thought (ok, it pertains to food so maybe not that much thought! I signed up at the daring kitchen to be part of their daring cook and daring baker challenges. This is my first challenge with the daring cooks challenge and it happened to be one of the foods I favor.... risotto.

You can find Eleanor and Jess, otherwise known as MelbournefoodGeek and Jessthebaker at their websites... I'm sure they would love a visit from you!

The requirements for this month were, and I quote, “You MUST make your own stock and the risotto base. The base consists of wine, rice, oil, stock cheese and butter. Omit the cheese if using seafood or doing something sweet. You can flavour the risotto however you like. Once you have the basic recipe down, you can flavour it in numerous ways. Of course if you can't eat chicken stock, make a stock you can eat. "

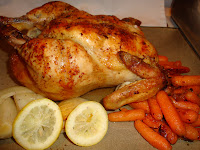
Their recipe options, though quite good I imagine, was not what I desired. I decided to make this a true challenge and start from the very beginning with first making a roasted chicken recipe I've been dying to try (to use the carcass for the stock) I made Julia Child's roasted chicken and let me tell you this, hands down it was the best chicken I have ever had. Take a look... doesn't it just scream moist and yummy???? The picture doesnot give it justice, believe me it was everything you could hope a roasted chicken would be!


Next step was making the stock. I used Alton Brown's recipe as the primary base and it was far better than other stock recipes I've tried. So good, in fact, that I can no longer imagine using the stuff from the store! Yes indeed, this will be a regular staple in my freezer.

Chicken Stock

4 pounds chicken carcasses, including necks and backs
1 large onion, quartered
4 carrots, peeled and cut in 1/2
4 ribs celery, cut in 1/2
1 leek, white part only, cut in 1/2 lengthwise
10 sprigs fresh thyme
10 sprigs fresh parsley with stems
2 bay leaves
8 to 10 peppercorns
2 whole cloves garlic, peeled
2 gallons cold water

Directions:

Place chicken, vegetables, and herbs and spices in 12-quart stockpot. Set opened steamer basket directly on ingredients in pot and pour over water. Cook on high heat until you begin to see bubbles break through the surface of the liquid. Turn heat down to medium low so that stock maintains low, gentle simmer. Skim the scum from the stock with a spoon or fine mesh strainer every 10 to 15 minutes for the first hour of cooking and twice each hour for the next 2 hours. Add hot water as needed to keep bones and vegetables submerged. Simmer uncovered for 6 to 8 hours.

Strain stock through a fine mesh strainer into another large stockpot or heatproof container discarding the solids. Cool immediately in large cooler of ice or a sink full of ice water to below 40 degrees. Place in refrigerator overnight. Remove solidified fat from surface of liquid and store in container with lid in refrigerator for 2 to 3 days or in freezer for up to 3 months. Prior to use, bring to boil for 2 minutes. Use as a base for soups and sauces.

*************************************

That was the base recipe I used. I did not have 4 pounds of carcasses so I threw in some chicken thighs and legs, with the skins removed, to equal three pounds. I'll use the chicken meat in a future recipe and I will also remember to save any chicken bones we have in the freezer to use for making more stock!

Julia Child's roasted chicken recipe has you making a "sauce" to go over the meat. It’s pretty basic with chicken stock, fresh thyme and just a bit of the chicken's drippings. This ended up being brown in color and not that impressive as sauces go... The addition of the sauce added nothing to the chicken itself in flavor. I had almost a cup of this sauce remaining so I set it aside to use in with my stock recipe. This tiny bit of sauce made my stock richer in color, which I really liked. I neglected to take a picture of my completed stock and now it’s just a block of stock ice. I'll add a picture the next time I use the stock. These are the delicious ingredients:

and finally...... The Risotto!

Ina Garten has some of the best recipes! I still had one lone butternut squash that I had bought at the farmer's market last fall and face it, the poor thing needed to be eaten before it became overly ripe. Ina Garten's recipe also gave me the opportunity to use the saffron I purchased when I was in Turkey this past September. I've never used pancetta or shallots (not something I generally will keep on hand for budgeting reasons) so for me it was a win, win situation! Oh my, it was yummy! I must confess that the first bite was a bit of a texture difference for me... I can't quite place it, but that first bite just seemed a bit off. The second bite was much tastier and that third bite... well, it was a bit of heaven. The more you ate of it the better the dish tasted!


 Ina Garten's Butternut Squash Risotto                           
 1 butternut squash (2 pounds)
2 tablespoons olive oil
Kosher salt and freshly ground black pepper
6 cups chicken stock, preferably homemade
6 tablespoons (3/4 stick) unsalted butter
2 ounces pancetta, diced
1/2 cup minced shallots (2 large)
1 1/2 cups Arborio rice (10 ounces)
1/2 cup dry white wine ( I substituted with stock)
1 teaspoon saffron threads
1 cup freshly grated Parmesan

Directions

Preheat the oven to 400 degrees F.

Peel the butternut squash, remove the seeds, and cut it into 3/4-inch cubes. You should have about 6 cups. Place the squash on a sheet pan and toss it with the olive oil, 1 teaspoon salt, and 1/2 teaspoon pepper. Roast for 25 to 30 minutes, tossing once, until very tender. Set aside.

Meanwhile, heat the chicken stock in a small covered saucepan. Leave it on low heat to simmer.

In a heavy-bottomed pot or Dutch oven, melt the butter and saute the pancetta and shallots on medium-low heat for 10 minutes, until the shallots are translucent but not browned. Add the rice and stir to coat the grains with butter. Add the wine and cook for 2 minutes. Add 2 full ladles of stock to the rice plus the saffron, 1 teaspoon salt, and 1/2 teaspoon pepper. Stir, and simmer until the stock is absorbed, 5 to 10 minutes. Continue to add the stock, 2 ladles at a time, stirring every few minutes. Each time, cook until the mixture seems a little dry, then add more stock. Continue until the rice is cooked through, but still al dente, about 30 minutes total. Off the heat, add the roasted squash cubes and Parmesan. Mix well and serve.

I served the risotto with some pan fried chicken breasts.

There are so many versions of risotto to try from savory to sweet.  While I have always found my timing for risotto to be off from what each recipe says (this one took almost an hour and I'm not sure why!) it is an easier dish to make than one would think.  Honestly, I don't know why the chef's on Hell's Kitchen always have so much problem with it :-)


Print Friendly and PDF

Tuesday, March 9, 2010

Julia Child's Roasted Chicken

I've seen such rave reviews about this chicken recipe that I was eager to try it for myself when roasting chickens finally went on sale.  Although only my mother and I appreciated the sauce that the recipe suggests making, my husband said hands down it was the most moist chicken he had ever had!

Julia Child's Roasted Chicken


1 (3 1/2 to 4 pound) chicken
1 small yellow onion, quartered
1 lemon, thinly sliced
1/2 cup celery leaves ( I didn't have a full 1/2 a cup
so I used fresh parsley to make up the difference)
Salt and black pepper
Butter
1 small onion, chopped
1 carrot, chopped (I used baby carrots
instead as that was what I had on hand)
1/2 teaspoon dried thyme
2 cups chicken broth

Directions

Preheat oven to 425 degrees F.

Wash the chicken in hot water and dry thoroughly. Season the cavity with salt and black pepper and stuff with the onion, lemon, and celery leaves. Rub the chicken lightly with softened butter and season all over with salt and pepper. Tie the drumsticks ends together and set the chicken, breast side up, in an oiled v-shaped rack or on an oiled roasting pan in the oven.
(all in its buttery glory!)
Roast for 15 minutes at 425 degrees F, then reduce the heat to 350 degrees, baste the chicken, and roast for 15 minutes. Add the chopped onion and carrot to the pan, basting them and the chicken. Continue roasting the chicken until the juices run clear, for a total of 45 minutes plus an additional 7 minutes for each pound. (In other words, a 3 1/2 pound chicken would take a basic 45 minutes plus an additional 25 minutes, for a total 70 minutes or 1 hour and 10 minutes of cooking time.)

Remove the chicken and spoon the fat out of the roasting pan. Into the pan, stir in the herbs and blend in the broth and, stirring constantly, boil for several minutes on the stovetop to concentrate the flavor. Correct the seasoning and strain the sauce into a warm sauceboat. Carve the chicken and serve with the warm sauce.

Bon Appetite!

As roasted chickens go, this was hands down the best recipe I have ever had.  I was afraid that the lemon would produce too much flavor but it did not.  Best of all, the leftover carcass and sauce went into a chicken stock that I made the following day and it was oh so yummy! 
Print Friendly and PDF