Friday, July 29, 2011

Ciabatta bread


With Borders going out of business (boo hoo), I thought I would check it out for good cookbook sales.  Well, the sales weren't that good but I picked up a few items that I had been eyeing for a bit.  I found this book called:
What a fabulous book!  I've been wanting to experiment with my own recipes but the perfectionist in me has held me back.  Ratio gives me the building blocks to give me the courage I need to step out of my comfort zone.  

The first chapter is about doughs and batters.  Carbs and I get along just fine...just a peek at my thighs will prove that! I've made bread before, too, but always very careful to follow a recipe.  Ratio gives you...well, it gives you the of ingredients you need in order to make a successful loaf of bread.  Once the proper ratio is used, the rest of the additions are up to you.  

I made this wonderful herb filled Ciabatta bread to go with the Greek Penna with Chicken I had made.  We just couldn't get enough of the bread... a crisp crust and a soft inside... It was carb heaven!


Basic Bread Dough
20 ounces bread flour
12 ounces water
2 teaspoons salt
1 teaspoon active or instant yeast
   additions:
1 tablespoon fresh thyme
1 tablespoon fresh rosemary
1 teaspoon garlic powder


In mixing bowl, place the flour and add the water.  Add the salt then sprinkle the yeast over the water and allow it to dissolve.  Mix the ingredients to combine, add the additions of thyme, rosemary and garlic,  then knead the dough.  I used my Kitchen Aid and with the dough hook attachment I let it knead for about ten minutes. 


I like to cook my bread in a enamel cast-iron Dutch oven. This bread only needs one rise and so I lightly greased my Dutch oven with olive oil and placed in the dough.  Dough should double in appearance.
When dough has doubled, stipple dough with fingers.  I did a light spray of olive oil over the top and then sprinkled with coarse Kosher salt and Parmesan cheese.


Baking Directions for use in Dutch oven: Preheat oven to 450 degrees F.  Cover the pot and bake for 15 minutes.  Uncover the pot, drop temperature to 375 degrees F. and continue to bake bread until done... about another 15 minutes. Dough should sound slightly hollow when it is cooked through.


Since this dough contains no added fats, it will spoil quickly.  Best if used within two days.

Thursday, July 28, 2011

Greek Penne pasta with Chicken


I wasn't sure I would be able to do the monthly challenge this month, but, as luck would have it, I did a dish that fits the criteria. We were challenged to make a dish using farmer's market ingredients

This is the first year I have been successfully able to grow herbs.  I guess the lousy start to the summer we had was good for something!  I made this dish last night and even my non-veggie husband ate two servings!  I liked the fact that it had no true "sauce" to it, only what the vegetables and feta cheese made.  Hubby thought it could use a bit of an Alfredo like sauce but the rest of us thought it was perfect as is!
Greek Penne and Chicken
adapted from this recipe by Jenny at allrecipes.com

  • 1 (16 ounce) package penne pasta
  • 1 1/2 tablespoons butter
  • 1/2 cup chopped onion (I had only a walla walla sweet on hand)
  • 2 cloves garlic, minced
  • 1 pound skinless, boneless chicken breast halves - cut into bite-size pieces
  • 14 ounces marinated artichoke hearts (I rinsed them to remove some of the oil)
  • 1 -15 ounce can petite diced tomatoes
  • 1/2 cup crumbled feta cheese
  • 3 tablespoons chopped fresh parsley
  • 2 tablespoons lemon juice
  • 1 1/2 tablespoon fresh oregano
  • salt to taste
  • ground black pepper to taste


Directions

  1. In a large pot with boiling salted water cook penne pasta until al dente. Drain.
  2. Meanwhile, in a large skillet over medium-high heat melt butter, add onion and garlic and cook for 2 minutes. Add chopped chicken and continue cooking, stirring occasionally until golden brown, about 5 to 6 minutes.
  3. Reduce heat to medium- low. Drain and chop artichoke hearts and add them, tomato, feta cheese, fresh parsley, lemon juice, oregano, and drained penne pasta to the large skillet. Cook until heated through, about 2 to 3 minutes.
  4. Season with salt and ground black pepper. Serve warm.


Wednesday, July 27, 2011

The Daring Bakers July 2011 Challenge: FRESH FRAISIERS!


Jana of Cherry Tea Cakes was our July Daring Bakers’ host and she challenges us to make Fresh Frasiers inspired by recipes written by Elisabeth M. Prueitt and Chad Robertson in the beautiful cookbook Tartine

I had my son-in-law’s birthday coming up and I just felt that this month’s Daring Baker’s challenge would be perfect for him. It came out delicious and would make it again.  I’m not overly fond of the simple syrup addition nor the almond paste, but those could easily be omitted (although then it wouldn’t be a true Frasier!!). 

While I chose to go with the simple strawberry, the fruit possibilities are endless.  Check out theDaring Kitchen website to see everyone else’s fabulous creations.

Basic Chiffon Cake:
Ingredients:
 1 cup + 2 tablespoons (270 ml) (5½ oz/155 gm) all-purpose flour
 1 teaspoon (5 ml) (4 gm) baking powder
 3/4 cups (180 ml) (6 oz /170 gm) sugar
 1/2 teaspoon (2½ ml) (1½ gm) salt, preferably kosher
 1/4 cup (2 fl oz/60 ml) vegetable oil
 3 large egg yolks
 ⅓ cup + 1 tablespoon (3.17 fl oz/95 ml) water
 1 teaspoon (5 ml) pure vanilla extract
 3/4 teaspoon (3¾ ml) (3 gm) lemon zest, grated
 5 large egg whites
 ¼ teaspoon (1¼ ml) (1 gm) cream of tartar

Directions:
1.Preheat the oven to moderate 325°F (160°C/gas mark 3).
2.Line the bottom of an 8-inch (20 cm) spring form pan with parchment paper. Do not grease the sides of the pan.
3.In a large mixing bowl, stir together the flour and baking powder. Add in all but 3 tablespoons (45 ml.) of sugar, and all of the salt. Stir to combine.
4.In a small bowl combine the oil, egg yolks, water, vanilla and lemon zest. Whisk thoroughly.
5.Combine with the dry ingredients and mix thoroughly for about one minute, or until very smooth.
6.Put the egg whites into a stand mixer, and beat on medium speed using a whisk attachment on a medium speed, until frothy. Add cream of tartar and beat on a medium speed until the whites hold soft peaks. Slowly add the remaining sugar and beat on a medium-high speed until the whites hold firm and form shiny peaks.
7.Using a grease free rubber spatula, scoop about ⅓ of the whites into the yolk mixture and fold in gently. Gently fold in the remaining whites just until combined.
8.Pour the batter into the prepared pan. Bake for 45 to 55 minutes or until toothpick inserted into the center comes out clean.
9.Removed the cake from the oven and allow to cool in the pan on a wire rack.
10.To unmold, run a knife around the sides to loosen the cake from the pan and remove the spring form sides. Invert the cake and peel off the parchment paper. Refrigerate for up to four days.
I didn't have an 8 inch spring form pan so I made a collar for my pan as I would a souffle!
 Pastry Cream Filling:
Ingredients:
1 cup (8 fl oz/250 ml) whole milk
1/2 teaspoon (2½ ml) pure vanilla extract
1/8 teaspoon (1/2 ml) (¼ gm) salt, preferably kosher
2 tablespoons (30 ml) (10 gm)cornstarch
1/4 cup (60 ml) (2 oz/55 gm) sugar
1 large egg
2 tablespoons (30 ml) (1 oz/30 gm) unsalted butter
3/4 teaspoon (3¾ ml) (4 gm) gelatin
1/2 tablespoon (7½ ml) water
1 cup (8 fl oz/250 ml) heavy cream

Directions:
1.Pour the milk, vanilla, and salt into a heavy sauce pan. Place over medium-high heat and scald, bringing it to a near boiling point. Stir occasionally.
2.Meanwhile, in a stand mixer add the cornstarch and sugar. Whisk to combine
3.Add the eggs to the sugar and cornstarch and whisk until smooth.
4.When the milk is ready, gently and slowly while the stand mixer is whisking, pour the heated milk down the side of the bowl into the egg mixture.
5.Pour the mixture back into the warm pot and continue to cook over a medium heat until the custard is thick, just about to boil and coats the back of a spoon.
6.Remove from heat and pass through a fine mesh sieve into a large mixing bowl. Allow to cool for ten minutes stirring occasionally.
7.Cut the butter into four pieces and whisk into the pastry cream a piece at a time until smooth.
8.Cover the cream with plastic wrap, pressing the plastic wrap onto the top of the cream to prevent a skin from forming. Chill in the refrigerator for up to five days.
9.In a small dish, sprinkle the gelatin over the water and let stand for a few minutes to soften.
10.Put two inches (55 mm) of water into a small sauce pan and bring to a simmer over a medium heat.
11.Measure 1/4 cup (2 oz/60 ml) of the chilled pastry cream into a small stainless steel bowl that will sit across the sauce pan with the simmering water, without touching the water.
12.Heat the cream until it is 120 F (48.8 C). Add the gelatin and whisk until smooth. Remove from the water bath, and whisk the remaining cold pastry cream in to incorporate in two batches.
13.In a stand mixer, fitted with the whisk attachment, whip the cream until it holds medium-stiff peaks. Immediately fold the whipped cream into the pastry cream with a rubber spatula.

Simple Syrup:
Ingredients:
1/3 cup (2⅔ fl oz/80 ml) (2⅔ oz/75 gm) of sugar, flavored or white
1/3 cup (2⅔ fl oz/80 ml) of water

Directions:
1.Combine the water and sugar in a medium saucepan.
2.Bring the mixture to a boil and let the sugar dissolve. Stirring is not necessary, but will not harm the syrup.
3.Remove the syrup from the heat and cool slightly.
4.Transfer syrup to a lidded container or jar that can be stored in the refrigerator. Simple syrup can be stored for up to one month.

Fraisier Assembly:
Components:
1 baked 8 inch (20 cm) chiffon cake
1 recipe pastry cream filling
⅓ cup (80 ml) simple syrup or flavored syrup
2 lbs (900 g) strawberries
confectioners’ sugar for dusting
½ cup (120 ml) (5 oz/140 gm) almond paste

Directions:
1.Line the sides of a 8-inch (20 cm) spring form pan with plastic wrap. Do not line the bottom of the pan.
Here's a tip... when slicing a cake in half ,
use toothpicks as your
guideline.
2.Cut the cake in half horizontally to form two layers.
3.Fit the bottom layer into the prepared spring form pan. Moisten the layer evenly with the simple syrup. When the cake has absorbed enough syrup to resemble a squishy sponge, you have enough.
4.Hull and slice in half enough strawberries to arrange around the sides of the cake pan. Place the cut side of the strawberry against the sides of the pan, point side up forming a ring.
5.Pipe cream in-between strawberries and a thin layer across the top of the cake.
6.Hull and quarter your remaining strawberries and place them in the middle of the cake. Cover the strawberries and entirely with the all but 1 tbsp. (15 ml) of the pastry cream.
7.Place the second cake layer on top and moisten with the simple syrup.
rolling out the almond paste
8.Lightly dust a work surface with confectioners' sugar and roll out the almond paste to a 10-inch (25 cm) round 1/16 inch (1.5 mm) thick. Spread the remaining 1 tablespoon (15 ml) of pastry cream on the top of the cake and cover with the round of almond paste.
9.Cover with plastic wrap and refrigerate for at least 4 hours.
10.To serve release the sides of the spring form pan and peel away the plastic wrap.
11.Serve immediately or store in the refrigerator for up to 3 days.
 

Monday, July 18, 2011

Secret Recipe Club: Chai Tea Creme Brulee


This is the first time I am taking part in Amanda's Cookin' Secret Recipe Club. This is a blog task in which we are challenged to choose a recipe from an assigned blog we are given. 

I was given the delightful opportunity to be given the blog of  Carolyn's,  All Day I Dream About Food. After being diagnosed with pre-diabetes, she took on the role of sharing with the world many fabulous recipes that are low carb and/or gluten free.

After much browsing through Carolyn's blog and drooling all over my computer (yes, her blog is truly drool worthy!) I chose to recreate her Chai Tea Creme Brulee.  I've tried making creme brulee once before and it was a massive failure.  Still, it is one of the recipes I chose to make before I die ( see that post here) and her recipe would give me the opportunity to have a success this time... plus it gave me the chance to use some of my cherished black tea that I brought home from Africa.  While Carolyn's original recipe includes erythritol and stevia, I adjusted the recipe to use regular sugar as I was unable to find erythritol.

Chai Tea Creme Brulee
adapted from here at All Day I Dream About Food
1 3/4 cups heavy cream
1 tbsp loose black tea
1 cinnamon stick (or 1 tsp ground cinnamon)
1 tsp coarsely ground cardamom seeds
1/2 tsp ground ginger
1/8 tsp ground cloves
4 egg yolks
1/4 cup granulated sugar
1/2 tsp vanilla extract
1 tablespoon raw sugar

 Directions:

Preheat oven to 300F.
Heat cream, tea, cinnamon, cardamom, ginger and cloves in a small saucepan over medium low heat, until steam rises. Remove from heat, cover the pan and let steep for 15 minutes. Strain through a fine-mesh strainer to remove all solids and set aside.

In a medium bowl, beat egg yolks and 1/4 cup of granulated sugar together until thickened and pale yellow. Add cream very slowly, stirring continuously. Add in vanilla.

Divide custard between 4 small ramekins (or a single one-quart ceramic or glass baking dish). Set into a larger baking pan and pour hot water to within 1-inch from top of ramekins or baking dish.


Bake until the custard is just set but still slightly wobbly in the middle, 40-45 minutes. Remove baking pan from the oven and let cool. Then wrap each ramekin tightly in plastic and chill for at least 2 hours.

Just before serving, divide raw sugar over tops of creme brulee, sprinkling across the top evenly. Heat with a kitchen torch until it bubbles and browns. Let sit for a few minutes to allow topping to harden. You can also brown the topping under your broiler, watching very carefully and turning the cups to ensure even browning.


BLOG HOP SNIPPET:


Thursday, July 14, 2011

The Daring Cooks' July Challenge: My Noodle hands! Spaetzle


Blog-checking lines: Steph from Stephfood was our Daring Cooks' July hostess.  Steph challenged us to make homemade noodles without the help of a motorized pasta machine.  She provided us with recipes for Spätzle and Fresh Egg Pasta as well as a few delicious sauces to pair our noodles with!

Having made egg noodles before, I knew that I would have to create something new for this challenge.  Along with being challenged to make pasta, Steph also wanted us to do something from our heritage. I don't know why, but while I always wanted to try spaetzle, the thought of making it scared me.  I guess that in my head I just made it seem so complicated.  Well guess what.... it isn't!  And I can kick myself for not having tried this years ago!  The dough in itself is very bland but that just gives you a large canvas to experiment with.  I went for a simple Spaetzle in brown butter and sage sauce.

Spaetzle in Sage Brown Butter

3/4 cup cold milk
3 large eggs
1/4 teaspoon ground nutmeg
1 teaspoon salt
2 cups all purpose flour
1/2 cup unsalted butter
4 fresh sage leaves, Chiffinod
2 fresh sage leaves


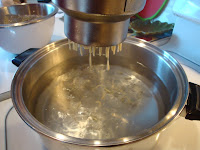
Bring to a boil a large pot of salted water. Combine milk, eggs, and nutmeg in processor; blend until smooth, about 30 seconds. Add salt and flour pulsing until batter is just smooth, about 30 seconds (batter will be very thick and sticky). Since I don't have a food processor, I just whisked the eggs and blended in the nutmeg and flour.  


Working in batches, pour batter through slotted spoon or grater held above boiling water, pressing with spatula to form strands. Stir gently to prevent sticking.  Simmer until Spaetzle float to surface, then continue cooking 1 minute longer.Using slotted spoon, transfer spaetzle to large buttered baking dish. (Can be made 2 hours ahead). Let stand at room temperature.)


Cook butter and Sage in heavy large skillet over medium  heat until golden brown, about 3 minutes.  Add Spaetzle and toss until heated through.  Season with salt and pepper.

Divide among plates. garnish with fresh sage.
Optional: One small sautéed onion diced in the butter.

You can see the butter starting to brown

Grab a fork and dig in!

Wednesday, July 13, 2011

calico beans


Whenever there is a family event that gathers for food... I mean, festivities, you can always count on there being calico beans. Why this is such a time honored fan favorite i have no idea.  Ok, maybe it has something to do with bacon... maybe it has a lot to do with bacon, I mean, our family is pretty much obsessed with bacon! 
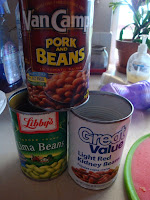
But I also think it has something to do with the rustic feel of it.  That and the fact that you can use pretty darn near any type of bean you have in your pantry.  We like it with a mix of kidney, lima and pork and beans but I've also made it with white beans, garbanzo (which I confess was not a real winner), and pinto.  When the kid were younger they disliked the lima beans so I would often just use two cans of pork and beans and one can kidney beans so as you can see its a fairly adaptable recipe. When doubling the recipe I will use a blend of five different beans
Calico Beans
1 pound bacon, cooked, drained and crumbled
1 pound ground beef
1 small onion, diced
3 cans of beans, rinsed and drained if necessary (Pork and beans don't get rinsed)
1 cup ketchup
3/4 brown sugar (use less if you want it to be less sweet)
1 teaspoon salt
2 teaspoons dry mustard
3 tablespoons vinegar (I like to use cider vinegar)

Directions:
Cook the bacon over medium heat and cook till done.  Drain off all but a tablespoon of grease and cook diced onions until translucent; remove from pan.  Brown ground beef and drain off the grease.

In a two quart casserole dish, medium pot or crock pot, combine beans, meat, onion,bacon and the remaining ingredients.  Mix well.
Bake uncovered for 1 hour at 350 degrees F.
Cook on stove top, uncovered for one hour on medium heat.
Use in crock pot and let simmer for at least 1 hour.

*My husband likes to add 1/4 teaspoon liquid smoke, its optional.

Serves 8

product review Mama's tibet bbq sauce


When Lin( from the daring kitchen) asked me if I would be willing to do a product review on hot sauce I was excited.  We don’t mind heat in our household, but we like the heat to be more of a background to the flavor; we don’t just want our mouths left with a burn.

Mama’s Fire graciously sent me each of their products to review: Mama’s Fire Tibetan Hot Sauce and their Tibetan BBQ Sauce.  Mama’s Fire is making its way to some select stores but most of us will have to rely on their website for ordering.  Prices are reasonable if you exclude the price of shipping.  They do, however, offer a deal with shipping purchasing more than one item.
Hot sauce Product Info:                                                          
1 jar - 13.7 oz (388g)
$6.25 USD + $5.85 S & H
(Order two bottles and pay shipping for the price of one!)
BBQ Sauce Product Info:
1 jar - 13.7 oz (388g)
$6.25 USD + $5.85 S & H
(Order two bottles and pay shipping for the price of one!)

As I was unfamiliar with their product I went to their website http://www.mamasfire.com to find out what I would (should) experience. To quote them “All ingredients are fresh and grown in the region. They are flash cooked in expeller-pressed Canola oil, bringing out the sweet, smoky flavors of the onion and garlic. The ginger provides an electric spice route fire that joins with the heat from the chilies to create a blissful and unique flavour that smoulders gently on the tongue.
     All batches of Mama's Fire are infused with the good wishes of the sauce's makers. Chanting incantations called mantra, the makers envoke the compassion of Padmasambhava, a legendary saint that brought Buddhism to Tibet.
     Mama's Fire is a cottage industry run and supported by the Sacred Works Project.”

I’m all for a product that gives back to the community so they had bonus points starting off from me! Still, the product has to taste good or else consumers just won’t buy it.

I invited family over to help give the BBQ sauce a try.  First taste, straight from the bottle, and we all had the same sense of tasting a sauce that had a slight resemblance to Arby’s sauce.  Surprisingly, it had very little heat to it.  In fact, some of the more heat thrill seekers I know felt that it had a zero heat factor.  We wanted to let the product shine on its own so we used it simply as a BBQ sauce for chicken wings.   My husband felt that the sauce lacked depth to it and was more liquid than sauce.  It gave the chicken some nice color but most of us were left wondering where the sauce was.  The product ended up with mixed reviews. Several people complained about its overall lack of flavor, while others thought it was a good mild sauce. 

My next challenge was to use the Tibetan Hot sauce.  It looks a lot like Tahini paste, with about the same consistency only it has red pepper flakes throughout it.  Sesame is one of the primary ingredients of their hot sauce so that explained the similarities.  With its strong nutty flavor I thought it would work great in a Thai peanut sauce but found the nut flavors to be too overwhelming and no one was pleased with the recipe.  I then used it straight from the bottle spread on to a tortilla wrap.  I filled the wrap with an Asian broccoli slaw and some grilled chicken.  This is where the Hot sauce truly shined! There was just the slight acidic taste of the slaw that blended well with the nuttiness of the hot sauce.  I still think it will be a wonderful addition to any Thai or Asian recipe but it will take a bit of experimentation.

In the end, I would have to give the BBQ Sauce a rating of average… nothing special, but nothing horrible either.  The Hot Sauce would get an “almost great” rating.  As I write this I’m thinking in my head that this sauce would likely make an amazing addition to hummus! If you like to use sesame oil and red chili peppers than I would say this would be an excellent addition to your kitchen.

Thursday, July 7, 2011

The Cookie Carnival: Double Chocolate Espresso Cookies


There have been lots of people staying at the Walden house where my mom volunteers.  More people means more cookies are needed and so I was excited when both of the Cookie Carnival recipes were announced. They need cookies that can be frozen and taken out as needed. While I have a nice rotation of cookie recipes I use, it always excites me when I come across a challenge recipe that can be used for them.  You see, if I don't give the cookies away then I end up eating them... this is not good! Nope, its always best if I can give the goodies away! The first recipe I will share with you is the Double-Chocolate Espresso Cookies; a Taste of Home recipe .  The review for the cookie were good, although some people complained of the mix being too thin.  I believe this was due to their not beating the sugar and eggs long enough to thicken.  Its important to beat it for at least three minutes...maybe longer depending on your mixer.  It took me about 4 1/2 minutes to get it the thick and lemon-color that I wanted.
Double-Chocolate Espresso Cookies
taste of home magazine
3 ounces unsweetened chocolate, chopped
2 cups (12 ounces) semisweet chocolate chips, divided
1/2 cup butter, cubed
1 tablespoon instant coffee granules
1 cup plus 2 tablespoons sugar
3 eggs
3/4 cup all-purpose flour
1/2 teaspoon baking powder
1/4 teaspoon salt

Directions:
In a small heavy saucepan, melt unsweetened chocolate, 1 cup chocolate chips and butter with coffee granules; stir until smooth.  Remove from the heat; set aside to cool.
my butter was super soft so I didn't need to cube it.
In a small bowl, beat sugar and eggs for 3 minutes or until thick and lemon-colored.  Beat in the chocolate mixture.  Combine the flour, baking powder and salt; add to the chocolate mixture.  Stir in remaining chips.

See how thick my Batter turned out!
 Drop by rounded teaspoonfuls 2-inches apart onto greased baking sheets.  Bake at 350 degrees F. for 10-12 minutes or until puffed and tops are cracked.  Cool for 5 minutes before removing to wire racks.  
Yield: 3 dozen


Wednesday, July 6, 2011

Chocolate goody bars


When my mother-in-law mentioned a brownie bar that had layers with frosting and rice krispies, I knew I had to try it.  Brownies are a big hit in the household and I wanted to make a dessert for our July Fourth gathering so it must of been kismet! This recipe was shared with her by a friend of the family.  They had tasted it at another gathering and she said that the pan quickly emptied.  These are amazing! They are soft and crunchy at the same time... I know, How weird is that!!!!  I thought that they were rather rich but solved that problem by adding a nice cold glass of milk t go along with it.  Is it any wonder my jeans are tighter this morning????
Chocolate Goody Bars
 recipe from the Trinity Lutheran Women
1  19.8-oz package fudge brownie mix
1/2 cup cooking oil
2  eggs
1/4 cup water
1  16-oz can vanilla frosting
3/4 cup chopped peanuts
3  cups crisp rice cereal
1  cup creamy peanut butter
1  12-oz package semisweet chocolate pieces

Directions:
Grease a 13x9x2-inch baking pan; set aside( I did 2 8-inch pans instead).
In a large bowl, stir together the brownie mix, cooking oil, eggs and water until well mixed.  Spread mixture into prepared pan.
Bake in a 350 degree F. oven for 28 to 30 minutes or until toothpick inserted comes out clean.  Cool completely on wire rack.

Frost with frosting.  Sprinkle with peanuts.  Cover; chill in the refrigerator.


Meanwhile, place rice cereal in a medium bowl.  In a small saucepan, combine peanut butter and chocolate pieces.  Heat and stir over low heat until chocolate is melted.  Pour over cereal.  Stir to coat evenly.  Spread over frosting.  Cover; chill in refrigerator until chocolate layer is set.  Refrigerate covered left-over bars.
Recipe makes 36 pieces.
mix
layer
indulge!
How exciting! Lisa from Sweet as Sugar Cookies asked me to link up to her Sweets for Saturday.  There are lots of awesome looking goodies there... go check it out!