Monday, February 21, 2011

Homemade Gnocchi Bake with Red Onions and Pancetta


This months Monthly Challenge was to make "red" foods for the month of February. Right off I swore I wouldn't do the obvious choices of red velvet cake or tomato based dishes..... But I was sooooooo wrong. When I did a Google search of "red foods" (seriously, look it up and you will see quite a listing!) and I came across this recipe for Gnocchi with Red Onions and Pancetta it just screamed out at me. Gnocchi has been on my list of things to make for ages now and hey, red onion count as red, right?? Ok, don't go getting all technical on me. I know that they are not really "red" but lets not get picky about things :-) 
Gnocchi
3 large baking potatoes (Idaho, about 1 3/4 pounds)
1 large egg
1 teaspoon salt
1/4 teaspoon fresh ground white pepper
1 pinch of freshly grated nutmeg
1/4 cup freshly grated Parmesan cheese
2 cups all purpose flour (as needed)

Directions:
Place the potatoes in a large pot with enough cold water to cover. Bring the water to a boil and cook, partially covered, until the potatoes are easily pierced with a skewer but the skins are not split, about 3
5 minutes.
Drain the potatoes and let them stand just until cool enough to handle. (The hotter the potatoes are when they are peeled and riced, the lighter the gnocchi will be.) Working quickly and protecting the hand that holds the potatoes with a folded kitchen towel or oven mitt, scrape the skin from the potato with a paring knife. Press the peeled potatoes through a potato ricer. Alternatively, the potatoes can be passed through a food mill fitted with the fine disc, but a ricer makes fluffier potatoes and therefore lighter gnocchi.
 Spread the riced potatoes into a thin, even layer on the work surface, without pressing them or compacting them. Let them cool completely.


In a small bowl, beat the egg, salt, pepper, and nutmeg together. Gather the cold potatoes into a mound and form a well in the center. Pour the egg mixture into the well. Knead the potato and egg mixtures together with both hands, gradually adding the grated cheese and enough of the flour, about 1 1/2 cups, to form a smooth but slightly sticky dough. It should take no longer than 3 minutes to work the flour into the potato mixture; remember, the longer the dough is kneaded, the more flour it will require and the heavier it will become. As you knead the dough, it will stick to your hands and to the work surface: Repeatedly rub this rough dough from your hands and scrape it with a knife or dough scraper from the work surface back into the dough as you knead.          

      Dust the dough, your hands, and the work surface lightly with some of the remaining flour. Cut the dough into six equal pieces and set off to one side of the work surface. Place one piece of dough in front of you and pat it into a rough oblong
Using both hands, in a smooth back-and-forth motion and exerting light downward pressure, roll the dough into a rope 1/2 inch thick, flouring the dough if necessary as you roll to keep it from sticking. (When you first begin making gnocchi, until your hands get the feel of the dough, you may find it easier to cut each piece of dough in half to roll it.). Slice the ropes into 1/2-inch-thick rounds. Sprinkle the rounds lightly with flour and roll each piece to prevent sticking. Repeat the whole process with the remaining pieces of dough. At this point the gnocchi must be cooked immediately or frozen.
To cook gnocchi:Bring six quarts of salted water to a vigorous boil in a large pot over high heat. Drop about half the gnocchi into the boiling water a few at a time, stirring gently, until tender, about 1 minute after they rise to the surface.
To freeze gnocchi:It is best to freeze gnocchi uncooked as soon as they are shaped. Arrange the gnocchi in a single layer on a baking pan and place the pan in a level position in the freezer. Freeze until solid, about 3 hours. Gather the frozen gnocchi into resealable freezer bags. Frozen gnocchi can be stored in the freezer for 4 to 6 weeks.
To cook frozen gnocchi:Frozen gnocchi must be cooked directly from the freezer in plenty of boiling water, or they will stick together. Bring 6 quarts salted water to a boil in each of two large pots. Shake any excess flour from the frozen gnocchi and split them between the two pots, stirring gently as you add them to the boiling water. It is important that the water return to a boil as soon as possible; cover the pots if necessary. Drain the gnocchi as described above and sauce and serve according to the specific recipe.
                                                         Gnocchi Bake with red onions and pancetta
adapted from here
1 tablespoon olive oil
4 ounces Pancetta, cubed
1 red onion, peeled and finely diced
2 cloves garlic, crushed
1 cup chopped tomato (I used one cup of canned diced tomato)
3 tablespoons sun dried tomato paste (sadly, this is unheard of in my area so I used regular tomato paste)
1 cup Mascarpone cheese
1 pound fresh gnocchi
8-10 fresh basil leaves, finely chopped
2 cups grated mozarella cheese (which I thought was way overkill so I used maybe 3/4 cup
1/3 cup white breadcrumbs (again, I thought this was a bit much so just used a couple tablespoons)

Directions:
Preheat the oven to 350°F / 180°C.
Heat the oil in a skillet and add the pancetta. Cook over a medium heat, stirring frequently, for 1 minute.
Add the red onion and garlic and cook, stirring, for a further 5 minutes, or until the pancetta is cooked and the onion softened.
Stir in the chopped tomatoes, sun-dried tomato paste, and mascarpone cheese. Simmer over a low heat for 5 minutes.
Meanwhile, cook the gnocchi for 1-2 minutes, until they rise to the surface. Do not overcook.
Drain the gnocchi thoroughly and place in a large ovenproof dish (My 9-inch square pyrex worked perfectly).
Add the chopped basil to the pancetta sauce mixture and stir. Pour the sauce over the gnocchi and toss gently to coat it.
Combine the grated cheese with the breadcrumbs and scatter over the gnocchi.
Cook in the preheated oven for 15-20 minutes, or until golden and bubbling.

Friday, February 18, 2011

Have the Cake challenge 2/2011 : Romeo and Juliet Cake

Print Friendly and PDF
This month's Have the Cake Challenge was to make a Romeo and Juliet cake.  What's that??? You've never heard of it?  That's ok, it was a new one to me as well. Sugar Plum Fairy found this recipe on the Chocorango blog and asked that we make this as festive for Valentine's day as possible.  As luck would have it, I have two birthdays in February; one on Valentine's day and the other on the 15th. I made this cake for my mother in-law's birthday.... actually, I made little individual cakes using the heart shape cupcake pan I have. I had to reduce the cooking time to 16 minutes (rotating the pans after 8 minutes) and the directions were a bit confusing so I ended up winging a few things. There's milk in the recipe, but the directions here or on the site this was taken from said when to add it. I decided that I would combine the milk and oil and where the directions stated to add the oil that's when I put it in. Also, I didn't know what to do with the guava jelly... that probably sounds stupid since the obvious answer is to put it on the cake. However, the jelly is.. well, its jelled. So to make it spreadable I added some water into a small pan and then added the jelly to warm it together and liquefy it. While it was still quite hot, I dipped the little cake tops into it. Having the paste would have been better, I'm sure of it. But I was lucky to find the jelly in our area so jelly it was.

Romeo and Juliet Cake3 large eggs
200g sugar
200g flour
2 tbsp cornstarch
1 tbsp baking powder
20g grated parmesan cheese
200ml milk
40ml oil
Topping
300g goiabada cubed (guava paste)
water

Directions
Preheat the oven to 350˚F. Grease a 22cm round pan. Sift the flour, cornstarch and baking powder. Set aside.
Beat the eggs with sugar for 10 minutes in high speed. Beat for more 2 minutes in slow speed. Fold in the sifted ingredients. (It was at this stage that I combine the milk and oil together) Mix in 1/4 of batter the oil. Fold in the remaining batter and mix the grated parmesan.
Spoon into the pan and bake for 25 minutes. Let cool on a rack. Cover with goiabada.
   Topping
Melt the goiabada with water. Let boil, stirring until reduce. Let cool slightly and cover the cake.
  I added a bit of water to the jelly in a small saucepan... thinned it out and then topped the cake with it.
Serve: 8 portions.

Tuesday, February 15, 2011

MS Cupcake Club - Chocolate Chip Cupcakes


This month, on the Martha Stewart Cupcake Club, we were challenged to make chocolate chip cupcakes. Now does that sound yummy or what!  Being so close to Valentine's day I wanted to make these little cakes for my Sunday school class. I found the cutest little Wilton heart shaped cupcake pans and then topped them off with a bit of chocolate ganash and some sprinkles.


Here's a little tip for when making any kind of cake using chocolate chips; add a bit of flour to the chocolate chips and toss to coat them with the flour.  Some will still sink towards the bottom but the majority will be throughout the cake.  


You can find the recipe for Martha Stewart's cupcakes here 

Monday, February 14, 2011

The Daring Cooks February 2011 Challenge: Cold Soba Salad & Tempura

Print Friendly and PDF
broccoli and mushrooms
This was an exciting and fun challenge for me. While the recipes are not at all complicated, you will find it a bit time consuming.  We invited some family over and enjoyed our food as each variety of tempura was made.  It reminded me of the way food was served to us in China... each dish was brought out one after another.  We had a great time and the food was delicious!

Blog-checking lines: The February 2011 Daring Cooks' challenge was hosted by Lisa of Blueberry Girl.  She challenged Daring Cooks to make Hiyashi Soba and Tempura.  She has various sources for her challenge including japanesefood.about.com, pinkbites.com and itsybitsyfoodies.com

Soba is a type of thin Japanese noodle made from buckwheat flour. It is served either chilled with a dipping sauce, or in hot broth as a noodle soup. It takes three months for buckwheat to be ready for harvest, so it can be harvested four times a year, mainly in spring, summer, and autumn.  Unfortunately, I was not able to find buckwheat noodles or flour in our area.  We were allowed to substitute any type of thin noodle so I used Somen Japanese style noodles.


Hiyashi Soba is a popular dish in summer. It's like a noodle salad. Restaurants in Japan serve Hiyashi Soba only in summer. Even if you don't have much appetite because of the heat, Hiyashi Soba can be appetizing. Common Hiyashi Soba toppings are omelet strips, ham, cucumber and grated Daikon. You can also have the noodles just with the dipping sauce.

Tempura is a Japanese dish of seafood or vegetables that have been battered and deep fried. A light batter is made of cold water (sometimes sparkling water is used to keep the batter light and soft wheat flour (cake, pastry or all-purpose flour). Eggs, baking soda or baking powder, starch, oil, and/or spices may also be added.Hiyashi Soba:

Oops... made a mistake and added the dipping sauce to the noodles.
Recipes courtesy of Globetrotter Diaries and About.com-Japanese Food
Soba Noodles:
2 quarts (2 Liters) water + 1 cup cold water, separate
12 oz (340 g) dried soba (buckwheat) noodles (or any Asian thin noodle)

Directions:
Cooking the noodles:
Heat 2 quarts of water to a boil in a large pot over high heat. Add the noodles a small bundle at a time, stirring gently to separate. When the water returns to a full boil, add 1 cup of cold water. Repeat this twice. When the water returns to a full boil, check the noodles for doneness. You want to cook them until they are firm-tender. Do not overcook them.
Drain the noodles in a colander and rinse well under cold running water until the noodles are cool. This not only stops the cooking process, but also removes the starch from the noodles. This is an essential part of soba noodle making. Once the noodles are cool, drain them and cover them with a damp kitchen towel and set them aside allowing them to cool completely.
Mentsuyu - Traditional dipping sauce:
2 cups (480ml) Kombu and Katsuobushi dashi (This can be bought in many forms from most Asian stores and you can make your own. Recipe is HERE.) Or a basic vegetable stock.    I used a basic vegetable stock.
1/3 cup (80 ml) soy sauce or a low sodium soy sauce
1/3 cup (80 ml) mirin (sweet rice wine)
      *Note: If you can’t find Mirin, a substitute recipe can be found HERE

Directions:
Put mirin in a sauce pan and heat gently. Add soy sauce and dashi soup stock in the pan and bring to a boil. Take off the heat and cool. Refrigerate until ready to use.

Spicy Dipping Sauce:
¾ cup 70gm/2½ oz spring onions/green onions/scallions, finely chopped
3 tablespoons (45 ml) soy sauce
2 tablespoons (30 ml) rice vinegar
½ teaspoon (2½ ml) (4 ⅔ gm) (0.16 oz) granulated sugar
¼ teaspoon (1¼ ml) (1/8 gm) (0.005 oz) English mustard powder
1 tablespoon (15 ml) grape-seed oil or vegetable oil
1 tablespoon (15 ml) sesame oil (if you can’t find this just omit from recipe.)
Sea salt and freshly ground black pepper to taste - roughly 1/3 a teaspoon of each

Directions:
Shake all the ingredients together in a covered container. Once the salt has dissolved, add and shake in 2 tablespoons of water and season again if needed.


Serving notes:Traditionally soba is served on a bamboo basket tray, but if you don’t have these, you can simply serve them on a plate or in a bowl. Divide up the noodles, laying them on your serving dishes. Sprinkle each one with nori. In small side bowl or cup, place 1/2 cup (120 ml) of dipping sauce into each. In separate small side dishes, serve each person a small amount of wasabi, grated daikon, and green onions.
The noodles are eaten by sprinkling the desired garnishes into the dipping sauce and eating the noodles by first dipping them into the sauce. Feel free to slurp away! Oishii!
green beans
Tempura
Recipes courtesy of pink bites and itsy bitsy foodies
Serves 4
1 egg yolk from a large egg
1 cup (240 ml) iced water
½ cup (120 ml) (70 gm) (2½ oz) plain (all purpose) flour, plus extra for dredging
½ cup (120 ml) (70 gm) (2½ oz) cornflour (also called cornstarch)
½ teaspoon (2½ ml) (2½ gm) (0.09 oz) baking powder
oil, for deep frying preferably vegetable
ice water bath, for the tempura batter (a larger bowl than what will be used for the tempura should be used. Fill the large bowl with ice and some water, set aside)
Very cold vegetables and seafood of your choice ie:
      Sweet potato, peeled, thinly sliced, blanched
      Carrot, peeled, thinly sliced diagonally
      Pumpkin, peeled, seeds removed, thinly sliced blanched
      Green beans, trimmed
      Green bell pepper/capsicum, seeds removed, cut into 2cm (¾ inch)-wide strips
      Assorted fresh mushrooms
      Eggplant cut into strips (traditionally it’s fanned)
      Onions sliced

Directions:
Place the iced water into a mixing bowl. Lightly beat the egg yolk and gradually pour into the iced water, stirring (preferably with chopsticks) and blending well. Add flours and baking powder all at once, stroke a few times with chopsticks until the ingredients are loosely combined. The batter should be runny and lumpy. Place the bowl of batter in an ice water bath to keep it cold while you are frying the tempura. The batter as well as the vegetables and seafood have to be very cold. The temperature shock between the hot oil and the cold veggies help create a crispy tempura.

Heat the oil in a large pan or a wok. For vegetables, the oil should be 320°F/160°C; for seafood it should be 340°F/170°C. It is more difficult to maintain a steady temperature and produce consistent tempura if you don’t have a thermometer, but it can be done. You can test the oil by dropping a piece of batter into the hot oil. If it sinks a little bit and then immediately rises to the top, the oil is ready.

Start with the vegetables, such as sweet potatoes, that won’t leave a strong odor in the oil. Dip them in a shallow bowl of flour to lightly coat them and then dip them into the batter. Slide them into the hot oil, deep frying only a couple of pieces at a time so that the temperature of the oil does not drop.

Place finished tempura pieces on a wire rack so that excess oil can drip off. Continue frying the other items, frequently scooping out any bits of batter to keep the oil clean and prevent the oil (and the remaining tempura) from getting a burned flavor.
yellow bell peppers
chicken
sweet potatoes
onions


Tuesday, February 1, 2011

Cookie Carnival: Two Tone Cookie Crinkles

Print Friendly and PDF
This month we once again had two options and I went for the one with..... chocolate of course!!!
These cookies are actually very similar to another cookie I wanted to make for Christmas, but time got away from me.  There is a bit of work involved, with these cookies, but the end result is well worth it.  Come join us at the cookie carnival here
This is a Better homes and garden recipe and can be also be found at their website.
Two tone Cookie Crinkles
Ingredients
1 cup butter, softened
1 cup granulated sugar
1  teaspoon baking powder
1/4  teaspoon salt
1 egg
1 teaspoon  vanilla
2-1/4  cups  all-purpose flour
1/4 cup unsweetened cocoa powder
Chocolate Ganache
 1/2 cup whipping cream
4 ounces high quality bitter sweet chocolate


Directions:
Beat butter in a large bowl with an electric mixer on medium to high speed for 30 seconds. Add granulated sugar, baking powder, and salt. Beat until combined, scraping side of bowl occasionally. Beat in egg and vanilla until combined. Beat in as much flour as you can with the mixer. Stir in any remaining flour. Divide dough in half. Stir cocoa powder into one portion of dough. Cover and chill dough halves in the refrigerator for 1 to 3 hours or until dough is easy to handle.Preheat oven to 375F. Roll each dough half to 1/8-inch-thickness on a lightly floured surface. Cut out dough with a floured 2-1/2-inch fluted square cookie cutter, or cut dough into 2-1/2-inch squares using a fluted pastry wheel. Use an hors d'oeuvre cutter to cut a 1-inch square, diamond, circle, or flower shape from the centers of half of cutouts of each color.
Place cutouts 2 inches apart on ungreased cookie sheets. Bake in preheated oven about 8 minutes or until edges are set. Transfer cookies to wire racks and let cool. 
 Spoon about 1 teaspoon Chocolate Ganache in centers of bottom side of each cookie without a cutout. Top each white cookies with a chocolate cookie with cutout, bottom sides down; top each chocolate cookie with a white cookie with a cutout, bottom sides down. If desired, sprinkle with powdered sugar. Makes 30 cookies. To store: Place unfilled cookies in layers separated by pieces of waxed paper in an airtight container; cover. Store at room temperature for up to 3 days or freeze for up to 3 months. Thaw cookies, if frozen. Assemble cookies with ganache, as directed. If desired, sprinkle with powdered sugar.
  Chocolate Ganache: Heat 1/2 cup whipping cream in a small saucepan just until bubbles begin to form around edge. Stir in 4 ounces chopped high-quality bittersweet chocolate using a wire whisk until mixture is smooth. Cover and chill in the refrigerator about 30 minutes or until mixture mounds slightly. Makes about 3/4 cup
Tip: For mini sandwich cookies, bake the center cutouts in the preheated 375F oven for 5 to 6 minutes. Cool cookies, then assemble by spreading ganache on half of the cookies and topping with remaining cookies to make sandwiches.

Thursday, January 27, 2011

THE DARING BAKERS JANUARY 2011 CHALLENGE: BISCUIT JOCONDE IMPRIME/ENTREMET

Print Friendly and PDF

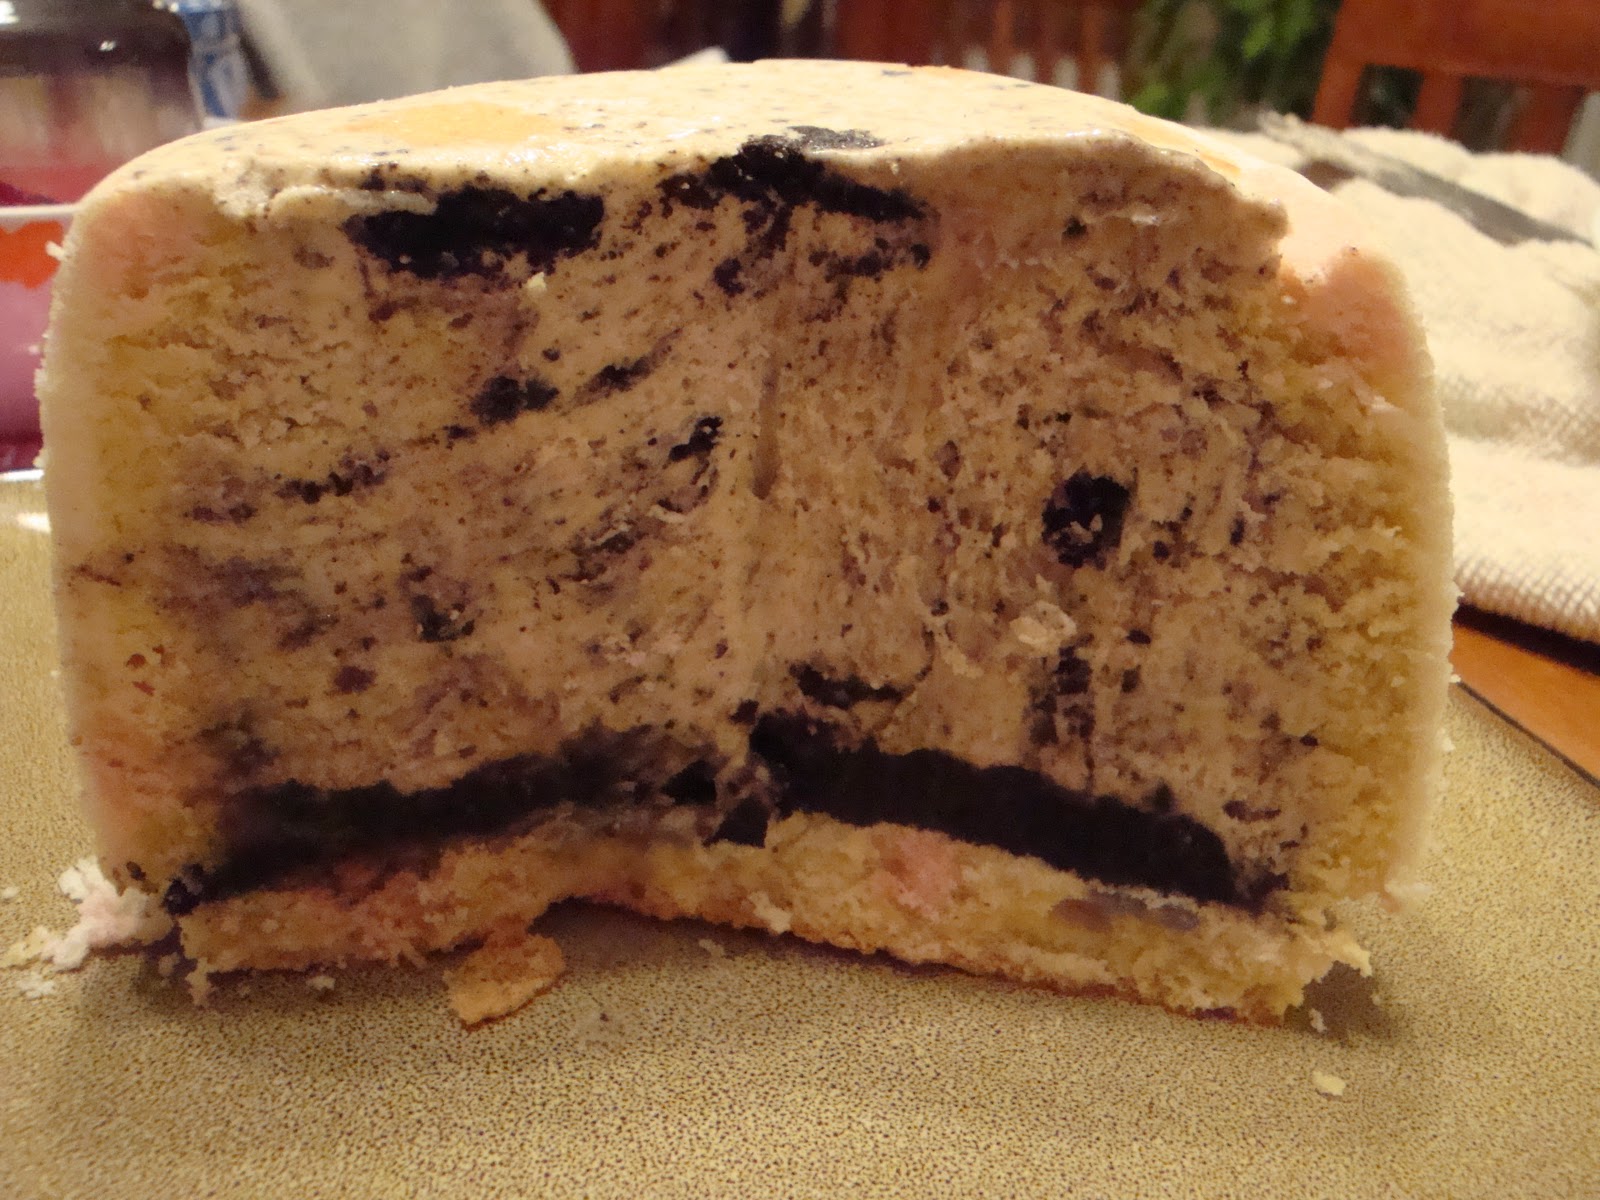
First off, I want to tell you that while I completed this challenge, I felt it was an epic failure. Ok, maybe that is a bit extreme.  I mean, the cake was edible and quite tasty but it was the whole decorative paste that I somehow managed to mess up.  Sad to say, the design is not visible.  I've learned from my mistake and in the future I hope to recreate this dessert and have total success!

Blog-checking lines: The January 2011 Daring Bakers’ challenge was hosted by Astheroshe of the blog accro. She chose to challenge everyone to make a Biscuit Joconde Imprime to wrap around an Entremets dessert

There are two steps needed to make the cake itself: The Jaconde Sponge and Patterned Joconde-Décor Paste. 

Joconde Sponge

YIELD: Two ½ size sheet pans or a 13” x 18” (33 x 46 cm) jelly roll pan
Ingredients:
¾ cup/ 180 ml/ 3oz/ 85g almond flour/meal - *You can also use hazelnut flour, just omit the butter
½ cup plus 2 tablespoons/ 150 ml/ 2⅔ oz/ 75g confectioners' (icing) sugar
¼ cup/ 60 ml/ 1 oz/ 25g cake flour *See note below
3 large eggs - about 5⅓ oz/ 150g
3 large egg whites - about 3 oz/ 90g
2½ teaspoons/ 12½ ml/ ⅓ oz/ 10g white granulated sugar or superfine (caster) sugar
2 tablespoons/ 30 ml/ 1oz / 30g unsalted butter, melted
        *Note: How to make cake flour: http://www.joythebaker.com/blog/2009/09/how-to-make-cake-flour/

Directions:
     1.In a clean mixing bowl whip the egg whites and white granulated sugar to firm, glossy peeks. Reserve in a separate clean bowl to use later.
     2.Sift almond flour, confectioner’s sugar, cake flour. (This can be done into your dirty egg white bowl)
     3.On medium speed, add the eggs a little at a time. Mix well after each addition. Mix until smooth and light. (If using a stand mixer use blade attachment. If hand held a whisk attachment is fine, or by hand. )
     4.Fold in one third reserved whipped egg whites to almond mixture to lighten the batter. Fold in remaining whipped egg whites. Do not over mix.
     5.Fold in melted butter.
     6.Reserve batter to be used later.

Patterned Joconde-Décor Paste
YIELD: Two ½ size sheet pans or a 13” x 18” (33 x 46 cm) jelly roll pan
Ingredients
14 tablespoons/ 210ml/ 7oz/ 200g unsalted butter, softened
1½ cups plus1½ tablespoons/ 385ml/ 7oz/ 200g Confectioners' (icing) sugar
7 large egg whites - about 7 oz / 200g
1¾ cup/ 420ml/ 7¾ oz/ 220g cake flour
Food coloring gel, paste or liquid *
   * If you wish to make a Cocoa Décor Paste Variation: Reduce cake flour to 6 oz / 170g. Add 2 oz/ 60 g cocoa powder. Sift the flour and cocoa powder together before adding to creamed mixture.

Directions:
1.Cream butter and sugar until light and fluffy (use stand mixer with blade, hand held mixer, or by hand)
2.Gradually add egg whites. Beat continuously.
3.Fold in sifted flour.
4.Tint batter with coloring to desired color, if not making cocoa variation.

Preparing the Joconde- How to make the pattern:
     1.Spread a thin even layer of décor paste approximately 1/4 inch (5 millimeter) thick onto silicone baking mat with a spatula, or flat knife. Place mat on an upside down baking sheet. The upside down sheet makes spreading easier with no lip from the pan.
     2.Pattern the décor paste – Here is where you can be creative. Make horizontal /vertical lines (you can use a knife, spatula, cake/pastry comb). Squiggles with your fingers, zig zags, wood grains. Be creative whatever you have at home to make a design can be used. OR use a piping bag. Pipe letters, or polka dots, or a piped design. If you do not have a piping bag. Fill a ziplock bag and snip off corner for a homemade version of one.
     3.Slide the baking sheet with paste into the freezer. Freeze hard. Approx 15 minutes.

     4.Remove from freezer. Quickly pour the Joconde batter over the design. Spread evenly to completely cover the pattern of the Décor paste.
     5.Bake at 475ºF /250ºC until the joconde bounces back when slightly pressed, approx. 15 minutes. You can bake it as is on the upside down pan. Yes, it is a very quick bake, so watch carefully.
     6.Cool. Do not leave too long, or you will have difficulty removing it from mat.
     7.Flip cooled cake on to a powdered sugared parchment paper. Remove silpat. Cake should be right side up, and pattern showing! (The powdered sugar helps the cake from sticking when cutting.)
This is where I failed... I must have had too thick of a bottom layer on my silpat.
     Preparing the MOLD for entremets:

You can use any type of mold.The suggestions were:
        1.Start with a large piece of parchment paper laid on a very flat baking sheet. Then a large piece of cling wrap over the parchment paper. Place a spring form pan ring, with the base removed, over the cling wrap and pull the cling wrap tightly up on the outside of the mold. Line the inside of the ring with a curled piece of parchment paper overlapping top edge by ½ inch. CUT the parchment paper to the TOP OF THE MOLD. It will be easier to smooth the top of the cake.
     2.A biscuit cutter/ cookie cutter- using cling wrap pulled tightly as the base and the cling covering the outside of the mold, placed on a parchment lined very flat baking sheet. Line the inside with a curled piece of parchment paper overlapping.
     3.Cut PVC pipe from your local hardware store. Very cheap! These can be cut into any height you wish to make a mold. 2 to 3 inches is good.  Astheroshe store would cut them for her. Cling wrap and parchment line, as outlined above.
     4.Glass Trifle bowl. You will not have a free standing dessert, but you will have a nice pattern to see your joconde for this layered dessert.

Preparing the Jaconde for Molding:
Video: MUST WATCH THIS. This is a very good demo of the joconde and filling the entremets:
     http://www.youtube.com/watch?v=ca4eLDok-4Q
     1.Trim the cake of any dark crispy edges. You should have a nice rectangle shape.
     2.Decide how thick you want your “Joconde wrapper”. Traditionally, it is ½ the height of your mold. This is done so more layers of the plated dessert can be shown. However, you can make it the full height.
     3.Once your height is measured, then you can cut the cake into equal strips, of height and length. (Use a very sharp paring knife and ruler.)
     4.Make sure your strips are cut cleanly and ends are cut perfectly straight. Press the cake strips inside of the mold, decorative side facing out. Once wrapped inside the mold, overlap your ends slightly. You want your Joconde to fit very tightly pressed up to the sides of the mold. Then gently push and press the ends to meet together to make a seamless cake. The cake is very flexible so you can push it into place. You can use more than one piece to “wrap “your mold, if one cut piece is not long enough.
     5.The mold is done, and ready to fill.
     *Note: If not ready to use. Lay cake kept whole or already cut into strips, on a flat surface, wrap in parchment and several layers of cling wrap and freeze.

Entremet- Filling Options:
Astheroshe gave several suggestions:
http://www.youtube.com/watch?v=0e1DsyDtcd0&feature=related
     It is nice to have a completed dessert so you can unmold and see the Joconde working. Fill with anything you desire. Layers of different flavors and textures! However, it needs to be something cold that will not fall apart when unmolded.
     Suggestions:
     Mousses, pastry creams, Bavarian creams, cheesecakes, puddings, curds, jams, cookie bases, more cake (bake off the remaining sponge and cut to layer inside), nuts, Dacquoise, fresh fruit, chocolates, gelee.     I made an ice cream filling... not traditional I guess but I was too frustrated at this point to really care!
You can see the design colors at the top.  Notice the too thick cake layer hiding the actual design.

I have the top of the cake upside down since you couldn't see the design anyway. Flipped over you can at least see that the disign did exist!  I had left over truffle mix that I layered above the ice cream. 


Look closely and you can see the barest markings of my design.


Saturday, January 8, 2011

Bagels

Print Friendly and PDF
This month's have the cake challenge was to forgo the sweet route and bake up some bagels.  I've been sugared up enough with all the Christmas baking I did so this was something I could truly enjoy trying.
A look throughout the Internet gave me a multitude of bagel recipes.  There were long and tedious recipes and relatively quick and easy... guess which route I went?! Long and tedious have their rightful place in my life but I didn't think it was the right route to go for a simple bagel.  A look through one of my favorite sites, Allrecipes.com, and I chose one that had been favorably reviewed and used the boiling method. Don't ask me why... I'm not a bagel expert... but boiling seemed the best method in my thinking.  After all, didn't it turn out great when I made the pretzels?  The recipe I found was a fabulous base recipe.  I will be making bagels again and when I do I'll be adding other things like flax seed, whole wheat, dried fruit, cheese... the possibilities are endless!

Boiled Bagels
By: Jandl


Ingredients

4 1/4 cups all-purpose flour
2 (.25 ounce) packages active dry yeast
1 1/2 cups warm water (110 degrees F/45 degrees C)
3 tablespoons white sugar
1 tablespoon salt
1 tablespoon white sugar

1.In large bowl, combine 1-1/2 cups flour and yeast. Mix water, 3 tablespoons sugar and salt together, and add to the dry ingredients. Beat with a mixer for half a minute at a low speed, scraping the sides of the bowl clean. Beat at a higher speed for 3 minutes. Then, by hand, mix in enough flour to make a moderately stiff dough.               
2.Turn out onto a lightly floured surface and knead until smooth and elastic (8-10 minutes). Cover, let rest for 15 minutes.

3.Cut into 12 portions, shape into smooth balls. Poke a hole in the center with your finger, and gently enlarge the hole while working the bagel into a uniform shape. Cover, let rise 20 minutes.
4.Meanwhile, start a gallon of water boiling. Put 1 tablespoon of sugar in it, mix it around a bit. Reduce to simmering. When the bagels are ready, put 4 or 5 bagels into the water, and cook 7 minutes, turning once. Drain them. Place on a greased baking sheet, and bake at 375 degrees F (190 degrees C) for 30 to 35 minutes. Remove from oven, eat hot or cold.
Another option to bake them was with Broiling option but I didn't go this route
For a glossier surface, place raised bagels on an ungreased baking sheet prior to boiling them. Broil them five inches from heat for 1 to 1-1/2 minutes on each side. Then put them into the hot water to be boiled as above. Note: do not bake broiled bagels as long as non-broiled ones, 25 minutes should be long enough.